
SIMPLE VALENTINE’S MUG RUG + BONUS CRAFTING IDEAS
If you are part of our LITTLE BOX OF FIGS subscription, you will know that in your most recent quarterly box, we featured the SIMPLE VALENTINE’S MUG RUG using the cutest Valentine’s fabric ever!
Sometimes a super simple project with the perfectly sweet fabric is just what we need.

Designed by Lizzy House for MODA fabrics, this FUNNY VALENTINE fabric is the perfect excuse for some Valentine’s Day crafting, don’t you think?

We loved the fabric and the heart-shaped mug rug idea so much, we wanted to make sure we shared it with ALL of you who are interested in crafting up some cuteness and adding a mug rug next to your work station.

The pattern sheet comes with a full materials list, cutting and piecing information, heart template shape, and tips for how to master those heart curves with bias binding.
Grab the SIMPLE VALENTINE’S MUG RUG PATTERN SHEET HERE!
……
CRAFTING IDEA FROM LACEY [@laceypoirier]

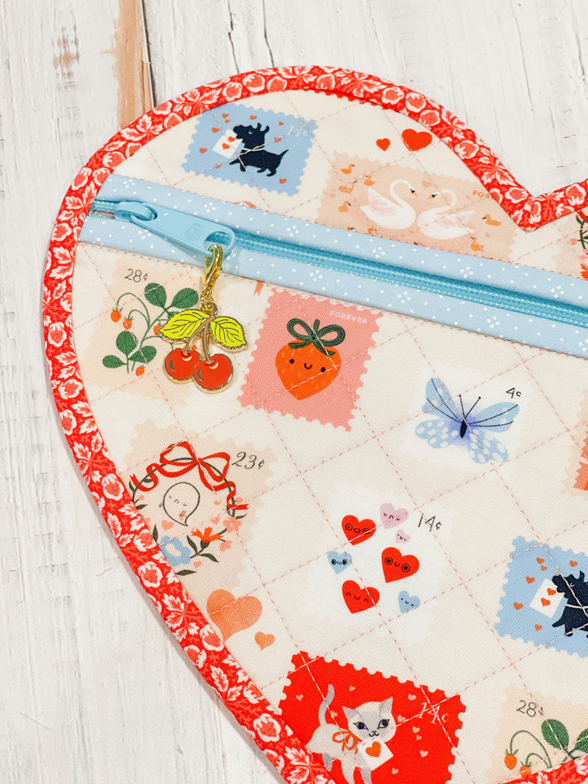
HEART ZIPPER POUCH
- Use the SIMPLE VALENTINE’S MUG RUG Pattern Sheet and follow Steps 1-3, but create TWO quilt sandwiches.
- NOTE: If you are using your Fat Quarter Valentine’s fabric from the most recent LITTLE BOX OF FIGS, choose another scrap fabric for your “backs”/inside linings of each quilt sandwich so you can make the most of the love day-inspired featured print.
- BEFORE you move on to Step 4, head over to Joanna’s PROJECT BAG TUTORIAL BLOG POST and create a zipper opening on ONE of your quilt sandwiches.
- NOTE: In the blog post, specifically follow Step 3. I chose to cut my “front panel”/quilt sandwich into two pieces with a measurement of 2” down from the top. If you are using directional fabric (which I did), be sure to pay attention to that as you are cutting.
- I chose to bind the two zipper edges with a coordinating light blue EYELET print from the new ROSIE fabric collection and used a blue By Annie zipper from my stash.
- Once you have your zippered “front panel”, use the heart shape in the SIMPLE VALENTINE’S MUG RUG Pattern sheet to trace your heart shape onto the fabric.
- To keep the Valentine’s fabric directional, I decided to find the center of my front panel and traced one half of the heart shape (the right side of the heart). I then turned the paper template to make a reverse image along the left-hand side. This eliminates STEP 5 in the Mug Rug Pattern Sheet.
- I aligned the top of the heart curves template to the top edge of my quilted panel. Again, this places the zipper approximately 2″ down. Repeat with your second quilt sandwich for the zipper pouch “back”.
- Head back to the PROJECT BAG TUTORIAL BLOG POST for Step 4, particularly paying attention to MOVING YOUR ZIPPER INTO THE CENTER before cutting. Then, cut out your drawn heart shapes from both the front and back panels and follow the rest of the blog for putting your pouch together.
- For binding, follow Step 8 of the Mug Rug Pattern Sheet for all the tips you need to finish there.
- Enjoy! Keep for yourself or add some goodies inside for a quilty friend, family member, or special kiddos in your life.

……
CRAFTING IDEA FROM SUSAN [@thefeltedpear]
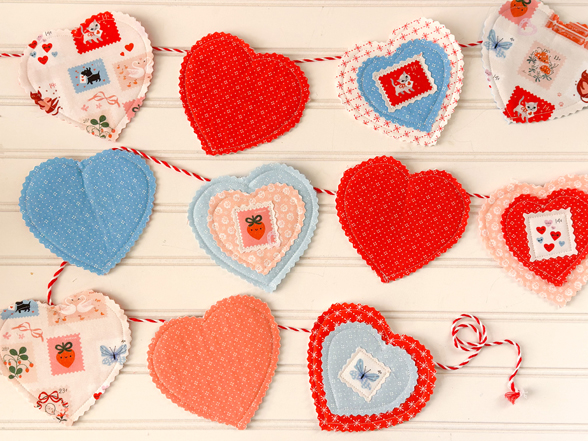
HAPPY VALENTINE GARLAND
- I used the PATCHWORK HEART GARLAND PATTERN SHEET for construction, with accompanying template.
- I made the hearts two different ways. The first way was the Lizzy House print on top, and a coordinating EYELET on the back (so it could be flipped around if I wanted to showcase a solid color).
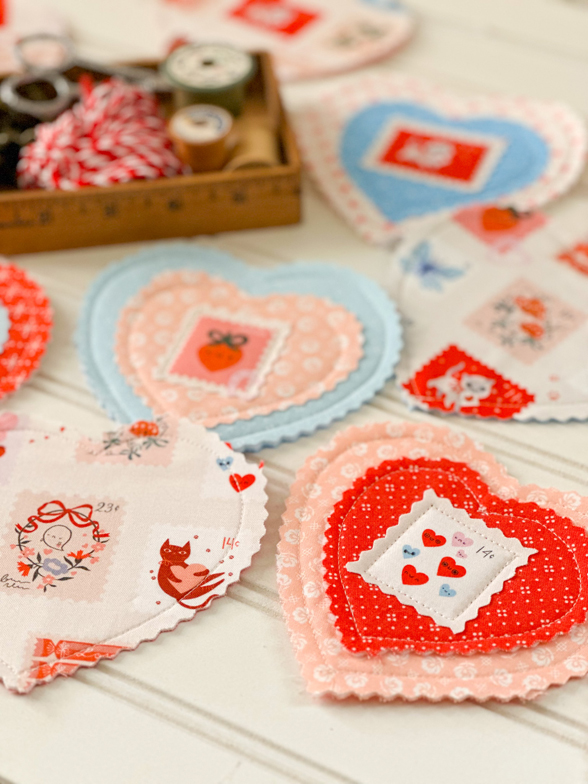
- The second was to use an EYELET or ROSIE print for the base of the heart, add a second heart at 70% of the HEART GARLAND pattern size, and then add a fussy cut postage stamp on top.
- I used only the Fat Quarter that came in the LITTLE BOX OF FIGS quarterly box and was able to comfortably make 9 full fabric Lizzy House print hearts. I only made 5 double hearts but could have made another 4 easily!
- I strung them on bakers twine threading it through a small safety pin placed on the back of each heart.
- Voila…instant Valentine’s decor!


……
Happy Crafting!
-Joanna, Lacey, and Susan