
FRUIT SALAD SAL: WEEK 7 – ORANGES
And then there was ONE. Did we save the best for last? I’ll let you be the judge of that…
I seriously don’t think I could pick a favorite! It’s all about what day or week you ask me!
WHERE IT ALL BEGAN
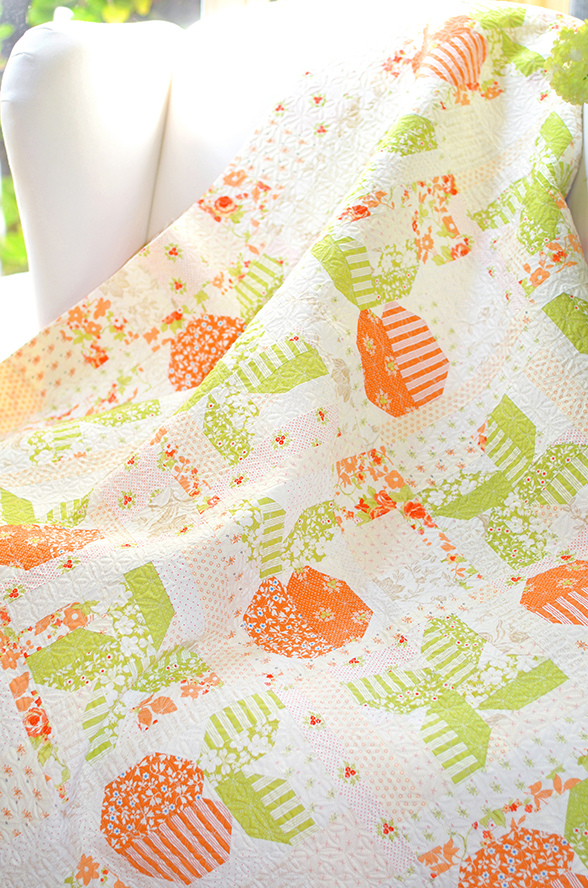
It would be safe to say that it was the ORANGE BLOSSOMS pattern and Sew Along that we did in our Facebook Group last Spring that began this whole fruit odyssey for me. I had done fruit quilts before [STRAWBERRY BLOSSOMS, CANNED PEARS, CHERRY PIE, BERRIES, AN APPLE A DAY project sheet, etc] but it was the ORANGE BLOSSOMS inspiration that got me to work on the rest of the fabulous FRUIT SALAD that we are working on now. There is just something about setting your favorite fruit -or your favorite fruit color- amidst all of this creamy low volume wonderfulness that… well, that inspires my creative brain!
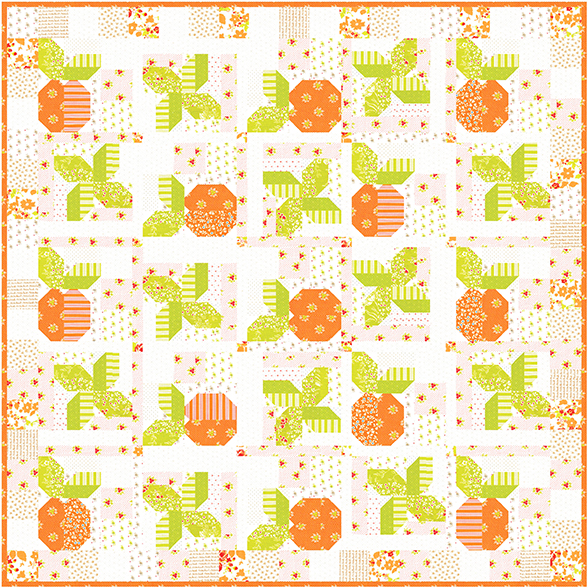
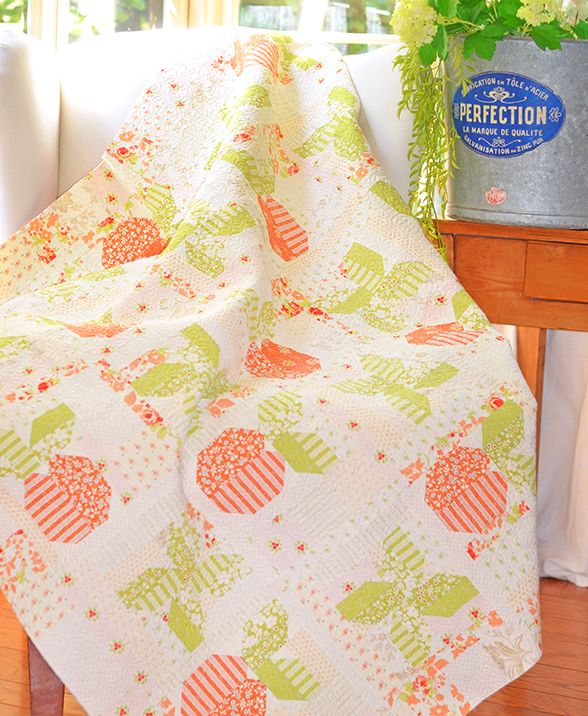
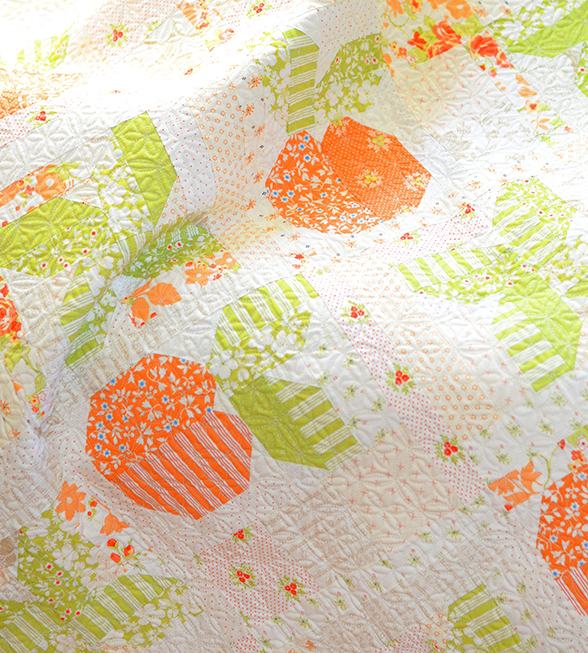
ORANGE BLOSSOMS is now one of the 8 featured quilts from my book, FRUIT SALAD, available HERE if you want to check it out. This quilt features 13 orange blocks, alongside 12 leaf quartet blocks. By simply rotating the fruit blocks’ position, they begin to *dance* across the quilt, which is truly delightful to see come together. It’s one of those “less is more” in terms of design and by simply rotating the oranges and the leaf sets, there is just so much movement I think!
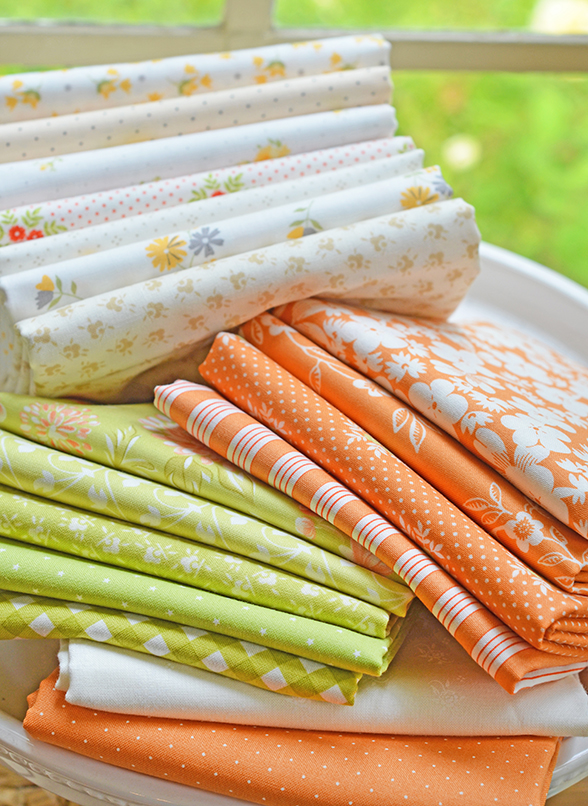
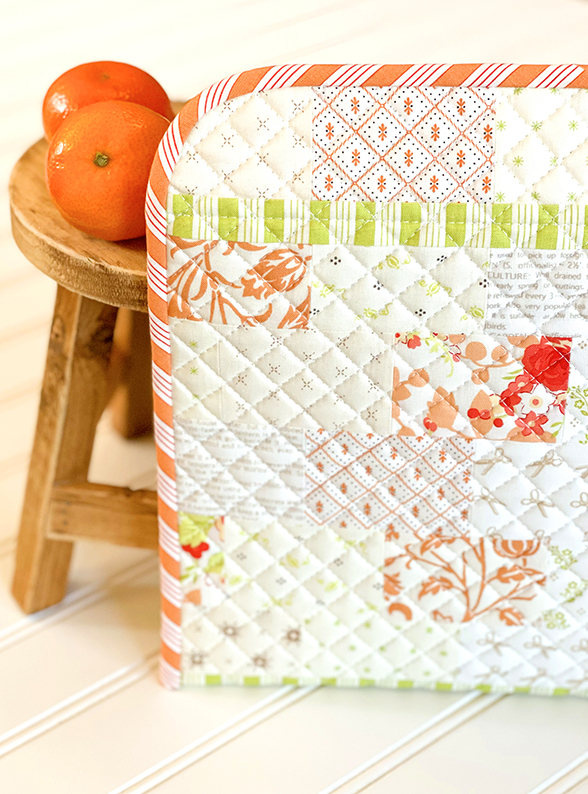
You will also notice the array of patchwork squares used in the setting of the quilt. This is perfect for all of those lovely low-volume, cream prints you may have in your scraps or stash! We also often try to build low-volume bundles for the SHOP, too, so keeping an eye on the shop webpage and signing up for our NEWSLETTER are great ways to stay ‘in the know’ on when they come in stock.
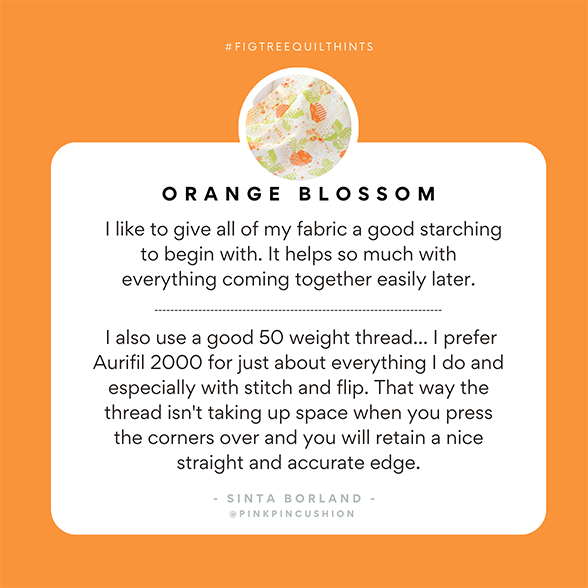
Hint of the Week
The leaf units that are stand alone blocks (unit #7) and the ones that attach to the orange blocks (unit #4 & unit #6) are ever-so-slightly different sizes in order to fit perfectly into the layout.
Pay attention to the placement and which green leaf pieces you are using for which unit. I definitely recommend labeling these to avoid frustration when you go to piece the block together.
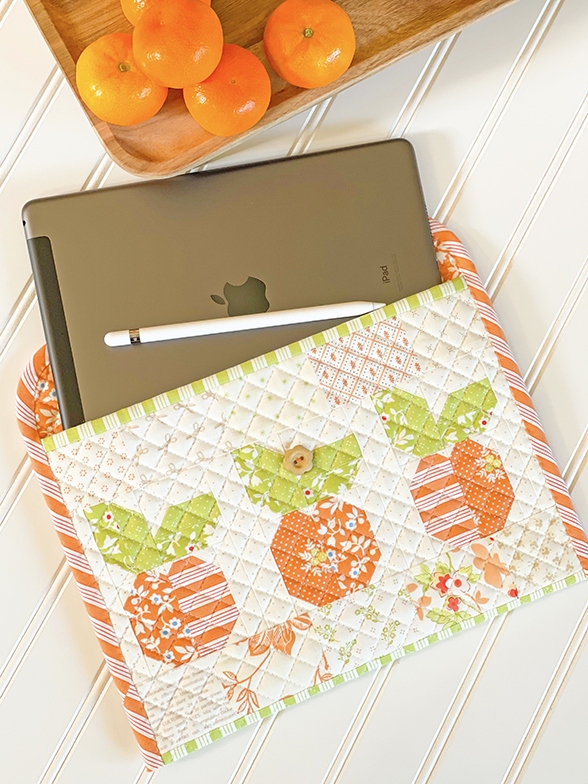
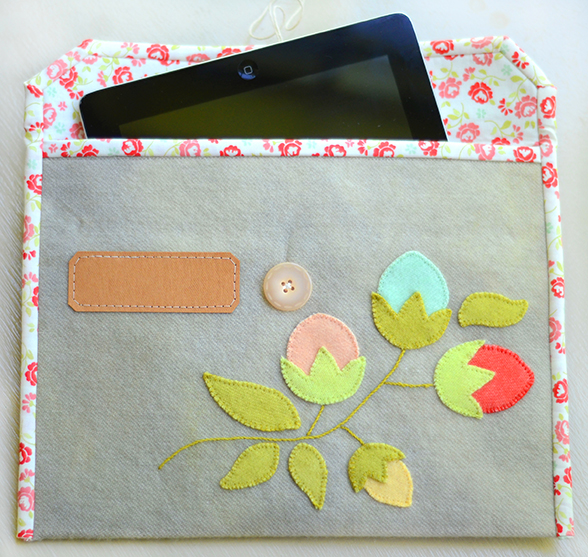
Special Project: ORANGE TRIO IPAD COVER

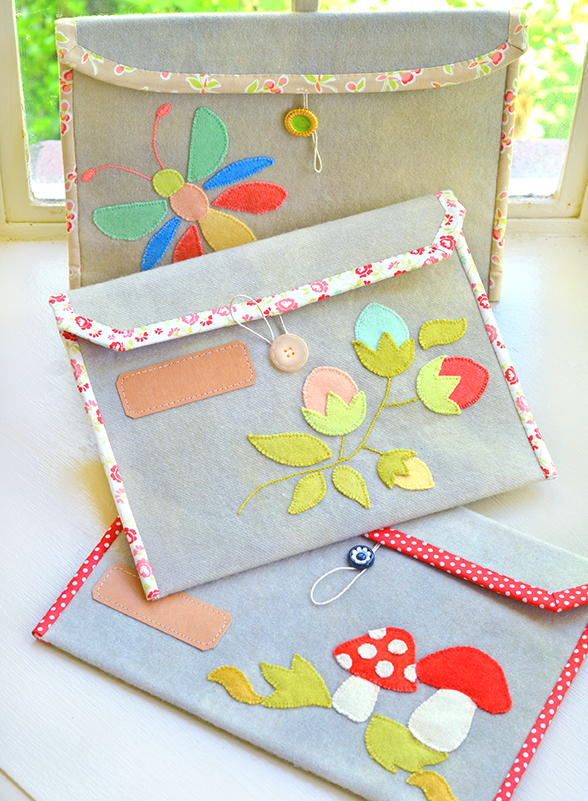
I am totally in love with the projects that these lovely ladies are coming up with throughout this SEW ALONG.
We have featured a few here and there are lots more inspiration and ideas in our Facebook Group too!
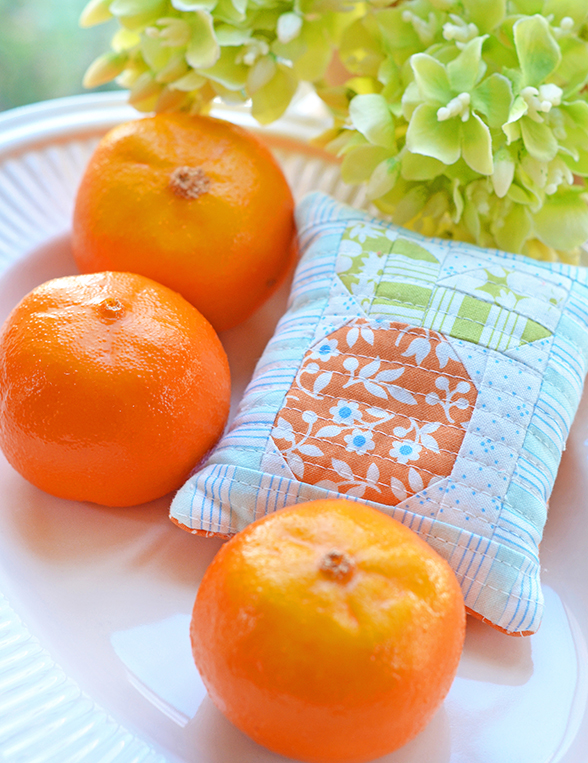
This week’s special project is from Lacey and I am just a little bit jealous. I keep asking her if she will just decide that she doesn’t need this and send it my way :-).
Inspired by the scrappy look of the ORANGE BLOSSOMS quilt, Lacey decided to make 3 *miniature* orange blocks using the FRUIT SALAD book, using the reduced quilt block math provided in a PREVIOUS POST.
She added multiple low volume, cream prints to make a quilted outer panel to an iPad cover, using my pattern: MY IPAD COVERS, available as a paper pattern or PDF in the shop!
HERE ARE THE STEPS
These instructions are for the LARGE COVER, which fits anything up to an iPad Pro
CUTTING INSTRUCTIONS FOR OUTER PANEL
- Sashing: From any cream, low volume print: Cut (4) 1 ¼” x 5” [a].
- Top Border: From any cream, low volume print: Cut (1) 2 ¼” x 12” [b] or use any scrappy pieced strip that measures that same final size.
- Bottom Border/Back Panel: From any cream, low volume prints: Cut (7) 2 ¼” x 12” [c] or use any scrappy pieced strips that measures that same final size.
ORANGE BLOCKS
- Step 1: Create 3 mini ORANGE blocks using the FRUIT SALAD book and the formula for shrinking quilt blocks to half-size, available on the blog post mentioned above! You could also use the: APPLE, PINEAPPLE, BLUEBERRY, or CHERRIES blocks – as they all finish the same size. You could even mix and match for even more fruit fun! This will act as your focal piece for the front cover to replace the wool felt applique in the original version.
PIECING INSTRUCTIONS
- Step 2: Using the FRUIT BLOCKS and sashing pieces cut above, assemble the row alternating a sashing to a fruit block.
- Step 3: Add the TOP BORDER to the top of the pieced fruit block unit.
- Step 4: Sew all 7 BOTTOM BORDER/BACK PANEL strips together to create a rectangle approximately 12 ¾” x 12”.
- Step 5: Assemble the fruit block front panel to the back panel rectangle.
- Step 6: If you want more stiffness to your cover, you can add fusible interfacing at this time. Then, cut batting and backing a few inches larger than the finished front panel. Spray or pin baste in place, and quilt as desired. NOTE: Denser quilting will shrink the finished panel more, but this pattern is very forgiving, and you can make it work!
- Step 7: Cut the finished quilted panel to the dimensions listed in the MY iPAD COVERS pattern ‘from wool and lining’ under the LARGE COVER CUTTING INSTRUCTIONS. Ignore the interfacing cutting, as you may or may not have already added that depending on your preference, and then decide on your binding strip fabric. If you plan to curve your top edges, I recommend cutting your binding on the bias to allow for some stretch.
- Step 8: Move to PAGE 3 of the pattern, and start at STEP 3. In STEP 4, the “leather” label is optional, but would be DARLING! STEP 5 can be eliminated, as you have quilted together your outer panel and lining. Then, follow STEPS 6-12 as outlined.
In the original pattern, we used a wool outer panel and colorful butterfly, flower, and mushroom wool applique embellishments. This quilted version makes for a great alternative, and the design possibilities are endless! Other than using a scrappy fabric panel (vs. wool) and adding batting/quilting, the rest of the assembly instructions remain unchanged.

Meet the Maker
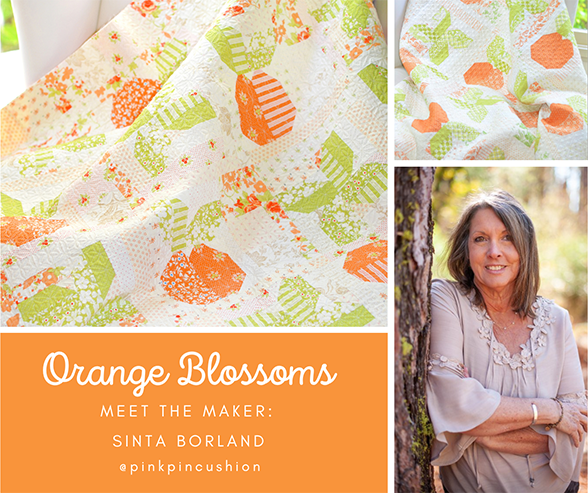
This ORANGE BLOSSOMS sample quilt was pieced by Sinta Borland and quilted by Marion Bott. Sinta and I met a LONG time ago when I was teaching a retreat for her shop in Oakhurst California. We hit it off right away and Sinta has been helping me out with samples on and off for over a decade. She is always working on some fun projects over on her social, @pinkpincushion.


Tomorrow and Next Week
Over in our Facebook group: Fig Tree Quilts Friends, we will be celebrating, yet another, FIG TREE FRIEND feature, while continuing to be in awe of all the amazing talents we are so grateful to have adorn our feed.
This has been so much fun! Next week, meet me right back here for our FINAL week, week #8: ASSEMBLY! Again, these blog posts will remain here indefinitely, and you are always welcome to work at your own pace. Just be sure you tag me in your makes, whenever that time comes. I will never get tired of seeing them!
-Joanna