
GIFT WEEK 2023: ALL THINGS KITCHEN!
My dear friend Susan [@thefeltedpear on Instagram if you don’t already follow her] is here today as our special guest on the blog to give you all the details on CHRISTMAS GIFT WEEK 2023.
Today, we will focus on all things KITCHEN. Be sure to stay tuned for a PART TWO blog post later this week for more fun homemade gift ideas…and more goodies the following week, as well!
FROM SUSAN
I love giving handmade gifts to friends and family. There is something special about creating things especially for your recipient. You can tailor the colors, size, or use for their preferences, and as a bonus you get to think about them as you are creating your gifts.
My family and I are gift givers. We love to show our appreciation with a small note or item, and each year I spend a large part of November and early December creating for those I care about.
A few years ago, I started sharing my “makes” in the FIG TREE FACEBOOK GROUP. I often highlight many of Joanna’s patterns but try to use them in a new way. I also usually spend a few afternoons with my daughter making some additional “crafts” to add to our gifts. The response has been great, and we often get questions in our Facebook group asking what our modifications were, or if we followed a particular tutorial for an item.
This year, in addition to all the Facebook fun, we thought it would be helpful to put all the items up on the Fig Tree Blog so all of the information is in one place and can serve as a reference the next time you are in need of a gift!
Day 1: Kitchen Goodies

Earlier this year, I made it a priority to get out and walk every morning. I love to be outside and hike with my husband and daughter, but I found myself feeling a little sluggish and definitely in need of a little bit of sunshine. I started walking after I dropped my daughter off at school (no excuses if I do it first thing!) and have found I really enjoyed it.
I quickly noticed that my neighborhood has a very social group of people who walk in the mornings. My neighbors are out with their cups of coffee and dogs and you can’t go a quarter of a mile without someone stopping and saying hello. They quickly adopted me into the fold, and before I knew it, I was exchanging recipes, plant cuttings, and home improvement tips with my new friends.
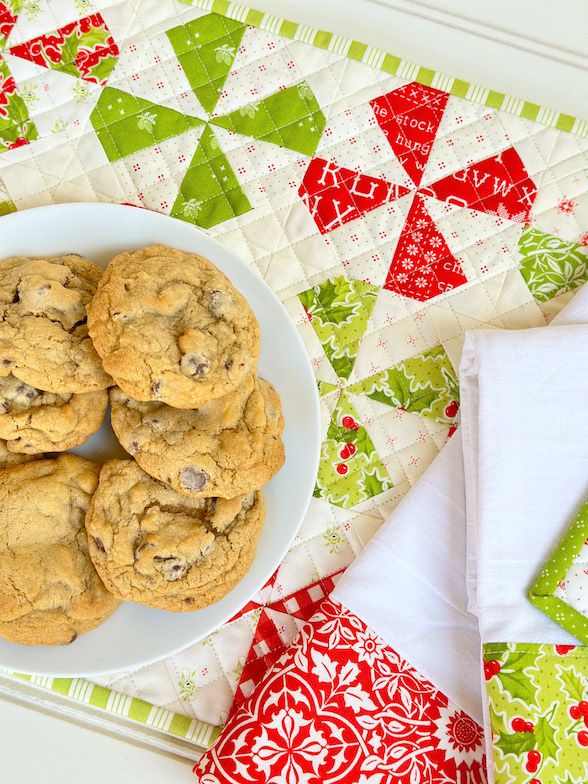
Today’s gifts are for two of the couples that I walk with. Both of the couples are empty-nesters and we have become good friends. They have heard me talk about how I love to quilt, and I know they will enjoy some handmade quilted items. I decided to make them each a set of two placemats, a potholder (which can also double as a coaster or mug mat), and an embellished towel.


I made two different placemat types to fit the personalities of the two different couples. For one couple, I made a pieced mat using Joanna’s PEPPERMINT CANDIES PDF SHEET as a base and adapted it to be placemat size. For the other couple, I quilted a panel of a large-scale focus print. I made complimentary dishtowels using MASON JARS as a jumping off point, and finished the gift off by using my scraps to make a quilted potholder. Although I opted for a green and red color scheme, you could easily make your projects non-holiday specific by substituting different fabrics.
My daughter and I are dropping them off next week so they can enjoy them throughout the holiday season, and I will let you know how it goes!
Placemats:

For the single panel placemats, cut two fabric panels 13” x 17” and quilt as desired with batting in between. Once quilted, trim panel to 12 ½” x 16 ½” and bind using 2 ¼” binding strips. I needed (3) binding strips to make both placemats.
To make a Peppermint Candy placemat, follow the instructions in the PEPPERMINT CANDIES PDF SHEET to make (12) Peppermint Candy blocks. Sew them together into three rows of (4) blocks each to form a placemat top. Cut a backing rectangle 13” x 17”. Layer the top, batting, and backing and quilt as desired. I opted for a small cross hatch pattern. Trim up the placemats to 12 ½” x 16 ½” and bind using 2 ¼” strips. I needed (3) binding strips to finish off both placemats.

Dishtowels:

To make each dishtowel, I used the MASON JARS pattern as a jumping off point. Flour sack towels are offered at many discount home stores and Joanna also carries them in her SHOP from time to time. Be sure to wash and dry them before you embellish them. I opted to just put a band on the lower edge of the towel and not add any applique. Since I wanted a wider band of fabric to show off my fabric better, I cut my fabric 7” wide and drew my line at 3 ¼”. I followed the same method to finish, as written in the pattern.
Fabric Potholders:
*Please note, these potholders are primarily decorative, and you should always use caution and your best judgement when handling hot items.

I wanted to make potholders that were a step above a single panel of fabric, but would still be quick and allow me to use up scraps from making the placemats. I have a set of “pocket” potholders in my kitchen that I love, and I decided to try to replicate them for my friends.

For a Pocket Potholder:
Materials:
- (9) 2 ¾” squares
- (1) 8” pocket backing square
- (2) 8” x 10” rectangle for back panel
- (2) 2 ¼” binding strips
- Thermal Batting
Sew together (9) 2 ¾” squares into three rows of three squares. Your patchwork square will measure 7 ¼” square. Layer your patchwork top, thermal batting [such as “Insulbright”], and pocket backing fabric to make a quilt sandwich. Quilt as desired. Trim to 7 ¼” square. Prepare the back panel of your potholder by quilting two 8” x 10” rectangles with thermal batting, as well. Trim back panel to 7 ¼” x 9 ¼”.
Bind the top of the pocket panel using a 2 ¼” strip of fabric. Layer the pocket panel on top of the backing panel making sure to align the bottom edges. Pin or Wonder Clip the pocket in place and baste around the edges. Attach binding to the perimeter of the potholder to enclose the raw edges.
If you would like to make a non-pieced pocket, simply substitute an additional 8” square of fabric for the patchwork panel.

Thank You!
Check back later this week to see the second set of handmade gifts I will be sharing! You can also join us in the FIG TREE QUILTS FRIENDS FACEBOOK GROUP for even more Gift Week Fun!
-Susan
Lois | 28th Nov 23
Thank you for sharing with us. You are amazing on what you get done. I hope to make a few of these.
I’m also hoping for the pattern release on the Christmas candy cane garland that was on the 12 days of Christmas. It was mentioned that you would be coming out with a pattern. Is that going to happen.
Thanks,
Lois
joanna@figtreequilts.com | 30th Nov 23
Its in the shop!
Debby | 28th Nov 23
The pocket potholder is so sweet. Your friends and neighbors are so lucky!!
Terry Grolemund | 28th Nov 23
Thank you for the great kitchen inspired projects. Yours are just beautiful and I am sure your friends will love them. I look forward to making these in the near future.