
MAKING A PROJECT BAG: VIDEO TUTORIALS
We posted a PROJECT BAG TUTORIAL blog post almost exactly 2 years ago and then updated it last year…and they are still on my mind! Hence why the details were included in our latest LITTLE BOX OF FIGS with a new front panel layout using leftover CHARM PACK squares [more on that at the end of this post]!
I decided to re-introduce the instructions here – as well as add in my very professional, very polished video tutorials, too! 🙂
All I can say is that these are so addicting (you’ve been warned!), and I have found countless ways to use them.
……
PROJECT BAG TUTORIAL
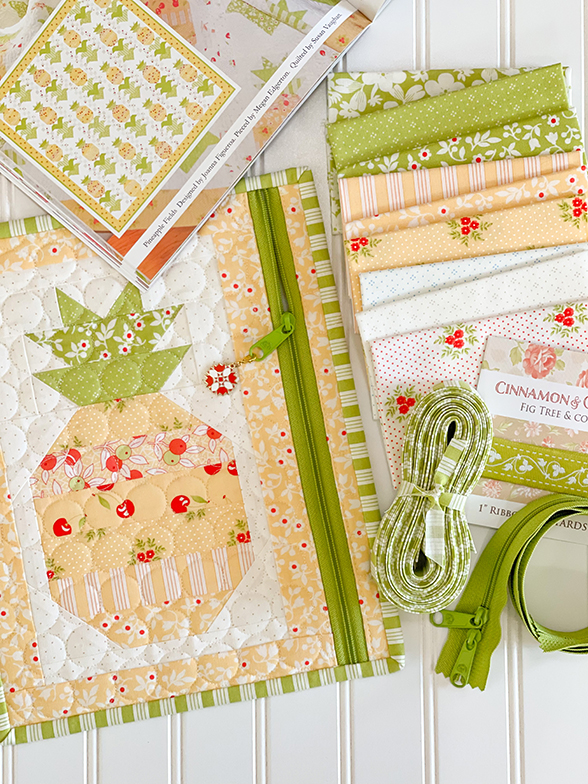
Step 1: GATHER YOUR SUPPLIES
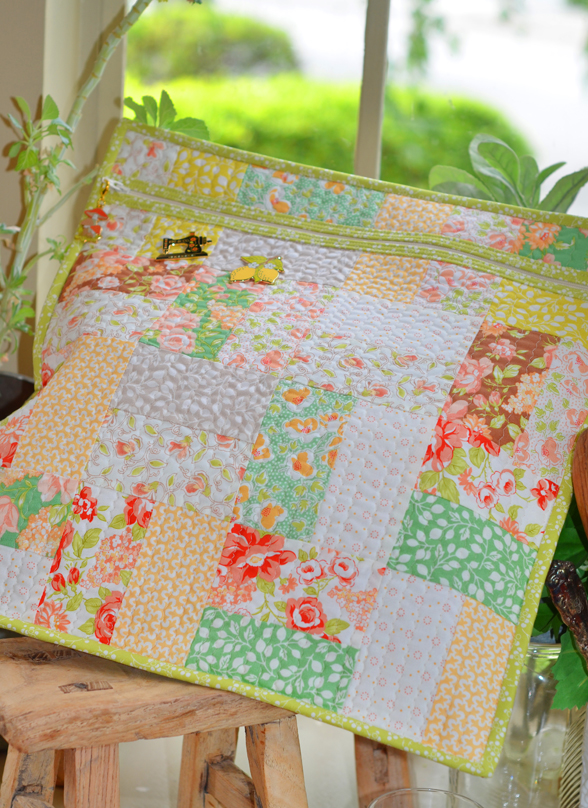
- FABRIC FOR THE BAG FRONT: [in our samples shown above, I used scraps for some and orphan FRUIT SALAD blocks for some]. You can make these as complicated or as simple as you want in ANY SIZE! For the big bags, where I will store large chunky projects, I am using a full ½ yd piece [so starting with 18″ x 18″ for each side].
- FABRIC FOR THE BAG BACK: In my case, I used a variety of linen fabrics for the back to give the bag more structure and texture. For the little ones, another scrap of Fig Tree fabric in a size to match your front works well.
- FABRIC FOR THE LINING: Again, this can be anything in either a scrappy mix if you are working through your scrap bin -OR- just a single piece of fabric. You will need one for the back side of the BAG FRONT as well as the back side of the BAG BACK.
- FABRIC FOR THE BINDING: Any kind of coordinating fabric for the binding portion of your project.
- ZIPPER: You will want your zipper to be a few inches bigger than the size of your bag. For the smaller bags, we used single zippers in creams and greens. For the larger bags, I used a slightly more heavy duty double zipper. Why you might ask? Pretty much as an excuse to be able to use two zipper pulls!
- FUSIBLE FLEECE: You can use any fleece or batting of your choice here but my favorite product for all of my bags is PELLON FUSIBLE FLEECE. For me, it is the perfect amount of structure without being stiff on one side, and without being floppy on the other.
- OTHER SUPPLIES: Some binding clips will come in very handy but you can, of course, just use pins. Any decorations that you might want to add including twill tape, ribbon as a hanging loop [which we did on the little bags using some CINNAMON & CREAM green ribbon], and of course ZIPPER PULLS! Other supplies that might come in handy include Roxanne’s Glue-Baste-It/fabric tape and quilt adhesive spray.
……
Step 2: QUILT THE BAG FRONT AND BACK
Make a quilt sandwich just like you would for a small quilt. Use whatever fabric you have put together for the BAG FRONT, a piece of your fusible fleece and a piece of your LINING.
Repeat the quilt sandwich process for the back of your project bag. This can be a single piece of quilted fabric or a patchwork just like the front. It could also be an un-quilted piece of fabric [in which case I would double up and do a double fold of fabric for some sturdiness. Having said that, I really love the structured feeling of the bags that are quilted on both sides.
Since the fusible fleece will only fuse to one side, I fuse it to the front and then add the lining with either a few pins or a bit of quilt basting spray.
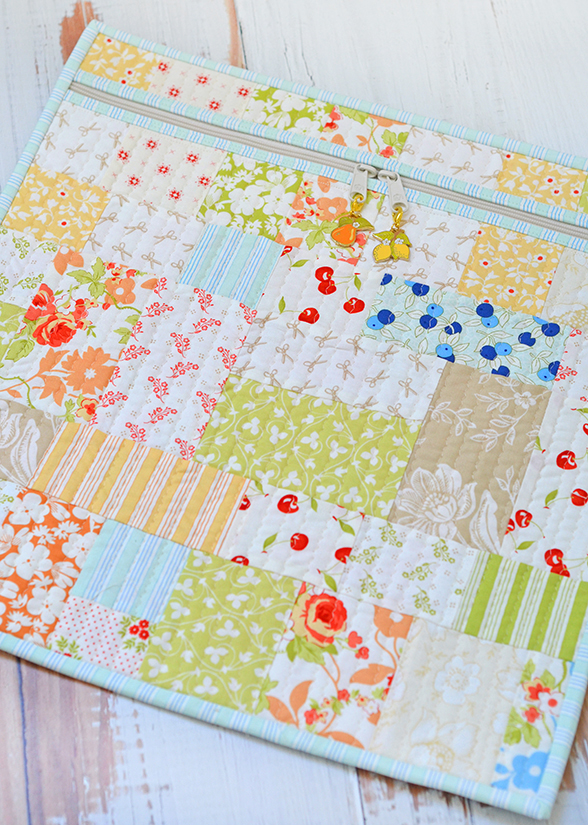
- LARGE BAG QUILT SANDWICH NOTES: For these larger ones, I chose my standard/favorite “little project stitch” on my home machine. I am referring to my oversized zigzag which I have talked about many times as my “go to” stitch in these situations. Crosshatch quilting is also very popular, visually appealing, and easy to do on projects like these. Just mark your fabric with tape or a heat-erasable pen.
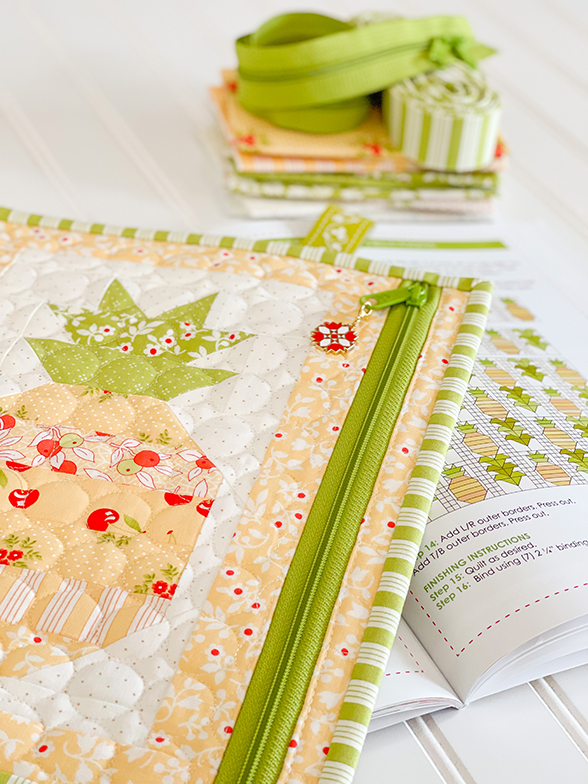
- SMALL BAG FRUIT BLOCK NOTES: I started with the fruit blocks themselves, and added borders until I was comfortable with the size. (This is the best part – these bags can be any size you want them to be!). I had several BAG FRONT pieces quilted on a longarm with a small, circle pantograph, which is an alternate idea if you aren’t comfortable quilting yourself or want a little more decorative appeal.
I suggest that your batting and lining fabrics are about 1″ larger than the top, as the quilting may shrink the finished size or distort it slightly along the sides, depending on the density of quilting, and you want to be able to trim it up easily.
Be sure to visit THIS BLOG POST for a more in-depth look at my go-to zigzag quilting method.
Voila… Insta zigzag straight stitching that looks almost like large hand stitching when it is done. Seriously…I love how the finished look feels all vintage and slightly puckered and yet even all at the same time.
Repeat the zigzag quilting for the BAG FRONT, just as we did for the BAG BACK in previous steps.
TRIM IT UP: Once you have quilted your front, trim up all four sides. Note this size because you will be making your back to match. For the larger bags, I started with 18″ square and by the time I was done with quilting, it had shrunk ½- ¾” of an inch. So I chose a size and squared it up to that.
Eventually, you will trim your BAG BACK to match the BAG FRONT size, as well. Stay tuned below for when I recommend trimming your BAG BACK!
……
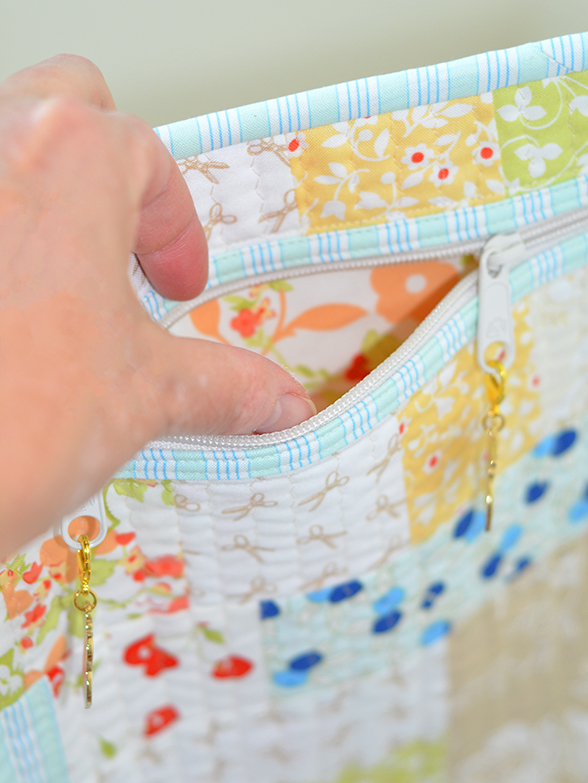
Step 3: ADDING THE ZIPPER
CUT THE BAG FRONT: Since for these project bags we are adding the zipper to the front/flat portion of your bag and not the top like on a traditional pouch or bag, you need to cut your front panel into two pieces in order to be able to do that. For the large bags, I cut a piece 1 ½” wide on the top. For the small bags, it was closer to 1″. You will now have a BAG FRONT “top” piece and a BAG FRONT “bottom” piece.
LARGE BAGS: For a little extra pizazz and to avoid bulkiness on these larger bags, I decided to create a finished/bound edge on the part of the bag that was going to line up along the zipper on each side. So that means that I bound the BOTTOM of the little top piece and the TOP of the main bag piece.
Lay the zipper down flat in front of you, right side up.
Position the two front bag pieces on top of the zipper, also right side up [I use my favorite double-sided seam tape here to secure them exactly where I want them, but you can also use a little bit of glue dots to that so that the zipper does not shift on you at all while sewing]. The bound sides will almost be touching each other with the zipper peeking out between them.
Make sure the top piece and the bottom piece are lined up correctly with one another along the side seams.
Make sure your zipper pull is somewhere in the middle.
Sew the zipper to each of the sides (the BOTTOM of the little top piece and the TOP of the main bag piece) of your front panels, right atop the binding you just created. This is to capture the zipper edge completely. You can do one stitch or two to really secure them. Be sure to move the zipper head out of your way somewhere in the middle.
It is really as simple as that!!
SMALL BAGS: The smaller Fruit Salad orphan block bags do not have any extra binding on the edges and the zipper needs to be added in the “normal” way in order to get a finished edge. For these, we picked a coordinating green zipper for that little bit of flair!
- Place the zipper face-down to the right side of the larger front bag piece where you want your TOP opening. Position in place [again I use double-sided seam tape or a little bit of glue so that you don’t have to fight with your fabric moving or shifting] and sew with a 1/4″ seam.
- Iron or finger-press this seam toward the front panel and add a line of stitching on the right side of the front panel approximately 1/8″ from the seam just created. This helps to stabilize the seam allowance bulk and creates a professional finish to the outside of the bag.
- Center the BAG FRONT top part onto the BAG FRONT bottom/zipper piece with right sides facing each other. Again, tape or glue in place and sew with a 1/4″ seam. Press toward the top panel and add your finishing stitch approximately 1/8″ from the seam just created.
……
Step 4: FINISHING THE BAG
At this point, you will want to ensure you stitch along the zipper ends – left and right vertical sides to secure them well – before trimming the zipper overage even with the FRONT top/bottom pieces. DON’T FORGET TO MOVE YOUR ZIPPER INTO THE CENTER BEFORE STITCHING & CUTTING! You’ll be a little disheartened if you lose your zipper at this stage of the game! :).
Now, line up your completed BAG FRONT, with zipper sewn in between your two top pieces, and your quilted BAG BACK. If either your BAG FRONT or BACK BACK are slightly bigger than one another, trim it up to be the same.
Place BAG BACK facing down so that the quilted BAG BACK is facing your working surface, then place the BAG FRONT on top, right side up. Using binding clips, clip around the outside. If you are worried about shifting, use a basting stitch around all four sides too just as an extra little security.
Since we are doing our binding on the outside, no bag turning will be needed! Instead of placing the panels right sides together, stitching, and flipping out to create a project bag (hiding the seam allowances in the lining), I decided to – again – make it like I would a quilt, with BINDING!
Check out my OOPSIE here…and don’t make the same mistake! 🙂
If you are going to add any little embellishments to the sides, this is the time. On some of the bags, I added a small piece of GREEN RIBBON to create a loop for holding or for hanging when I’m not using them. Just make a loop and tuck into the side seam of the bag before stitching them together!
Prepare your binding as you prefer. I like to use 2 1/4″ strips, personally. Machine bind your binding to the front of the bag as you would a quilt. Finish the back by hand or by machine [I did mine by machine and a little help from my favorite glue].
……
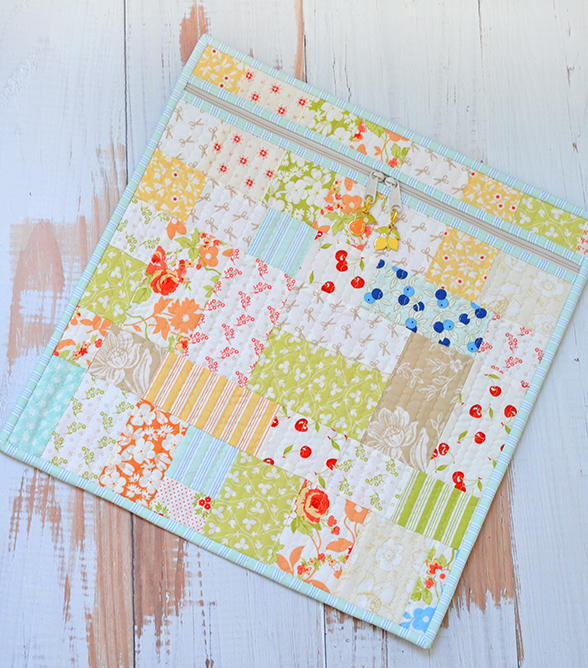
VOILA! Your project bag is ready for use!
……
LITTLE BOX OF FIGS BONUS PROJECT
We just kicked off the 1st box in our 2025/2026 LITTLE BOX OF FIGS subscription and included the simplified, printed pouch pattern directions and a new layout to specifically use up the leftover CHARM PACK squares from the main SUMMER SPOOLS quilt project from the box.
We hope these video clips help you be successful in your project bag-making journey and you’ll be well on your way to organizing all of your WIPS in style! Oh and you might to acquire a few more enamel pins and pulls.. because they are pretty much jewelry for your bags in my humble opinion!


Happy Sewing!
-Joanna
Lee | 18th May 25
The effort put into ”very professionally polished” video tutorials is quite appreciated! =)
inspiring to see your fabrics….
thanks
Lee | 18th May 25
ps. Just finished watching it all. A masterpiece.
…and no need to flip us off… =P =D