Did you all think I had forgotten you? So sorry for the long break. Between now and when we were last here together, I finished up all of my new patterns, sent our brand new Sherbets & Creams booklet to print, went to Market, graduated my oldest son from high school, went on vacation to Boston and Cape Cod and am now back working my way through 1273 emails!
Phew! I'm feeling tired just thinking about it all. But enough about that, as for the quilt along….
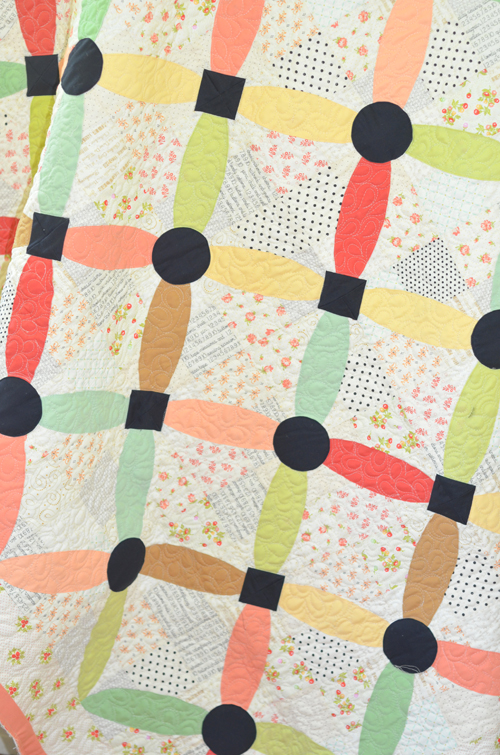
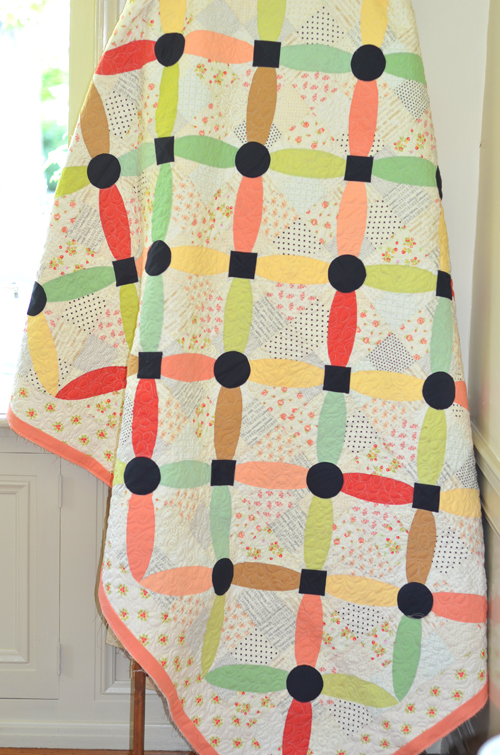
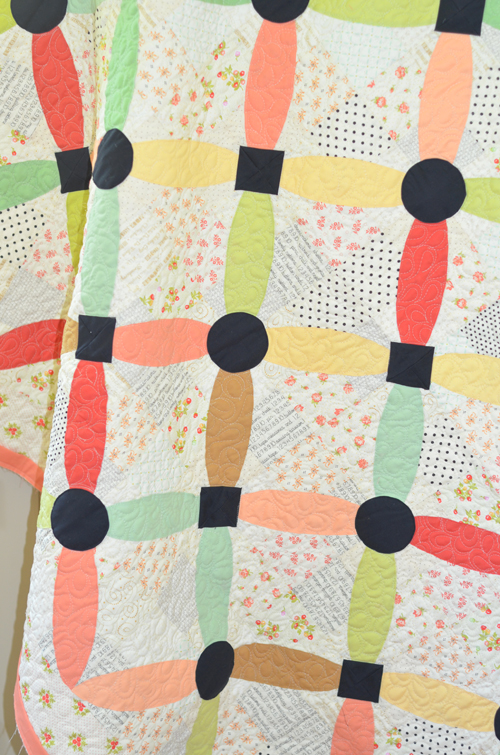
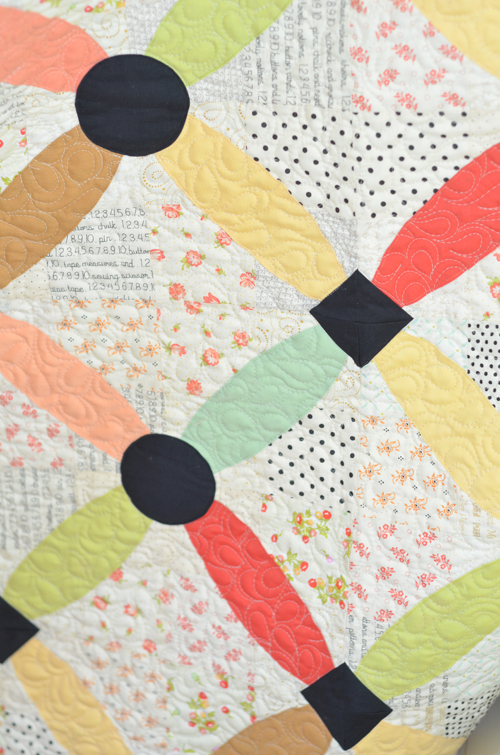
Step 1: You now have (20) squares of 4 pumpkin seeds. Add a black center circle to each 4-block. This is both a soft focal point for each block but also hides any imperfections you might have had with the tips of your pumpkin seeds. If you love how your seeds look and want a softer and less graphic quilt, feel free to leave these center circles off. We of course used the STARCH METHOD OF APPLIQUE to add them but you can use any method that you prefer.
Click HERE for the PDF download of the circle. It is basically a 2 5/8" circle [in case you have templates already or just want to trace something you have on hand]. If you are checking to see if your download is the correct size, the circle is 2.62" in diameter.
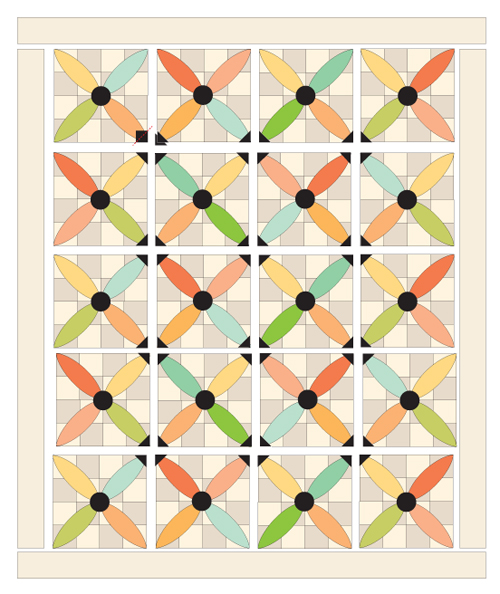
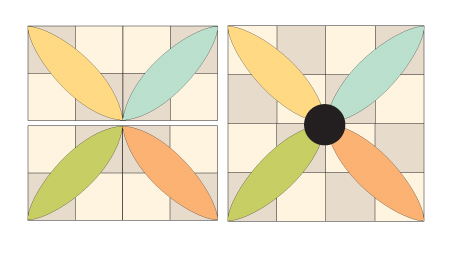 Step 2: Lay out your blocks until you like the placement. Layout is important because in the next step, you will commit to where they are in the quilt and won't be able to interchange them anymore.
Step 3: You will be sewing those black squares you prepared last month onto the inner corners of the blocks, using the "sew and flip" method that we use in so many of our patterns.
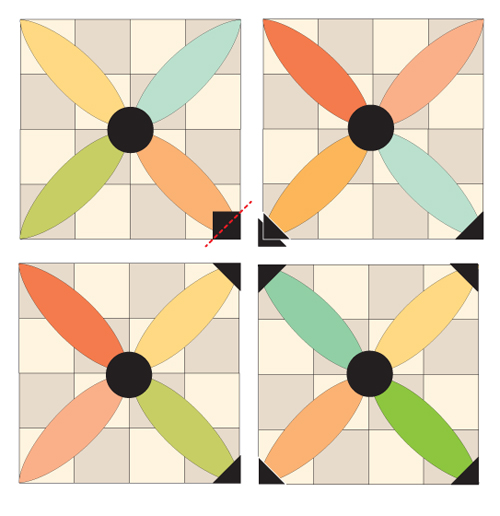 Mark or press your black squares on the diagonal and use that as the sewing line for each square.
Sew them to the corners as shown. Press out and trim out the excess fabric underneath. Cut out both the black and the background/bottom fabric.
It is important to note that not all the block corners have black squares added to them… the outer sides of the blocks are left plain and only the inner corners have squares.
Step 4: Once the squares have all been added, begin to sew your blocks together. Pin the blocks carefully so that the black triangles line up with each other on each side. If you sewed them accurately, you should have no trouble here.
Step 5: Add a border if you like. We chose to add a 4 1/2" border [cut measurement].
So cut (6) 4 1/2" strips if you want to join us in that size. We used a small black dot on the diagrams in the final booklet. In the actual sample quilt we ended up choosing a brighter cream print from Aloha Girl for a little added punch. The black dot would have been a great choice too… it was a hard call!
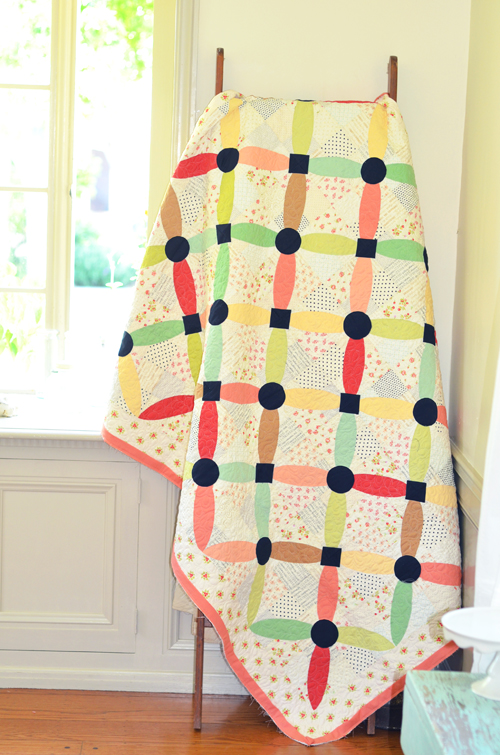
Step 6: Quilt as desired. Diana added her signature all over swirl feather pattern, leaving the black centers and squares alone . Bind with (7) 2 1/4" binding strips. We used black in the book and coral solid in the actual sample.
We hope you have enjoyed this quilt along! We have had such a wonderful time seeing all of your creations and your process. Many of you are SO MUCH MORE ORGANIZED than I ever hope to be.
If you liked the feel and "personality" of this quilt, it is one of five quilts in our brand new SHERBETS & CREAMS booklet that is hot off the presses and flying off our shelves as we speak. All five of the quilts in the book are made from these same SHERBET SOLIDS and a variety of cream/ low volume prints for the backgrounds and borders, etc. We think all 5 of these quilts are absolutely perfect for the summer! HERE is the link if you are interested in taking a look at the book.
Thanks for sewing along with me!
Happy sewing,
Joanna
About The Author
Joanna
Related Posts
MODA BLOCKHEADS 6 – BLOCK 7: BELLISSIMO STAR
Hello BLOCKHEADS! I am sitting this year out in terms of making all of the…
July 8, 2025COMING SOON: CHRISTMAS IN JULY EVENT
You read that right! We are celebrating CHRISTMAS IN JULY! All month long, we will…
June 26, 2025
Christine Horne | 29th Jun 16
Will there be directions for the alternate block and quilt which you showed us. When you first showed the appliqué shapes? I was interested in trying that version too.
Hildy | 30th Jun 16
I love this quilt! Thnak you so much for the sew-along I’m still behind but hopefully I’ll catch-up soon:-)
Pat Seager | 30th Jun 16
Don’t apologize for the delay. I needed the time as I’m doing hand blanket stitch applique. I’m still doing it.
Sharon B. | 1st Jul 16
A beautifully fun Summertime quilt! Thank you for the quilt along… and for all the other lovlies you create for us to stitch and enjoy! 🙂
Joanna | 2nd Jul 16
You are so very welcome!
Joanna | 2nd Jul 16
sounds lovely!!