
MILK & BLOSSOMS MEETS TULIP PITCHERS
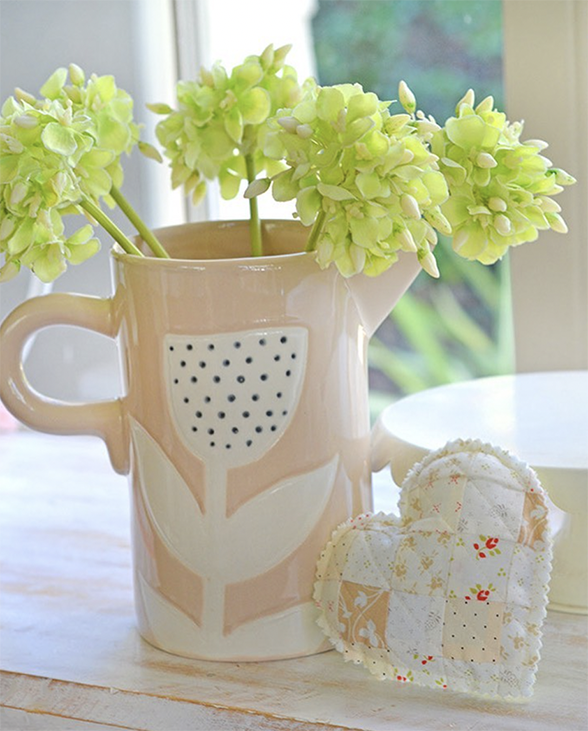
I bought a new ceramic flower pitcher featuring a hand-painted tulip accent – from Amazon, if you can believe it HERE – and when it arrived a little while back, I fell even MORE in love with it!
It is the perfect tan color with the most beautiful hand painted tulip on it. It is wonderful… wouldn’t you agree?

Of course I filled it with my favorite faux lime hydrangea blooms and it immediately became my coffee table centerpiece!
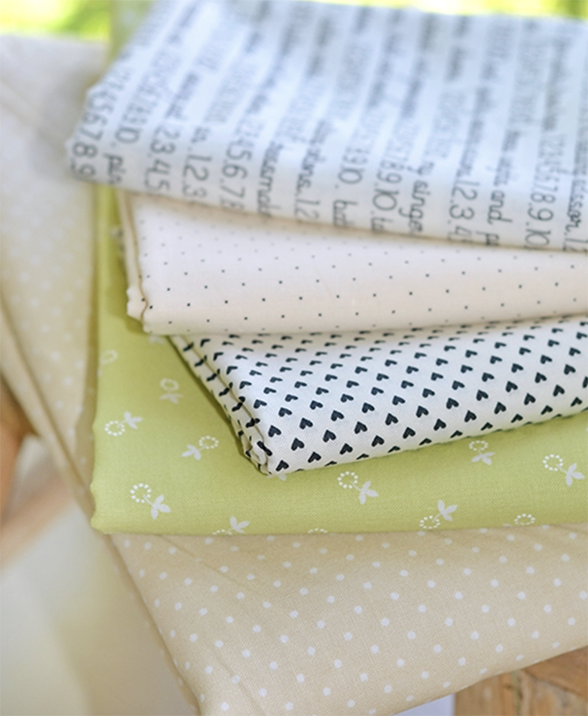
As I looked at it every day, the idea of turning it into a quilt, using its subtle color palette, just wouldn’t leave my head. So I started playing around with fabrics and ideas!
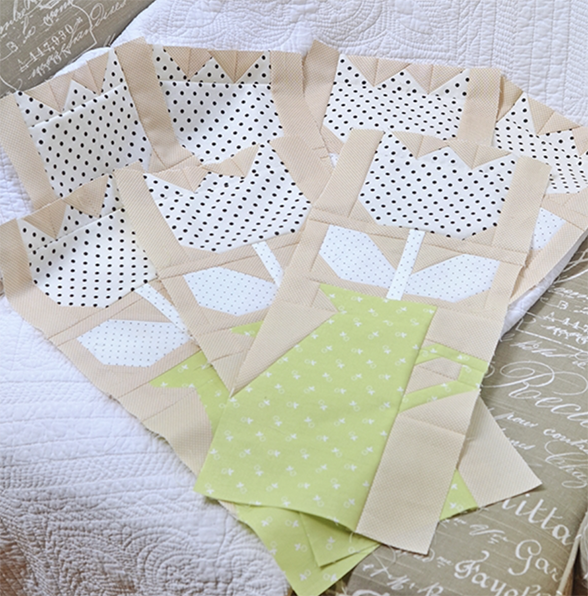
I started with my MILK & BLOSSOMS pattern (available via PAPER or DOWNLOADABLE PDF in the shop) and changed around the star-like flower tops to a tulip shape. At first I made a smaller tulip and didn’t love it so changed the size to feel oversized to mimic the feel of the ceramic pitcher.
WHAT YOU WILL NEED
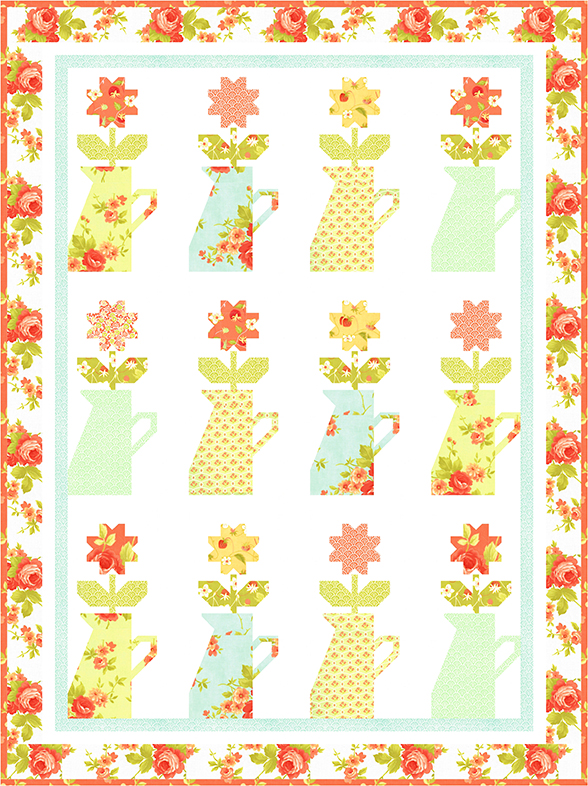
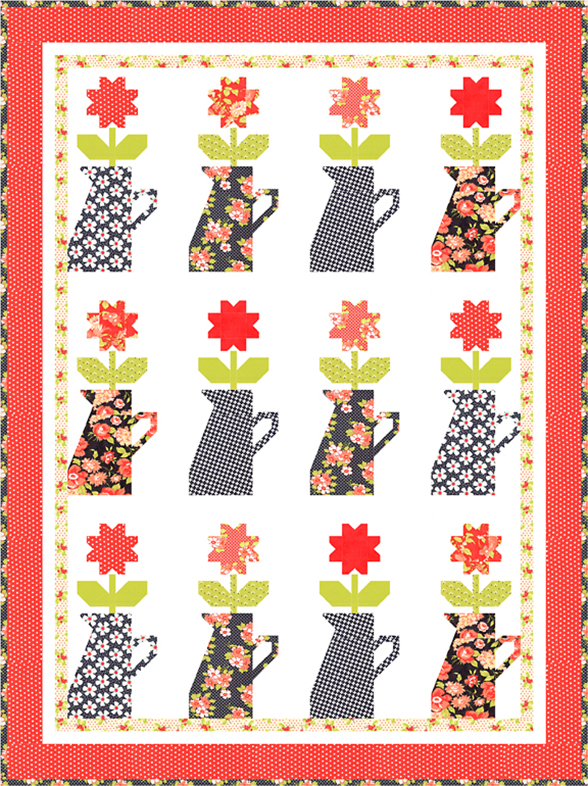
This here below is the original MILK & BLOSSOMS pattern which I absolutely love. In fact over the years, I have reinvented this pattern for several seasons including Christmas… see below.
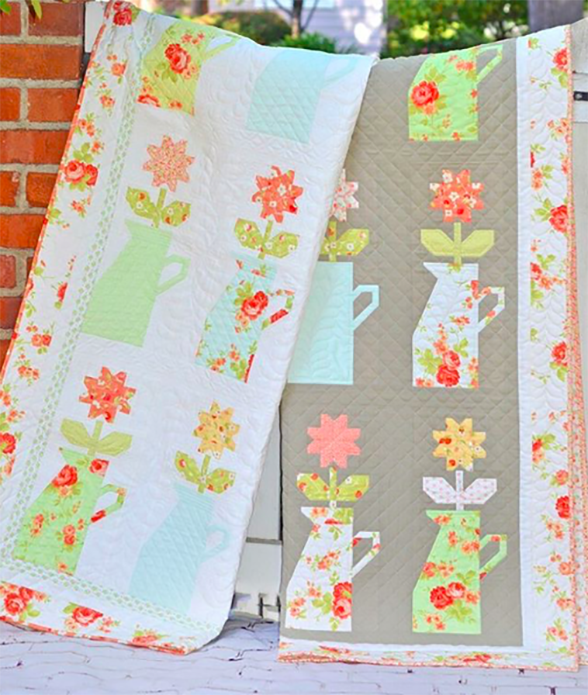
We called this one Poinsettia Blossoms and love it just as much as the original! This pattern really never gets old for me!
So back to the TULIPS…
When I first started working with blocks, I shared my progress over on Instagram and SO MANY of you fell in love with the new version. I promised you some kits if I could find some good fabrics and some info on how I made the changes so here we go…
EDIT: KITS ARE SOLD OUT.
But since I promised you guys the info, here are the edits you will need to make this yourself!
Again, you will still need the Milk & Blossoms Pattern to complete the quilt.
This is just a pattern sheet for the alternate FLOWER HEAD, which is what this top unit is referred to in the pattern.
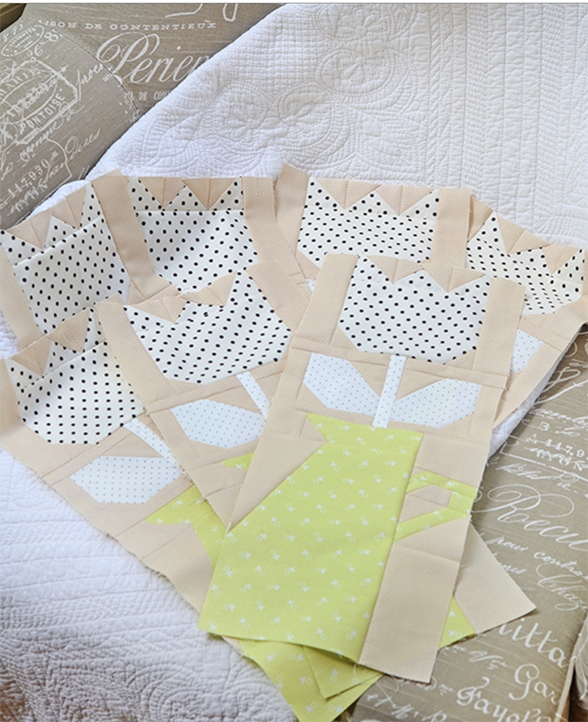
As you can imagine, this was not something that I had planned for in my design schedule so I have been working on a few blocks at a time as I have a few extra minutes here and there.
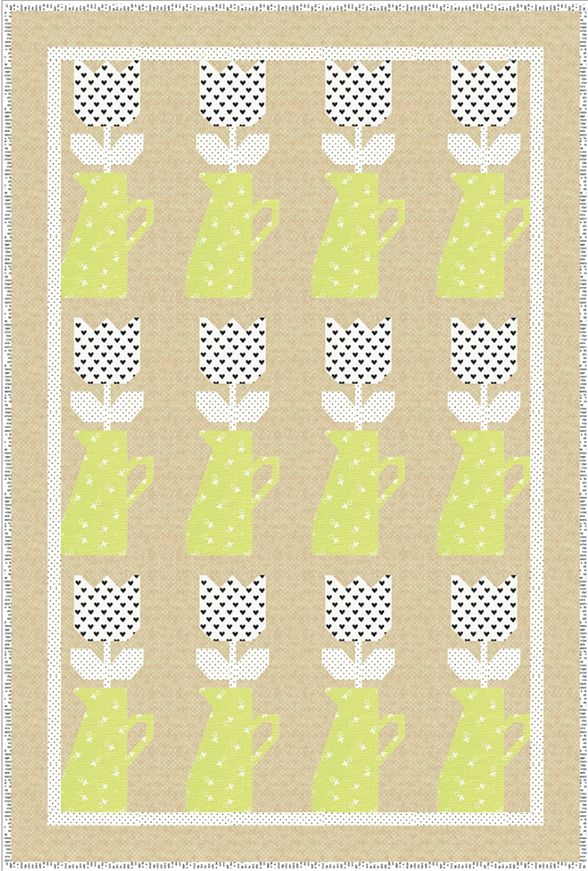
The TULIPS are really fun to put together and consist of 3 SEW&FLIP units on top and a larger body piece with the bottom corners SEW&FLIP as well.
The LEAF & STEM portion has no change in the actual construction from the original pattern but there are new measurements to make the leaves larger and chunkier to more closely mimic the feel of the tan pitcher that we were all inspired by!
The pitcher is identical to the pattern and the whole block gets a little trim down at the end to ensure it is the same size as the original.
Click HERE for a PDF of the info you will need to make the new TULIP HEAD & LEAF SET.
This printout will have all the info you will need to swap out the TULIP HEAD & LEAF SET for the original flower and leaf set. Pay attention to all of the notes on the printout for TULIP PITCHER success!
Follow all other pattern directions from MILK & BLOSSOMS.
THANK YOU
Thanks for stopping by the blog for this fun tutorial! I hope you pick up on this quilt’s sophisticated vibe – that’s what it keeps bringing to me – and I hope I see some of your TULIP PITCHERS “springing” up on social media soon! Be sure to tag me, @figtreeandco.
-Joanna
Dana M Haskell | 5th May 23
Oh my goodness, that mug was just meant for you and your Milk Blossoms quilt!!! It’s perfect. I have the pattern and have been wanting to make the original for awhile now. I love this version now too. So will have to do both or a mash-up of the 2!
Shirley Pearce | 5th May 23
Joanna, you have the magic touch! I just checked Amazon and they have sold out of the pitcher! So Cute!