
Embroidery Sampler
For those of you who are working on the STITCHERY SAMPLER SEW ALONG or even for those of you who are not and want to do this instead, we wanted to embroider along with the quilt along!
CLICK HERE to download our free embroidery sheet that you can transfer to the fabric of your choice [or use one of our starter kits while supplies last].
As you might have heard us mention before… WE ARE NOT EXPERTS BY ANY MEANS. But both Susan and I wanted to try our hand at a bit of embroidery so we are sharing our journey with you! Here are a few tips and pieces of info we have to share with you. Each week we will talk about the stitches we used for that week and any tips we might have for you for that week.
And Sophie, Susan’s daughter is here to stitch along with us too!
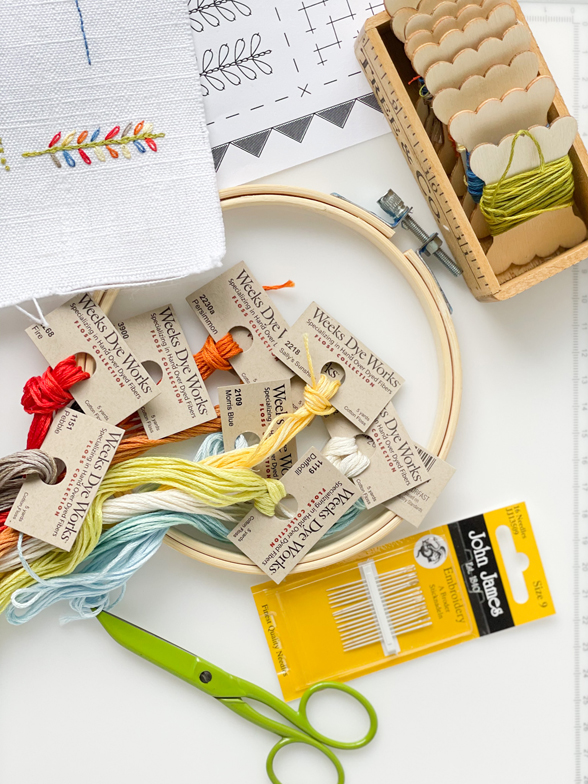
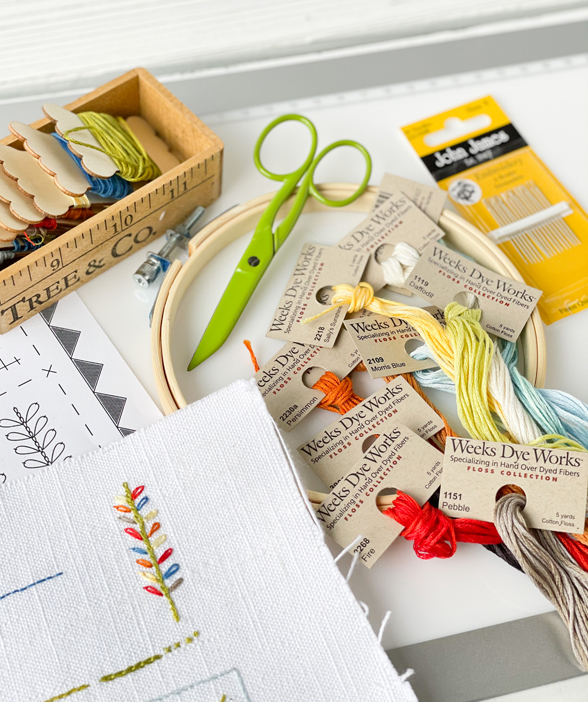
SOME SUPPLIES WE SUGGEST
- Embroidery Hoop (6”)
- Background Fabric – Fat Quarter of your favorite background. We recommend either Chantilly White Silky or a white linen or other textured background [we are using a Chantilly White Silky and a white “Bark Cloth”]
- Needles of your choice
- Frixion Pen
- Lightweight interfacing. We recommend Shapeflex to give your fabric a bit more stability. Probably not needed if using the barkcloth or other thicker fabric.
- Embroidery snips or small scissors
- Lightbox- any kind of light box would work. If you dont have one, a good bright window will work too 🙂
THREADS: Coordinating Threads of your choice. We are using Weeks Dye Works colors that coordinate/compliment with our Figs & Shirtings fabrics. We love the slightly variegated, soft and silky threads from Weeks. The colors we will be using are:
- 1092 Grits
- 2218 Sally Sunshine
- 2225a Marmalade
- 2230a Persimmon
- 2268 Fire
- 1119 Daffodil
- 2207 Pepperoncini
- 2109 Mom’s Blue
- 2131 Aqua
- 2339 Blue Bonnet.
- 1151 Pebble
- 3900 Kohl
SOME INFO TO GET STARTED:
Step 1: Cut your background piece oversized to account for the fact that you might want to frame it, or turn it into a pillow when you are finished. Basically think through your final use before trimming it down.
Step 2: Interface with a light weight interfacing, like the Shapeflex that we recommended. You might want to skip the interfacing if you are using the Barkcloth or another more heavyweight background. Feel free to try it out and see what you like.
Step 3: Mark with a Frixion pen…we marked the first block and the framework around the 12 blocks to get started. Use a lightbox or even a window if you need to.
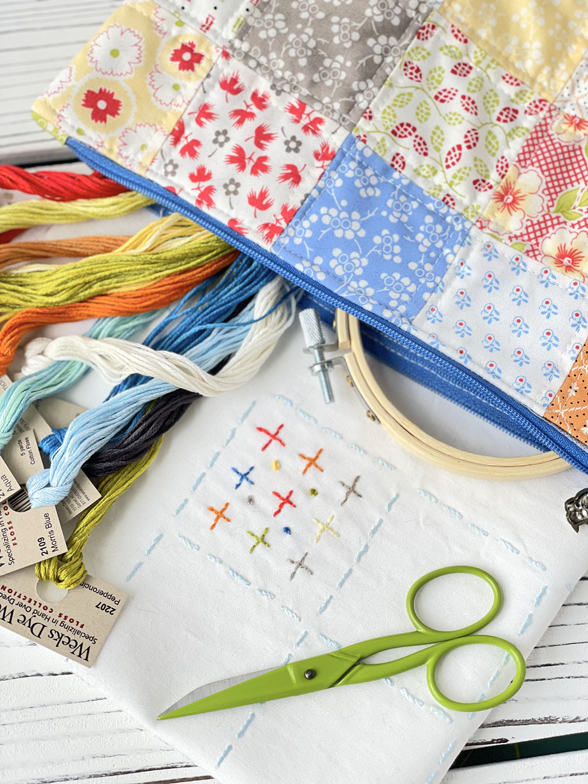
Step 4: Decide on your Stitches: We used 3 strands of floss.
BLOCK #1 “PLUSES”: Backstitch and French knots.
BLOCK SASHING: A stem stitch with 3 strands.

Other Helpful Tips and Tricks:
-use good light
-Warm-up your hands by doing practice stitches just like you warm up for free motion/hand quilting. Kits have plenty of extra background fabric you can play with your stitches and try new ones out. Your stitches will look totally different with the different weights of threads. Experiment with adding strands for a thicker look.
-Feel free to substitute stitches for ones you enjoy. Its your sampler so feel free to experiment!!
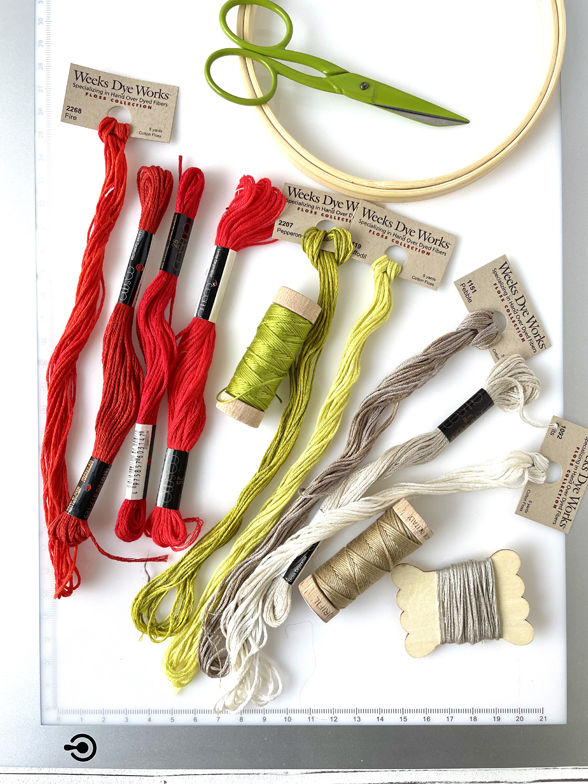
-We think it will look pretty in Red and Geen. Here is an idea of what that one will look like.
HERE ARE SOME GREAT VIDEO RESOURCES FOR STITCHES:
Back Stitch… https://www.youtube.com/watch?v=rZ_wVC84UmM&feature=emb_title
Stem Stitch… https://www.youtube.com/watch?v=TebgWq9AqyY&feature=emb_logo
French Knots… https://www.youtube.com/watch?v=W1Cq24d5-8s&feature=emb_logo
Each week we will share what stitches we have chosen and show you our progress and Sophie’s too!
Stitching samples and photos by Susan Vaughan.
Meg | 11th Jan 21
Will this print the right size or is there a scale to follow?
joanna@figtreequilts.com | 14th Jan 21
If you press “don’t size”, you should be fine. If it shrinks it down a little, that would be okay too, the difference would be minuscule I think.
Ruth Knee | 12th Jan 21
Thank you so much
Jeanne Boswell | 12th Jan 21
What are the correct dimensions of this piece.
I printed out the pattern on a 8 by 11 sheet, is that it?
joanna@figtreequilts.com | 14th Jan 21
I’m not sure I understand? Yes, the sampler fits on a regular 8 ½” x 11″ sheet.
Sandra Paskiet | 12th Jan 21
Love the small ruler box in the photo! Do you sell those!
Millie Copeland | 13th Jan 21
I have printed the embroidery sampler and accompanying Basic Stitchery information. I understand why you chose the colors of the Weeks Dye Weeks floss – one could use wherever colors one might have on hand but your choices are bright and complimentary to Fig Tree fabrics.
My granddaughter and I have struggled trying to find a simple but effective way for her not only to learn basic stitches but to feel confident as she follows directions. Your printed sampler is the best version.
I realize it appeared in the Winter 2020 blog – but I would love to know where to find where she/I can find where you wrote “each week we will share what stitches we have chosen and show you our progress ……”
joanna@figtreequilts.com | 14th Jan 21
We have just started this stitch along and have only done the first block so far. The next one will be this next Monday, and each following Monday until we are done. Hope you and your daughter join us!