
Embroidery Stitch Along: Week #13- Borders & Finishing
Welcome back to our weekly Embroidery block to accompany our Stitchery Sampler Sew Along. If you would like info on previous blocks, our supplies or general start and embroidery info, scroll back to the previous embroidery posts. The easiest way to do that is to search the word “embroidery” in our search box.
CLICK HERE to download our free embroidery sheet that you can transfer to the fabric of your choice.

SASHING, BORDERS & FINISHING
This week, Sophie and I wrapped up our Embroidery Samplers, and I have to say we have had so much fun stitching together for the past twelve weeks.

We have enjoyed our weekly time of drinking tea while trying out stitches, and some wonderful mother-daughter memories were made. Not to mention, Sophie learned she really enjoys hand embroidery!

Sophie finished up her sampler last week, and opted not to include a border. I think partly this was because she was anxious to start her next project and partly because she found a frame at a local housewares store that she wanted to use to finish off her project! The white wooden 8″ x 10″ frame fit her sampler perfectly! Sophie’s sampler is now in the mail to a special friend and I hope she loves it!
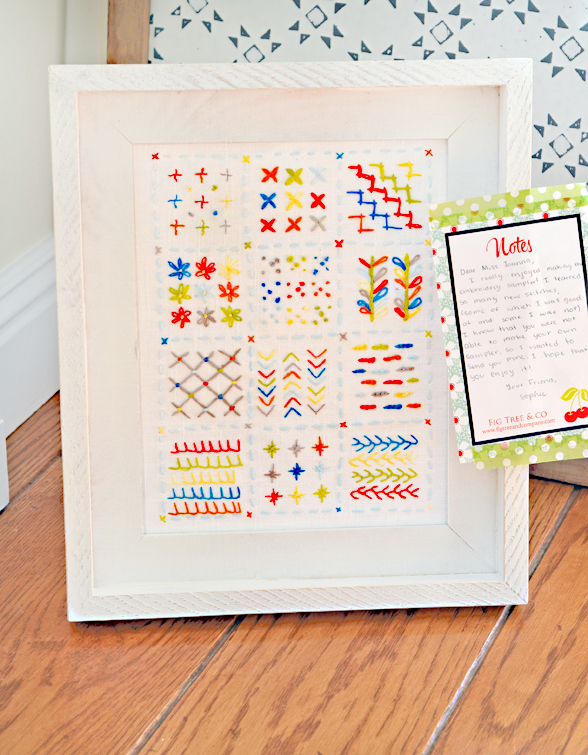
EDIT: This is Joanna and I just got Sophie’s sampler in the mail!! Oh my gosh, I am so honored to be the recipient of her beautiful work and it means so much knowing that she and Susan worked on these together each week :-). I had no idea it was coming to me and I am so proud of her! I love these stitches so much!! Thank you, thank you Sophie!
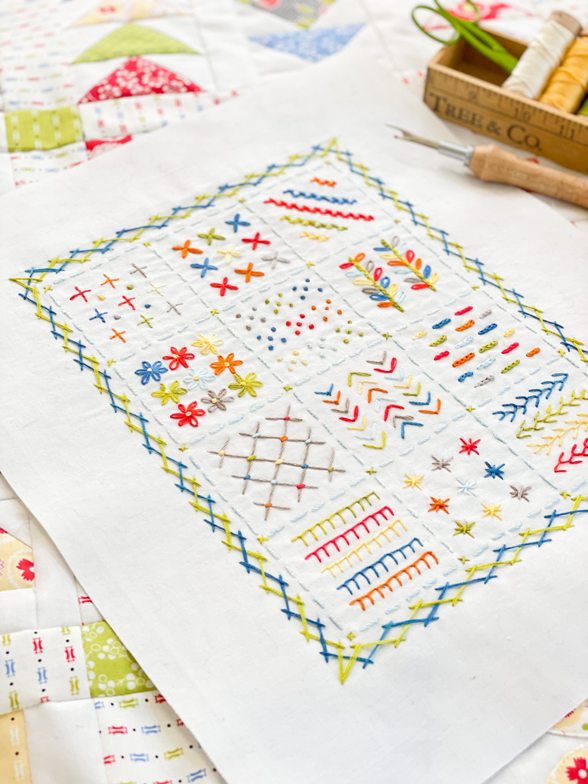
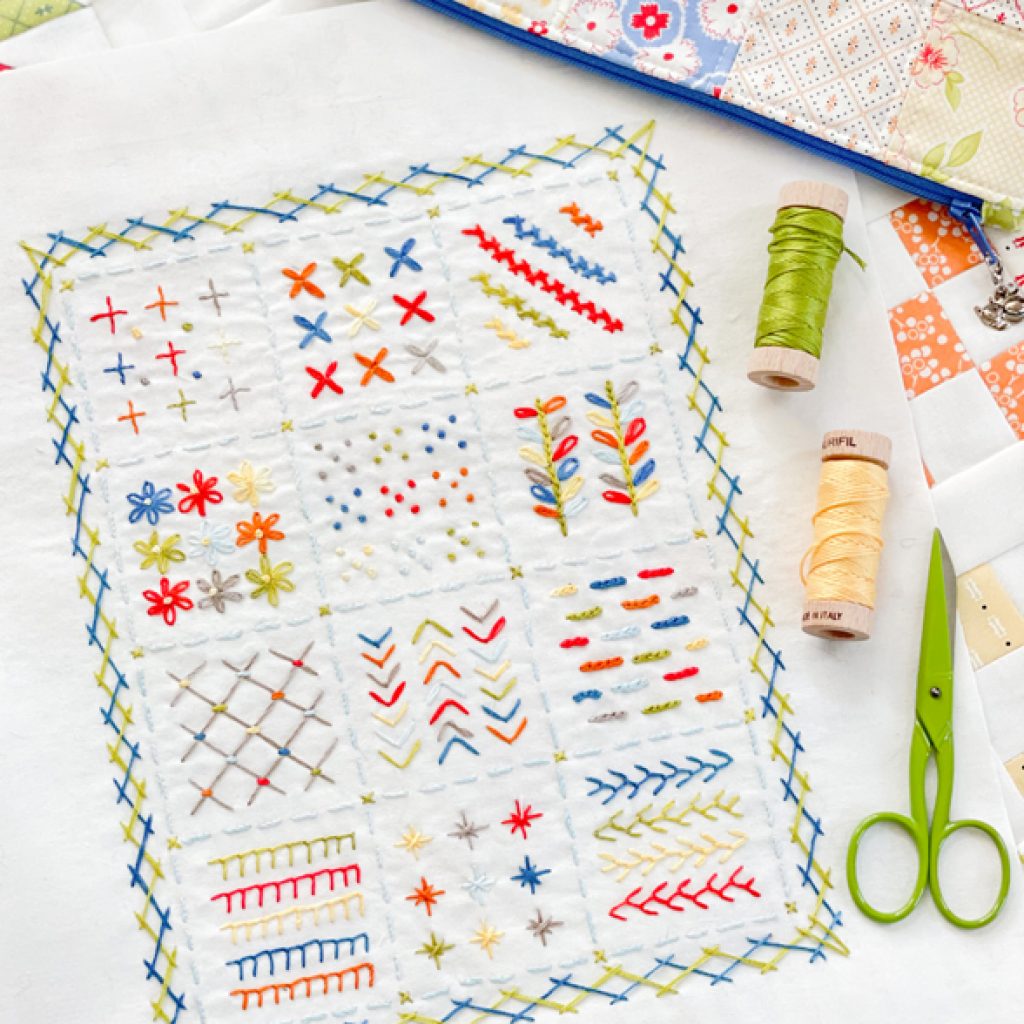
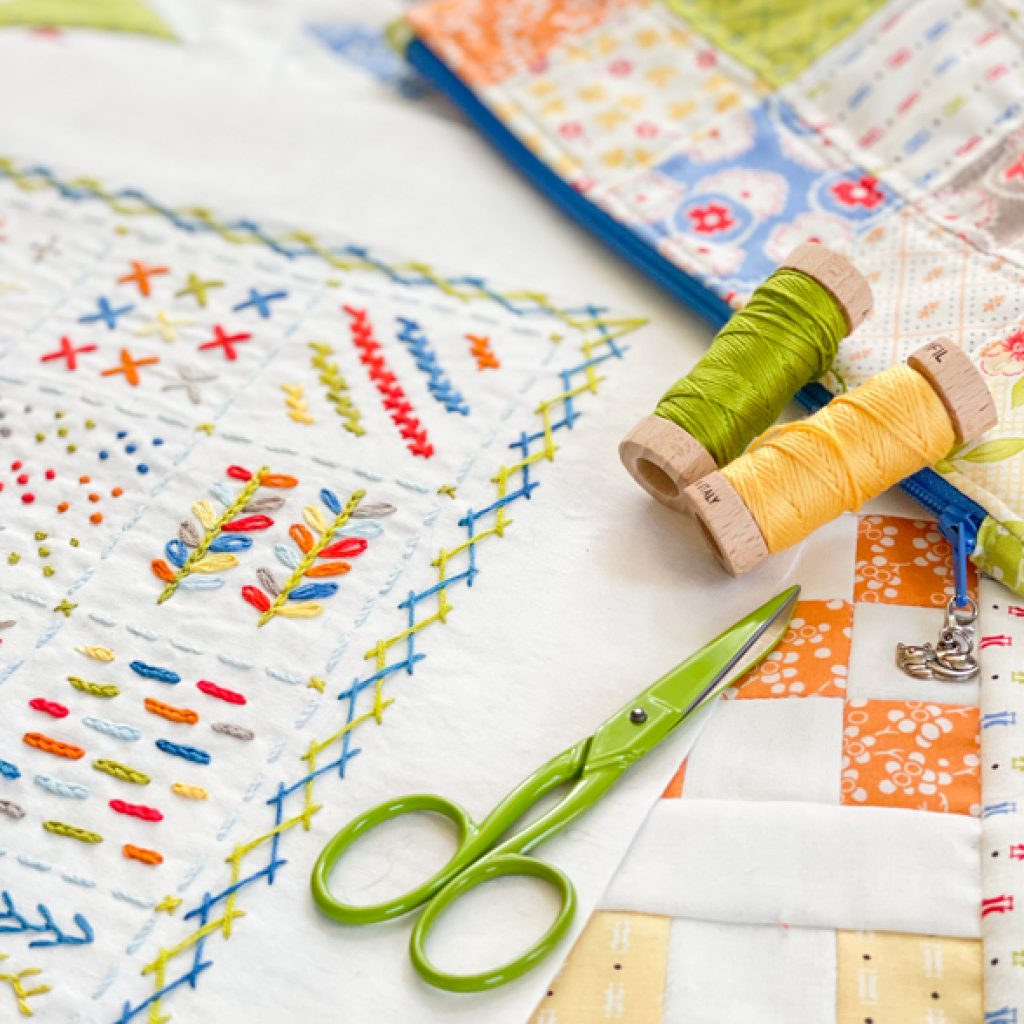
I wanted to add a border to my sampler because I thought it could use a little something to finish it off. I really liked the Sawtooth border from the original quilt, but wasn’t happy with my satin stitches filling in the triangles on my practice sampler.
Sophie suggested doing a Herringbone Stitch (from Week 3) to still keep the illusion of the peaks and valleys of the original quilt’s border. After watching a refresher video on how the Herringbone Stitch works, I stitched a side of my sampler and liked the look, but thought it was missing just a little something. I decided to add a second set of Herringbone stitches and intertwine them with the first to form a Double Herringbone.
A few tips for using the Double Herringbone as a border:
- Using a Frixion pen, mark parallel lines to use as a guide around your sampler. I spaced mine 3/8″ apart.
- Divide your line into even sections around the perimeter and lightly mark each section with a dot. You will use these marks to help you know where the start of each stitch falls.
- I used four strands of floss to stitch my border.
- As you stitch, pay attention if your stitch goes under or over the previous stitch. It is easy to get confused!
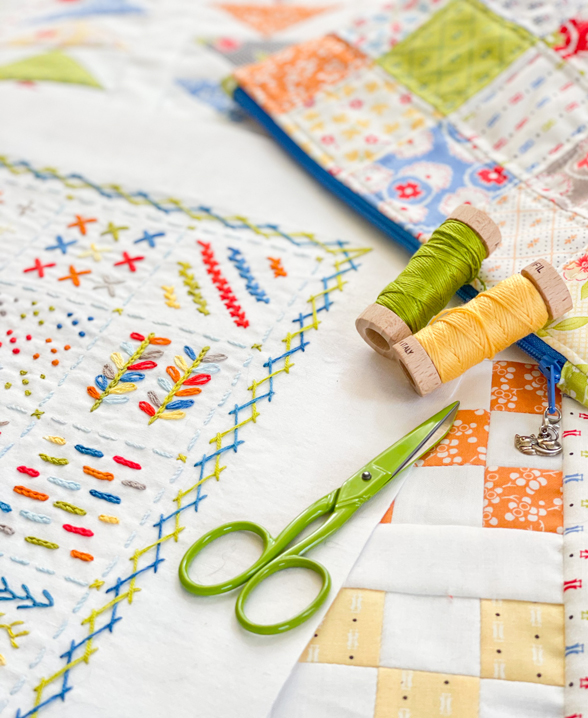
- Work one side of blue and then go back and fill in the green. When you get to the corner start again repeating the process for all four sides.
- Experiment with the colors you choose! I thought I was going to use blue and orange to match the quilt, but found I enjoyed the pop of the green much better.
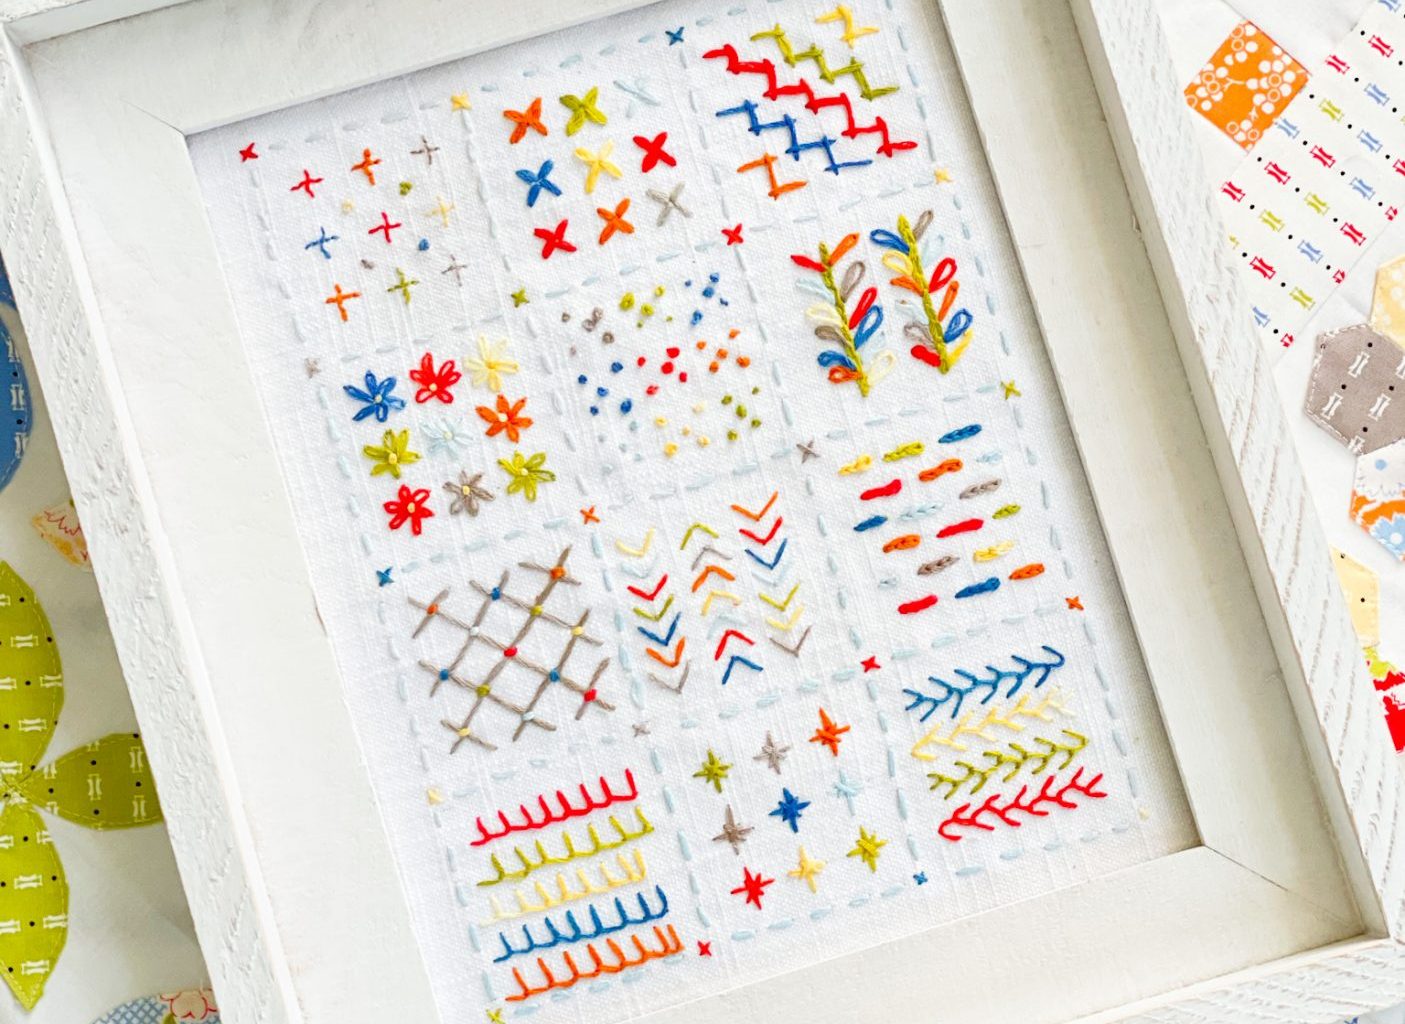
I trimmed up my sampler leaving a 2″ border around on all sides. I haven’t decided how I want to finish my sampler off but I am leaning towards framing it in an 11″ x 14″ frame leaving a little bit of white background showing. - Follow us on social media to see what we choose!


Thank you for taking this stitching journey with us as we all learned together!
Here is a good video for this stitch:
Double Herringbone Video Tutorial: https://www.youtube.com/watch?v=KP3q3H5bnf8
Guide of Stitches So Far:
Week 1: Back Stitch with 3 strands and French Knots
Sashing: Stem Stitch with 3 strands
Week 2: Granitos with 3 strands
Week 3: Herringbone Stitch with either 6 or 4 strands [see above]
Week 4: Lazy Daisy Stitch and French Knots with 3 strands
Week 5: Colonial Knot [or French Knot] with 4 strands
Week 6: Chain Stitch with Lazy Daisy with 4 strands
Week 7: Lattice Fill Stitch with 4 or 6 strands
Week 8: Fly Stitch with 4 strands
Week 9: Chain Stitch with all 6 strands
Week 10: Blanket/Buttonhole Stitch with 4 strands
Week 11: Star Stitch with 4 strands
Week 12: Feather Stitch with 4 strands
Week 13: Double Herringbone with 4 strands
HERE ARE SOME GREAT VIDEO RESOURCES FOR PREVIOUS STITCHES:
Granitos Stitch: Link: https://www.youtube.com/watch?t=128&v=Cysb2KK29dA&feature=youtu.be
Back Stitch… https://www.youtube.com/watch?v=rZ_wVC84UmM&feature=emb_title
Stem Stitch… https://www.youtube.com/watch?v=TebgWq9AqyY&feature=emb_logo
French Knots… https://www.youtube.com/watch?v=W1Cq24d5-8s&feature=emb_logo
Herringbone Stitch… https://www.youtube.com/watch?v=4JyFBXtsO34&t=4s
Lazy Daisy (petal formation)... https://www.youtube.com/watch?v=hmYvBZhUkrI
Lazy Daisy (for connecting the petals)… https://www.youtube.com/watch?v=2pYtAKpRlTM&t=8s
Chain Stitch: https://www.youtube.com/watch?v=KP3q3H5bnf8
Blanket/Buttonhole Stitch: https://www.youtube.com/watch?v=KP3q3H5bnf8
Star Stitch: https://www.youtube.com/watch?v=knT5oG-jwVM
Double Herringbone Stitch: https://www.youtube.com/watch?v=ZXQMm2wUKaw
Each week we will share what stitches we have chosen and show you our progress and Sophie’s too!
Stitching samples and photos by Susan Vaughan.
Kathy English | 9th Apr 21
Your embroidery projects turned out great! Beautiful! ❤️🌿❤️
Travel Information | 1st May 21
Another great post from you, all useful in filling my head up with helpful knowledge.
I have also taken the time to share this on Fb 🙂