
Embroidery Sew Along: Block #4
Welcome back to our weekly Embroidery block to accompany our Stitchery Sampler Sew Along. If you would like info on previous blocks, our supplies or general start and embroidery info, scroll back to the previous embroidery posts…
CLICK HERE to download our free embroidery sheet that you can transfer to the fabric of your choice [or use one of our starter kits while supplies last].
THE HEXIE BLOCK
In our quilt along, we are working on Block #4 this week, our HEXIE block, and for many of us our first attempt at working on a hand pieced hexagon block. Many of us found this to be so much more fun than we had expected and my hope is that you will love this week’s embroidery project just as much!
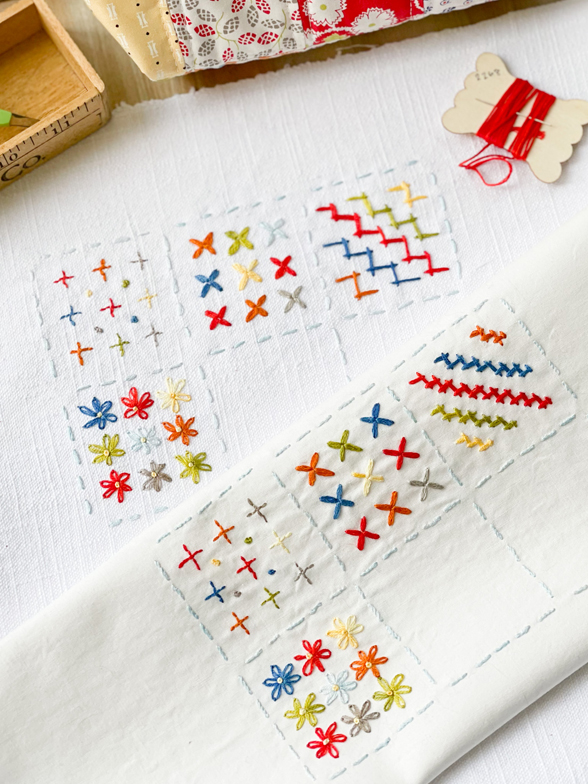
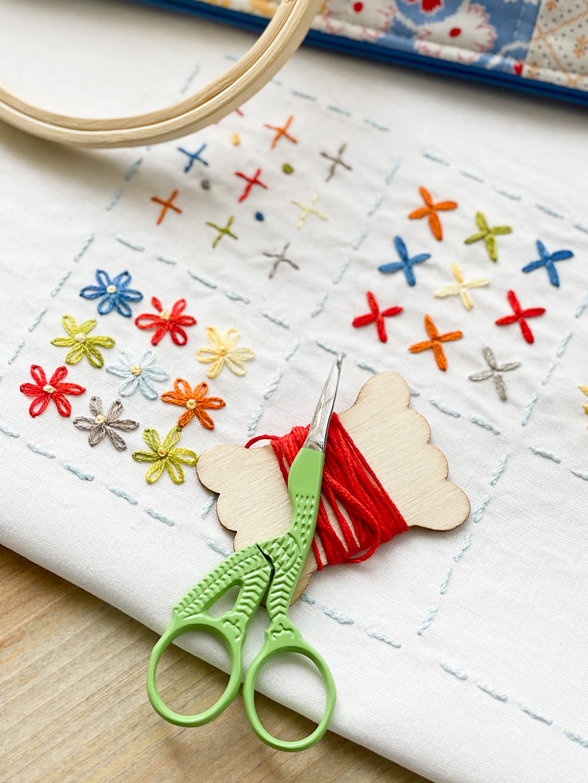
This week, we used the LAZY DAISY stitch to represent our Hexie Blocks.
We thought the hexagons looked like small flowers, and the radiating chain stitches resembled flowers from Sophie’s grandma’s “Gramms” garden.
When testing our stitches on our practice cloth, we quickly realized that using multiple colors for each flower was too overwhelming, but it looked perfect with a single color representing each flower. After we finished all our stitches, we thought our flowers needed a little something extra so Sophie went in and added a french knot to the center of every block for an extra dose of cuteness.
Sophie and I used three strands of floss for our Lazy Daisy stitches as well as three strands of floss (wrapping three times) for our French Knot centers.

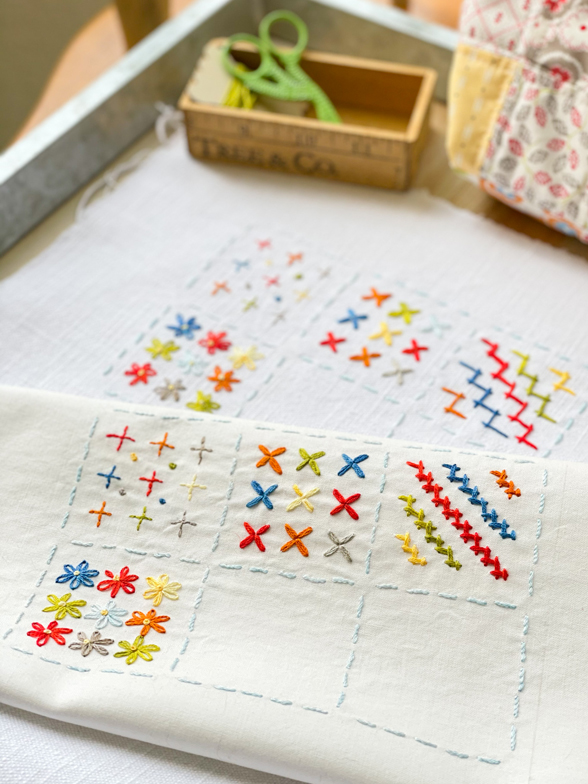
Because she had a few extra minutes this week, Sophie played around with a few stitches for her sashing. She tried out a backstitch, a stem stitch, and a running stitch for her sashing, and found she was most happy with using a running stitch with all six strands of floss. We are both using a light blue, but thought the sashing would look equally good in the charcoal black or blue/aqua from the Fig Tree Kits.

A few tips:
- Don’t pull your stitches too tight! You want your stitches to be short and plump.
- Try not to twist your stitches. Twisted stitches make your petals appear skinnier and are an easy fix when you correct it right away.
Here are some good resources:
Lazy Daisy (petal formation) https://www.youtube.com/watch?v=hmYvBZhUkrI
Lazy Daisy (for connecting the petals) Video: https://www.youtube.com/watch?v=2pYtAKpRlTM&t=8s
French Knot Video: https://www.youtube.com/watch?v=W1Cq24d5-8s&t=145s
Guide of Stitches So Far:
Week 1: Back Stitch with 3 strands and French Knots
Sashing: Stem Stitch with 3 strands
Week 2: Granitos with 3 strands
Week 3: Herringbone Stitch with either 6 or 4 strands [see above]
Week 4: Lazy Daisy Stitch and French Knots with 3 strands
HERE ARE SOME GREAT VIDEO RESOURCES FOR PREVIOUS STITCHES:
Granitos Stitch: Link: https://www.youtube.com/watch?t=128&v=Cysb2KK29dA&feature=youtu.be
Back Stitch… https://www.youtube.com/watch?v=rZ_wVC84UmM&feature=emb_title
Stem Stitch… https://www.youtube.com/watch?v=TebgWq9AqyY&feature=emb_logo
French Knots… https://www.youtube.com/watch?v=W1Cq24d5-8s&feature=emb_logo
Herringbone Stitch… https://www.youtube.com/watch?v=4JyFBXtsO34&t=4s
Each week we will share what stitches we have chosen and show you our progress and Sophie’s too!
Stitching samples and photos by Susan Vaughan.
Amie P | 2nd Feb 21
I have a daughter who has down syndrome . Megan would love a kit! How do I get 2 ?