GIFT WEEK 2023: DESKTOP ACCESSORIES
Hope everyone is enjoying the last few days of Novemver.
Susan is back today so grab some coffee or your favorite tea [you know me and my tea] and get ready for lots of inspiration coming…today’s blog post is JAM-PACKED WITH GOODNESS!
FROM SUSAN
Welcome back to DAY TWO of our Gift Week Celebration! I loved hearing how y’all are inspired to create for your friends and family and am so glad the ideas we shared on Tuesday were helpful.
Today is all about what I have been calling “Desktop Accessories” and I made these especially for a gift exchange with several ladies I have a class with on Wednesday morning. We have met weekly for the past 5 years for coffee and an academic bible study. We chitchat, laugh, and it’s a highlight of my week.
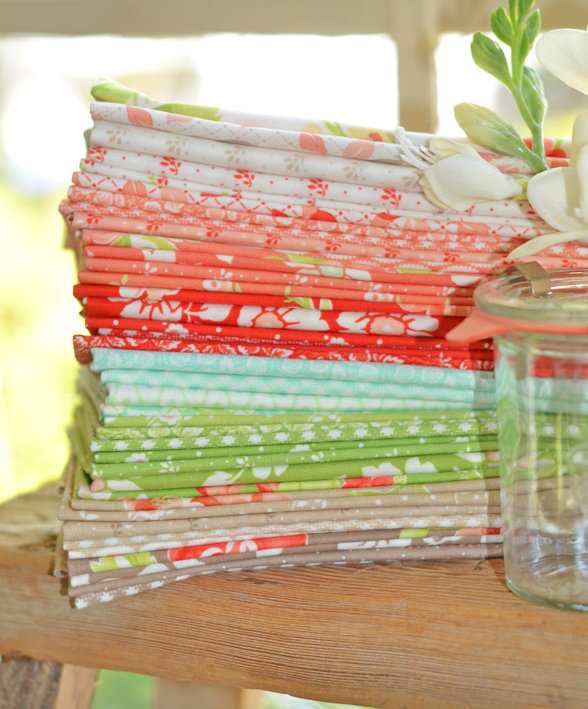
Our group decided to do a small gift exchange and I knew right away I wanted to make something for them out of Joanna’s upcoming line, JELLY & JAM. I knew they would love the bright and cheerful colors, and since our gift exchange was close to Christmas, having a handmade item that didn’t feature traditional red and green colors would be a win.
We are encouraged to come to class prepared, and that often means taking a few notes. I thought the ladies would enjoy a few accessories they could use to help them get prepared.
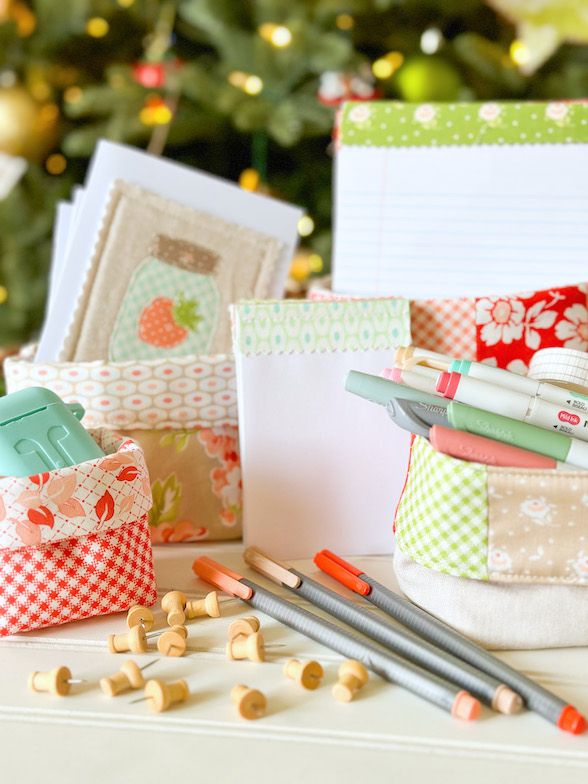
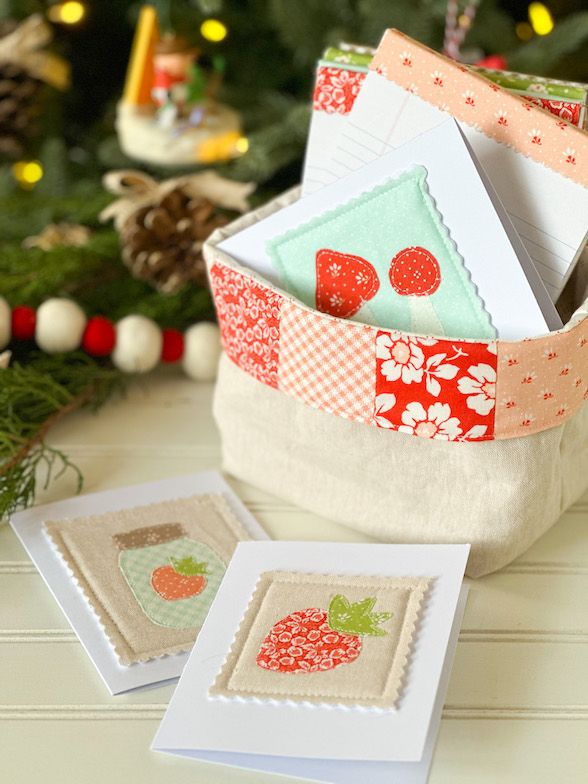
In looking through my pattern binder, Joanna’s LITTLE BOXY CATCH-ALL Pattern Sheet caught my eye for the base of my gift. Not only could I “stuff” them with a few goodies but I wouldn’t need to worry about wrapping things up, and they could use the baskets on their desks well after the holiday season is over.
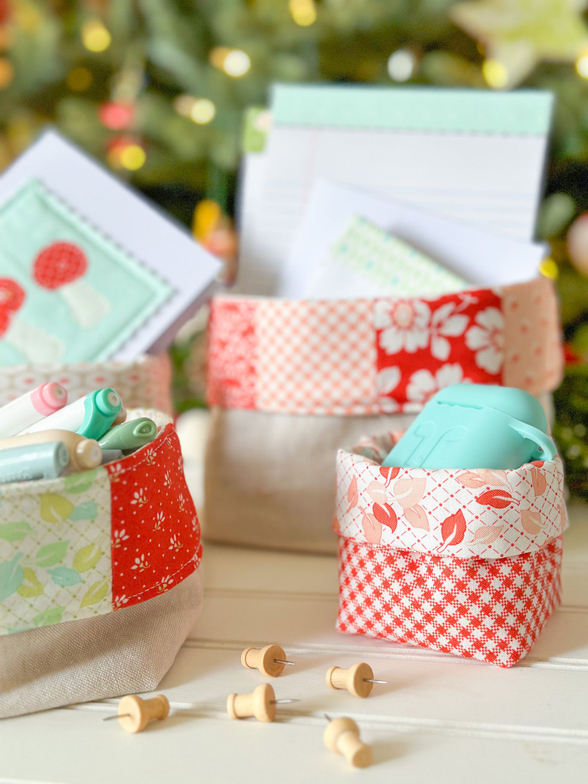
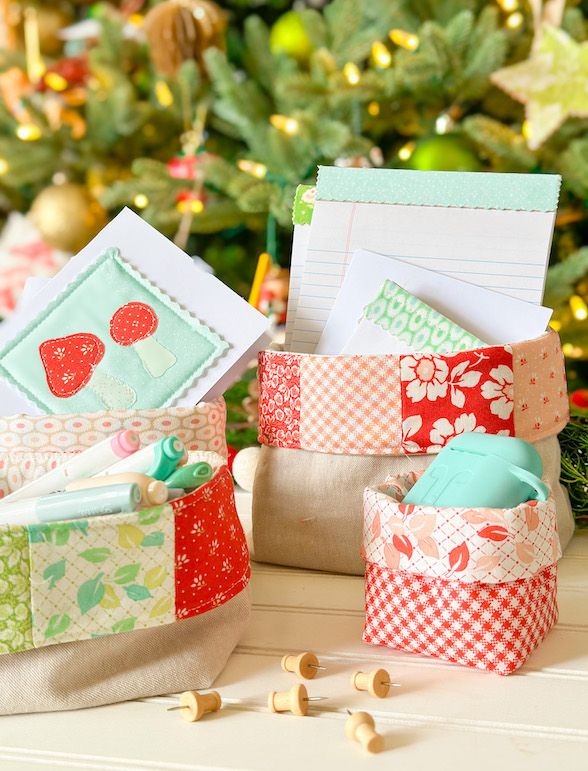
Let me tell you, these Little Boxy Catch-All Baskets are addictive! Once I made the first ones, I couldn’t stop making them. My daughter kept challenging me to come up with different sizes for all kinds of storage options. The sky is the limit for how you could adapt the pattern. I wound up adapting the pattern to an additional mini, medium, and large size for all kinds of storage needs.
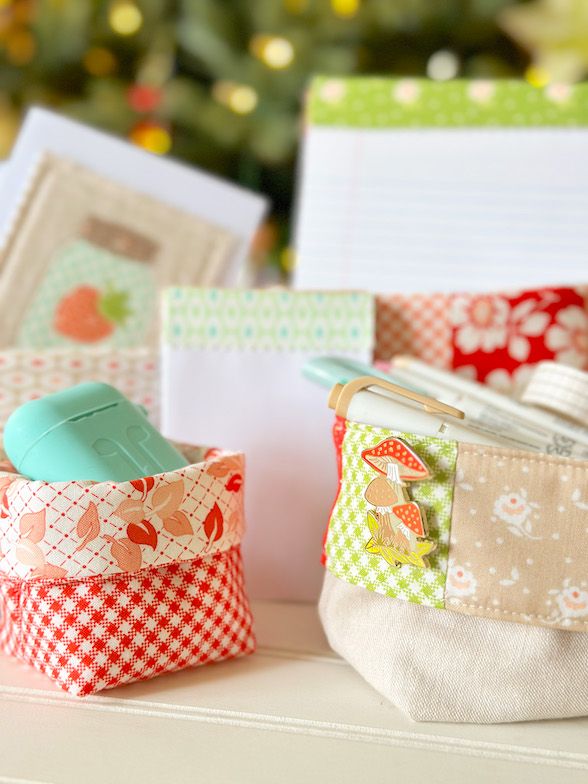
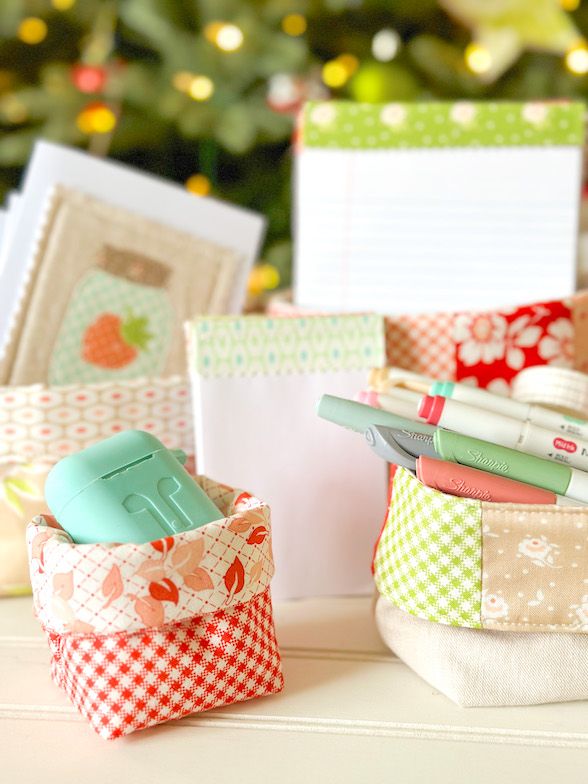
The large one holds quite a bit, and right now is on my desk holding mail I need to sort through and take action on. The medium basket size was a special request from my daughter to serve as a “cozy” for one of her houseplants, and the mini size is just the perfect size for holding pushpins, paper clips, or your earbuds. They also would make great storage options for inside your sewing room, child’s playroom, or even your kitchen/garage!
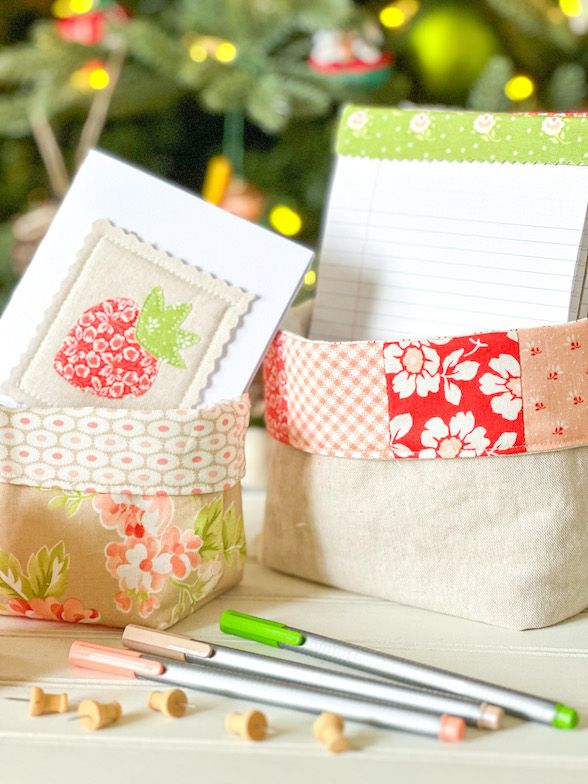
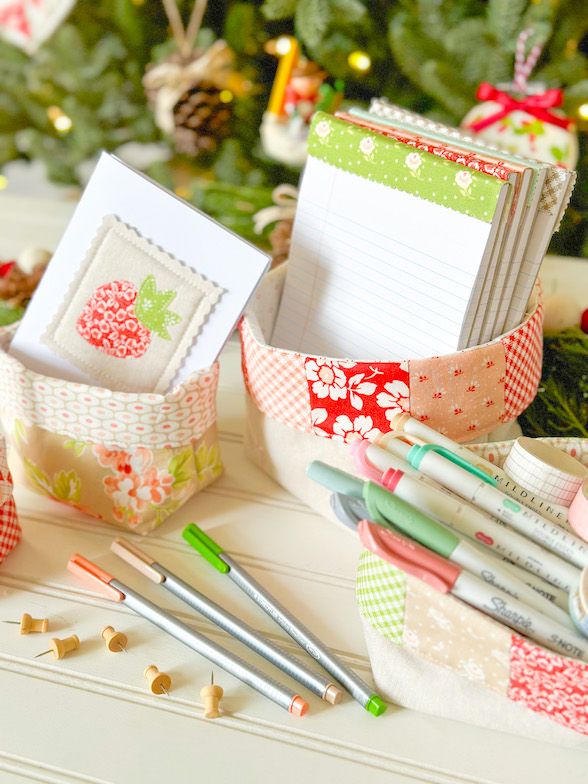
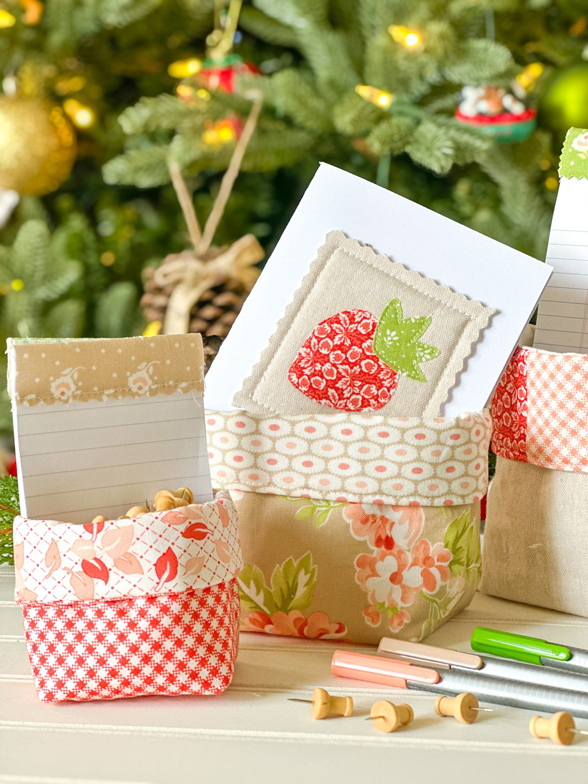
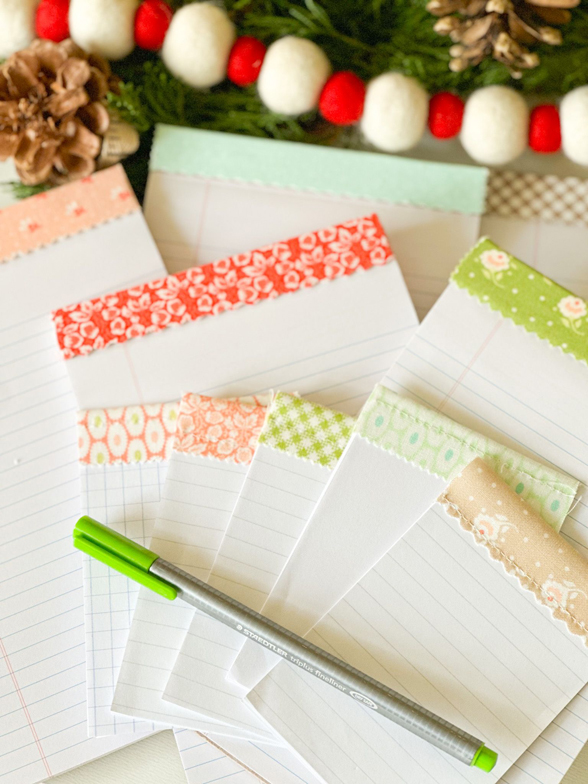
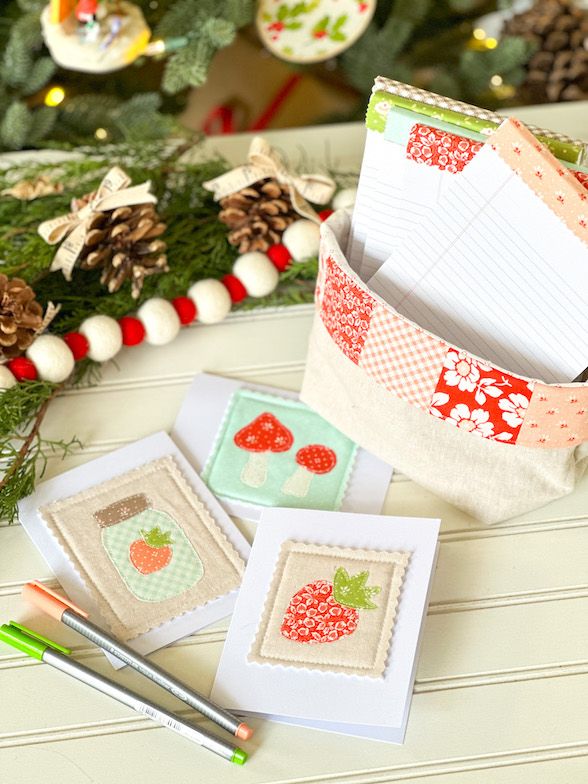
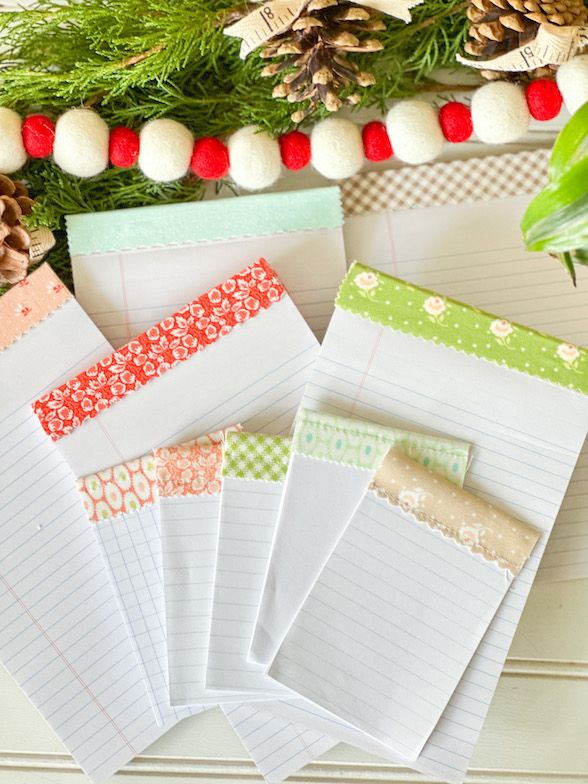
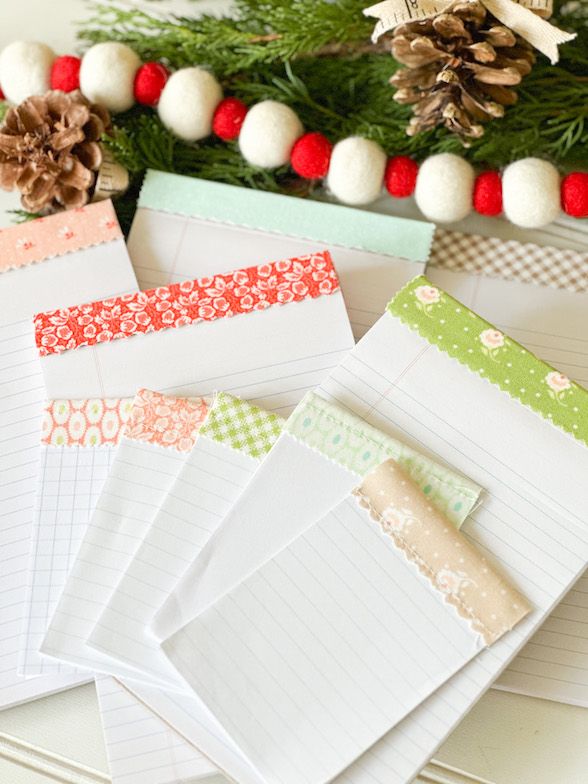
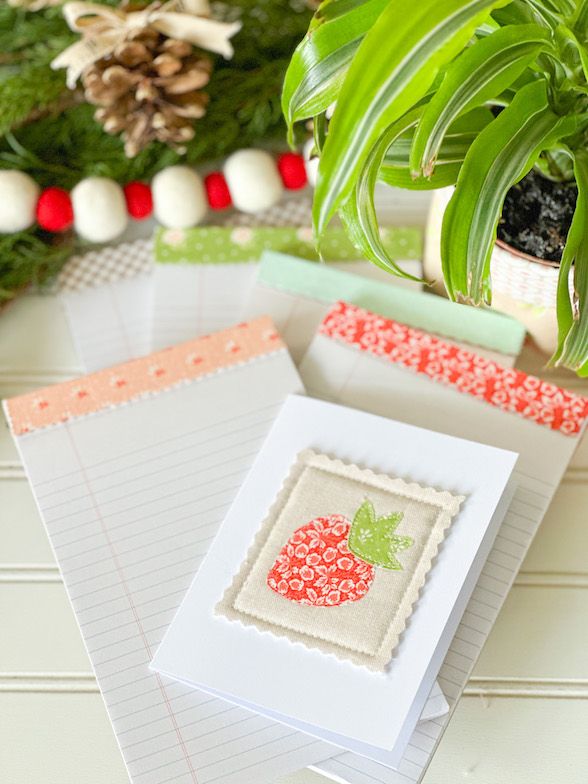
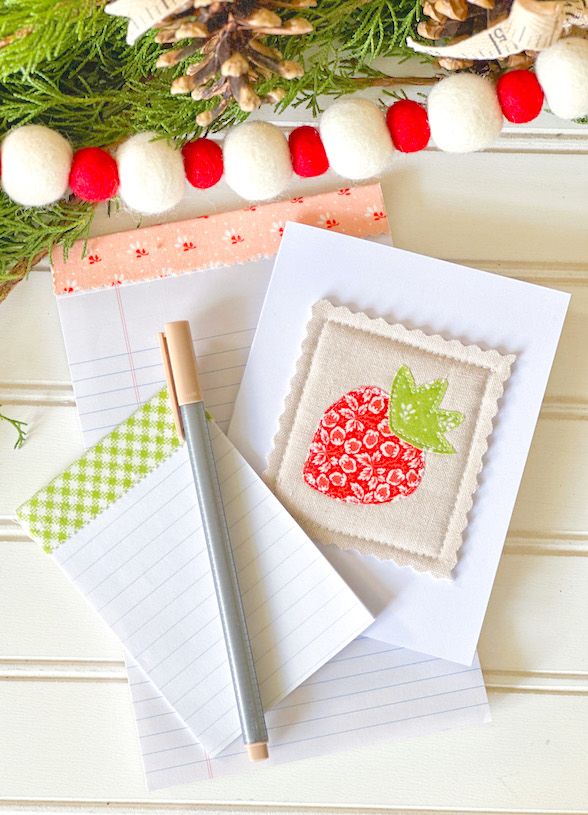
Once I had my baskets made, I started brainstorming things to fill them with for my friends. I knew all of us loved stationery and fancy pens, so I used that as my jumping-off point. I checked out a few shops but couldn’t seem to find notepads that matched my baskets and fit in my budget, so I decided to make my own! I took small legal pads and “Mod Podge-d” fabric scraps on top for maximum cuteness. I even added a few mini notepads that I made from scrap paper I had at home and placed a thin fabric strip on top.
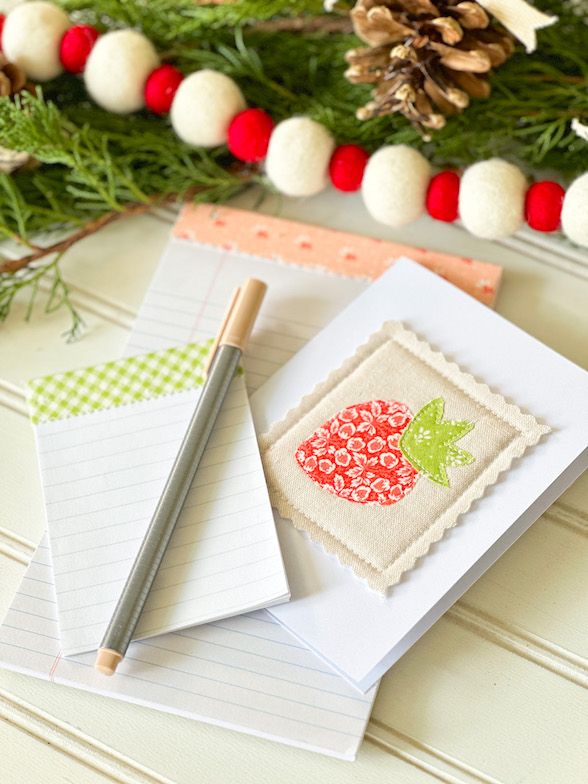
I filled the baskets, and I had a little bit of leftover room, so I decided to add a couple handmade cards. These were surprisingly easy to do and with a fancy pen it rounded out the gift basket.
In all, I spent about three afternoons sewing and crafting and had gifts for all 12 ladies in my class. I call that a win!
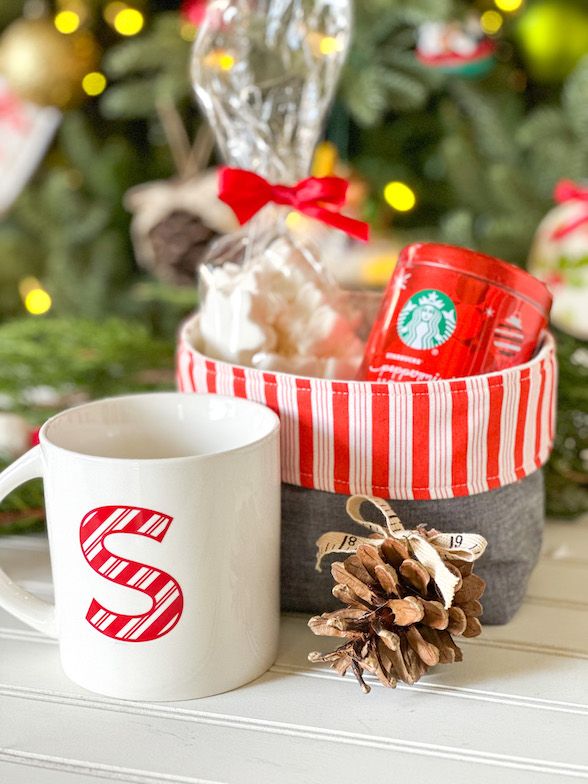
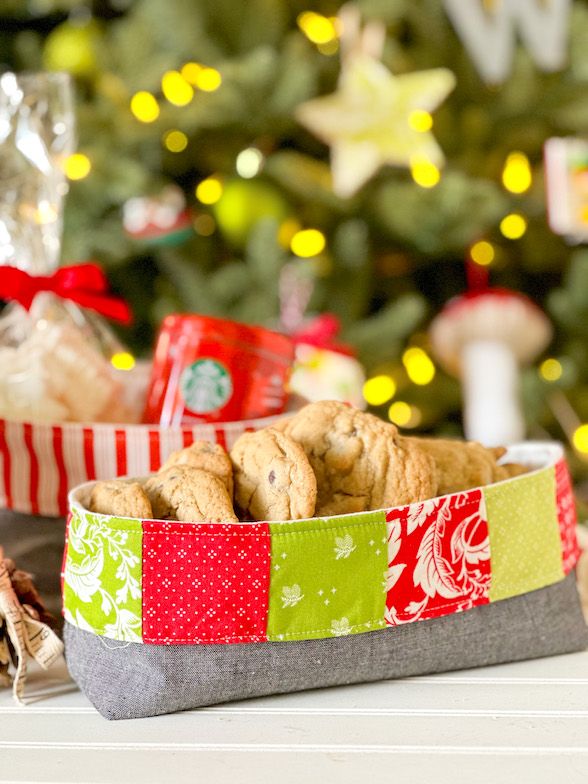
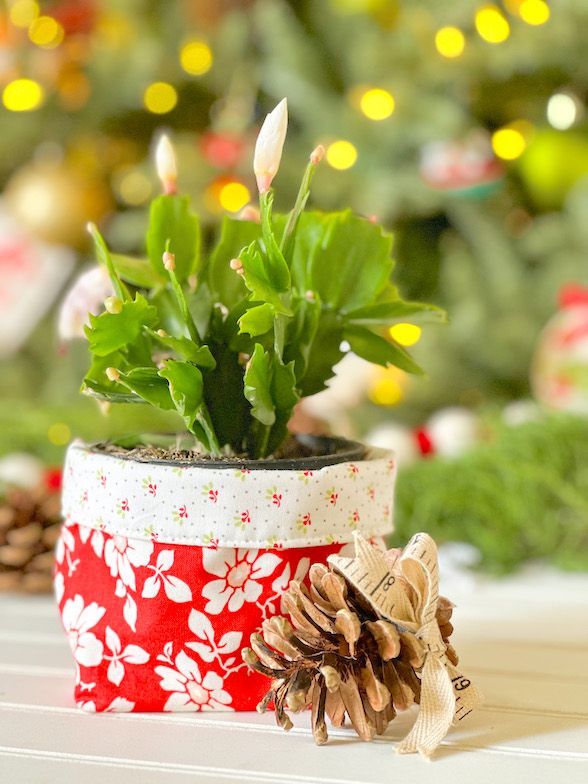
I didn’t let the fun stop there and while I was whipping up my gifts, I thought about how I could use the Little Boxy Catch-All baskets as holiday wrapping, too so I made a few extras. I used the large size to hold a mug, hot chocolate, and gourmet marshmallows for a friend, and made a few of the little catch-alls to fill with Christmas cookies to deliver to some neighbors. I made about a dozen of the medium size for Sophie to gift with a Thanksgiving/Christmas Cactus to some of her teachers and library colleagues. We have gifted a few out already and they have been a huge hit!
……
To Make Fabric Baskets:
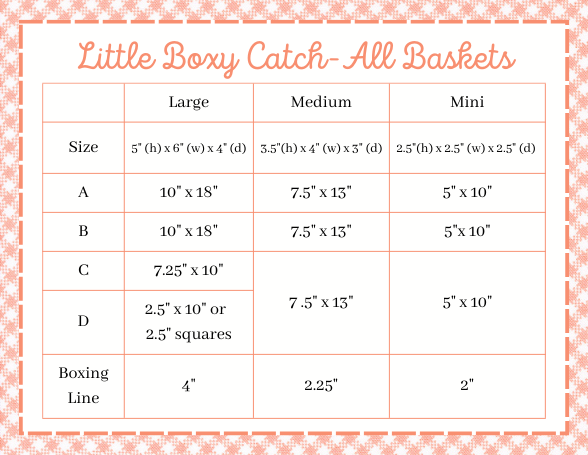
Use the chart provided for the measurements of the A, B, and C pieces as well as the “boxing” measurements and follow the methods as explained in the LITTLE BOXY CATCH-ALL Pattern Sheet. For the large basket, trim the 2 ½” square strip to fit. For the mini and medium, we opted to use one solid piece of fabric instead of having a top accent and made our turning openings on the sides rather than on the bottom of the lining.
Hints and Tips:
For increased stability, I chose to interface my lining with a lightweight interfacing and made sure to top stitch my basket to keep everything in place. This is a project where you will want to allocate a bit of extra time for pressing your basket. It will help the baskets stand up straighter and look even more polished.
……
To Make Fabric Legal Pads:
Materials:
- Small legal pad (5” x 8”)
- Wite-Out tape
- Fabric scraps
- Freezer paper
- Mod Podge
- Foam brush
I ordered a couple packages of (8) legal pads from Amazon. If you have the option, pick a legal pad that has a light-colored binding at the top. This well help keep any logos from the paper showing through on your legal pad. Precut any fabric scraps to approximately 2” x 5”.
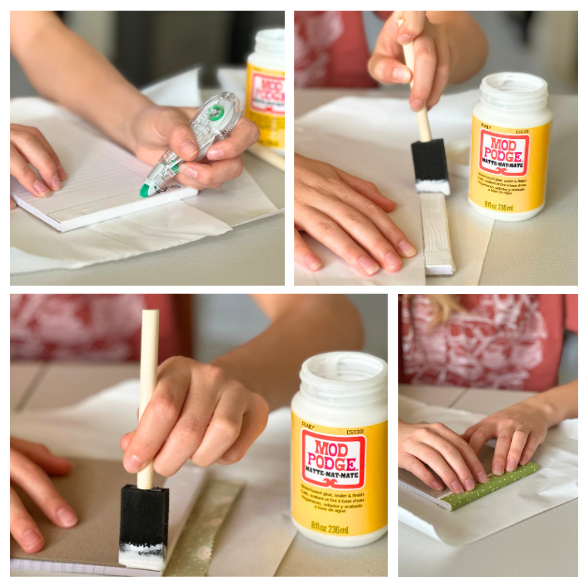
First, you want to white out any visible logo on your notepads that might show through. Then place your legal pad on your desk and cover the sheets of paper with freezer paper leaving just the binding showing. Give the binding a light coat of Mod Podge and lay your fabric strip on top wrapping it around to the back edge. Once dry, trim up any loose threads from the sides as necessary.
Hints and Tips:
We didn’t find it necessary to give it a top coat of Mod Podge, but if you are concerned about the fabric peeling you may consider doing this.
We found it helpful to make one sample legal pad to confirm the size of our fabric strip would cover both the top and back part of the binding. If it is too thick or doesn’t cover the binding all the way, adjust your fabric cut size accordingly.
This method works for both standard and small legal pad sizes. Simply start with a fabric scrap 2” by the length of your pad and make adjustments as necessary.
……
To Make ‘Mini’ Pocket Notepads:
Materials:
- Scraps of paper cut to 3” x 4”
- Fabric scraps approximately 1 ½” x 3”
Joanna taught a workshop this Spring and I came along to visit and to help her out. The guild gave us each a welcome bag when we arrived and included a few of these mini notepads in it. They are the perfect size to keep in your purse, and keep your notes organized so you don’t lose them. They take just a couple minutes each to make. The graph paper version is super handy for quickly sketching out a quilt block or layout idea, too.
Cut your paper 3” x 4” and neatly stack approximately 10-12 sheets together. Sew across a 3” side with a ¼” seam allowance to hold your paper together. You might find it helpful to clip the other 3” edge of paper with a Wonderclip to keep your fabric from shifting as you sew.
Once basted, iron your fabric scrap in half to approximately ¾” x 3” and use pinking shears or a rotary cutter blade to make decorative edges along the 3” side. Slip the paper inside the fabric and stitch in place. Trim any edges if necessary.
Hints and Tips:
This is a great way to use up scraps of paper, or extra sheets from journals or notebooks you are no longer using. We made notepads from lined, unlined, graph, and dot papers. We also found it helpful to increase our stitch length on our machine and use a larger-sized needle (14 or 16). Since you are stitching though paper, you might want to use a dull needle, or mark it and only use it for stitching though paper.
……
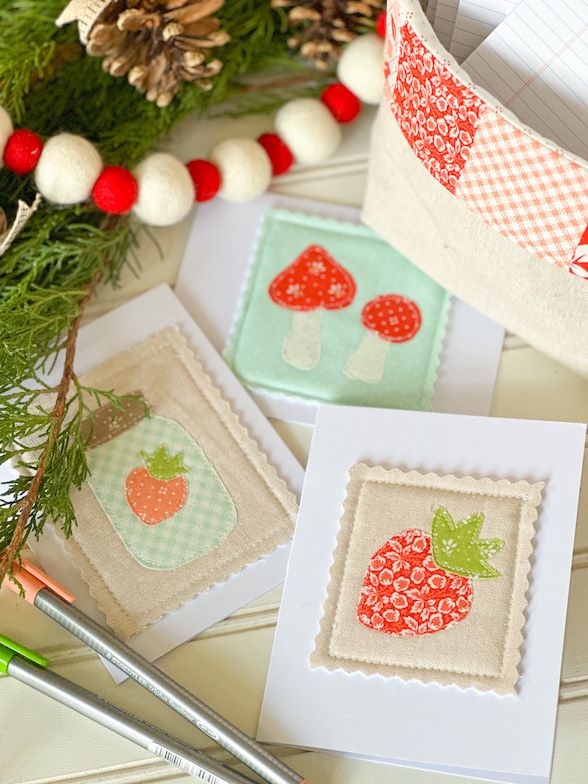
To Make Fabric Accent Greeting Cards:
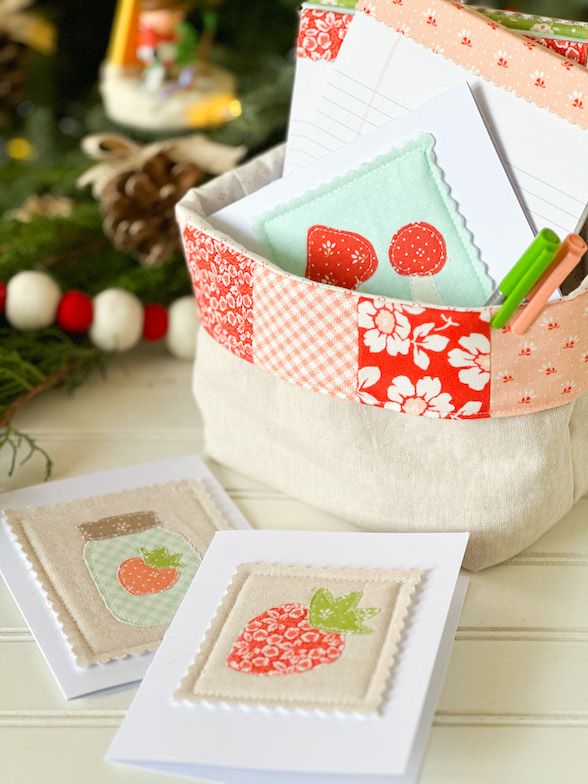
These fabric greeting cards were just the finishing touches for the gift baskets. I used the designs from the HAZEL THE HEDGEHOG and MASON JARS patterns for this set of cards, but have plans to use the SEWING GOODIES Needle Book Pattern, Robin & Holly, and the Vintage Christmas Truck from the Vintage Christmas Towel Pattern sheet for some holiday cards!
Materials:
- Precut and folded notecards
- Fabric scraps
- Fusible batting
- Soft Fuse Fusible Product
- Teflon Pressing Sheet
First, scale your pattern with a photocopier to fit the size of your notecard. I scaled the Mason Jar and Mushrooms at 60% and made the single strawberry the size included in the pattern. Trace your fabric pieces onto the back of the Soft Fuse with a thin Sharpie or Micron pen. Loosely cut out the shapes, and iron them onto the back of fabric scraps. Cut out on the lines your individual shapes. Assemble the applique on a Teflon pressing sheet and fuse to a background piece of fabric.
Once your applique is affixed to the background square, fuse the background square to a small piece of fusible batting. Using your sewing machine, raw edge applique each design going through the background square and fusible batting. Trim edges leaving roughly ¾” around each design. Center your applique on the top of the card and machine stich around the perimeter of the background square.
Hints and Tips:
To keep the cards from getting bent or damaged during transport, I tucked each of the cards into a self-sealing card sleeve. Since the card is slightly heavier, be sure to weigh your card to ensure you have proper postage for mailing. I was able to mail one card with a Forever Stamp, and one card needed a few extra cents of postage.
……
Check back next week to see the *third* set of handmade gifts I will be sharing! You can also join us in the Fig Tree Quilts Friends FACEBOOK GROUP for even more Gift Week Fun!
-Susan
Rebecca Stipe | 30th Nov 23
Wow Susan you are just amazing love these ideas that you come up with. Thank you so much 😊
joanna@figtreequilts.com | 30th Nov 23
Aren’t they the cutest? So inspiring to get crafting!
Jeanie | 30th Nov 23
These are awesome! Thank you!
Deb | 2nd Dec 23
I love your your great ideas. This is my project for the next couple of days. Thank you!