
Sewcialites Sew Along: We’re Back Again
Welcome back to the SEWCIALITES SEW ALONG everyone. If you remember we worked on our first block for this sew along back in the fall and we are back with our second one today!
For those of you here for the first time, WELCOME!
For those of you following along each week over at the Jolly Jabber… I am really enjoying seeing everyone’s blocks and fabric choices… so much creativity and the blocks are so very different with the different fabrics. I love that! Click HERE for the official Sewcialites Landing Page for all of the info in case you want to know more!
THE COURAGE BLOCK
Today I wanted to share with you my second block in the SEW ALONG… it is called COURAGE… and a perfect word to describe a beautiful and strong block I think. Courage is definitely a word that many of us have needed to summon this past year, don’t you think? And I am so glad that we have our quilting community here to cheer us on when we can’t seem to find the courage we need.
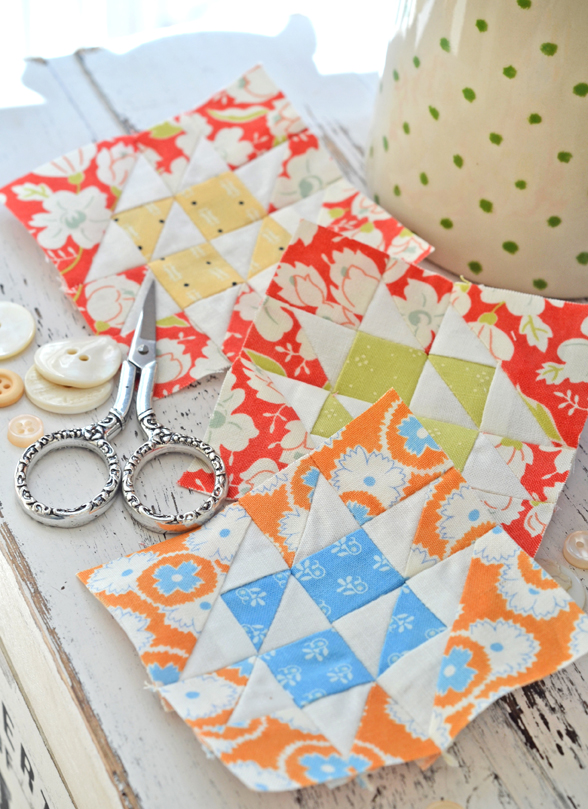
For our little sample blocks, we decided to pick a few summer feeling favorite fabric scraps from Figs and Shirtings mixed with Coney Island and Catalina. I also decided to stick with the same 3″ size block I made the first time around and even though that is one tiny block, they were still so much fun to make!
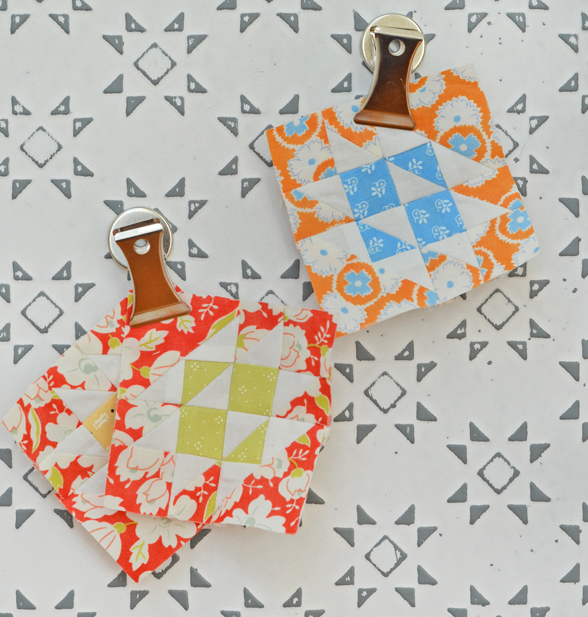
We had so much fun turning the first set of blocks into pincushions that I think we will do the same thing this time around.
Slowly but surely I am going to drown in pincushions :-).

CLICK HERE for the FREE PDF DOWNLOAD.
COLOR PLACEMENT
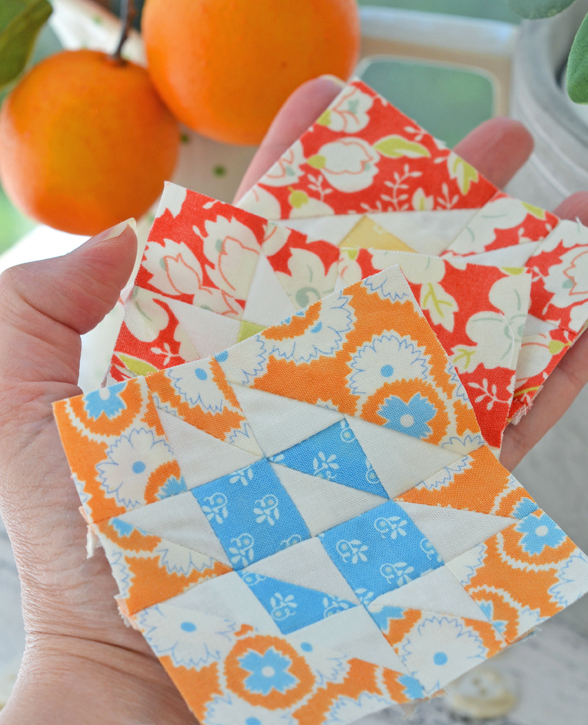
I decided to change the colors up a little bit this time as well, and pick one color for the center portion and another fabric for the outer bits in each block. I used ivory solid as the background color in all three versions. Finding it hard to pick a favorite between the three… and I do feel like they will make some super cute pincushions.
A FEW TIPS TO SHARE
- When working with little blocks such as these, be sure to use a little spray starch before starting. I am not a huge fan of the wet starch method but even a little spray starch before cutting is definitely recommended!
- Don’t forget to trim your units down to the required size as noted in the patterns. We have cut these half square triangles oversized on purpose and it would be an easy error to forget to trim them to size. These little ones were 1 ¼” each.
- When choosing your colors, make sure that there is enough contrast if using 2 different colors and a background so that your center actually stands out. Of my three, I think the orange and blue is the most successful.
- Pressing was important in this block. I pressed to the color on the half squares [a/d] triangle units. I pressed to the triangles [b] on the next set of units. After that, I pressed to the color on both [c] and [e]. After that… I pressed all of the assembly seams open. I found that it made my block lay flat and go together easily.

CLICK HERE for the FREE PDF DOWNLOAD.
CLICK HERE to read more about the block on the Jolly Jabber.
Just like last time, let’s have a little contest… go ahead and go to my INSTAGRAM page, follow me there if you don’t already and comment on the IG post about these blocks [won’t be up until tomorrow morning] and you will be entered to win one of these little blocks turned into a pincushion. A fun addition to any sewing room for sure. Good luck!
Connie Stanley | 13th Apr 21
Hi Joanna! I don’t know if i could ever make a block as pretty as yours. The closest I’d ever come to it would be purchasing the same fabrics that you make your lovelies in! 🙂
Could you possibly tell me the approximate date for the shipment of the first box April’s Little Fig Box? I’m so excited and I’ve been waiting so long it seems since signing up for it. I look forward to hearing from you soon and seeing the arrival of my April box very soon!
Connie