
Simple Winter Creams Snuggle Throw
So if you missed my Instagram post last week… this was my feeling…

“So this is my little winter gift to myself. ❄️☃️🎄 I don’t know about you but at some point, I have too many large projects undone and I can’t focus. One might think… well Joanna, that might be a good time to organize yourself and finish something, right? Well… that would be logical. 😂 Instead what my creative brain needs is to start and finish a super simple project that I can enjoy at home! So this is it… a super simple creamy patchwork, filled with creamy snowy prints, intermingled with our favorite winter fabric… CREAM SNUGGLE!! It will be the size of a lap throw and it will be done by the end of the weekend daggoneit! I know some of you might be in the same boat as me… so yes, we made kits too. You’re welcome. More later once I have some actual patches sewn together… probably after Christmas. Happy creamy winter to you!”
INFO IF YOU WANT TO DO THE SAME:
MATERIALS PREP
Step 1: Find a down [or down alternative] lap throw. After a few minutes of online research I found that the most common size for a down lap throw was 50″ x 70″ so that is the size I decided to go with. In the past we have gotten our throws at IKEA, but that wasn’t an option this time around. Places that had it when I was searching right before Christmas… Wayfair, Overstock, Amazon, Walmart. However the colors were very limited and mostly darker. I wanted a white one but settled on khaki because it was all I could find. As soon as it arrived a few days ago, I washed it [it shrunk a few inches all around after that] and made a simple envelope cover for it out of ivory solid fabric [so the dark color wouldn’t show through to my cream fabrics].
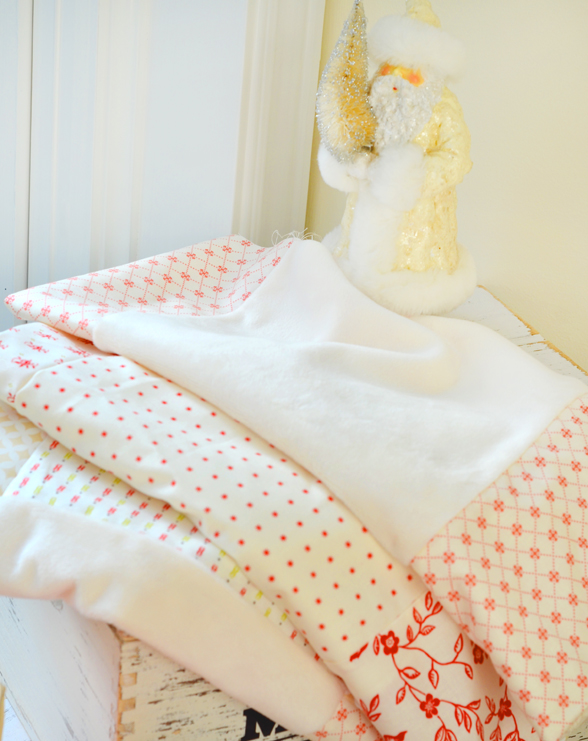
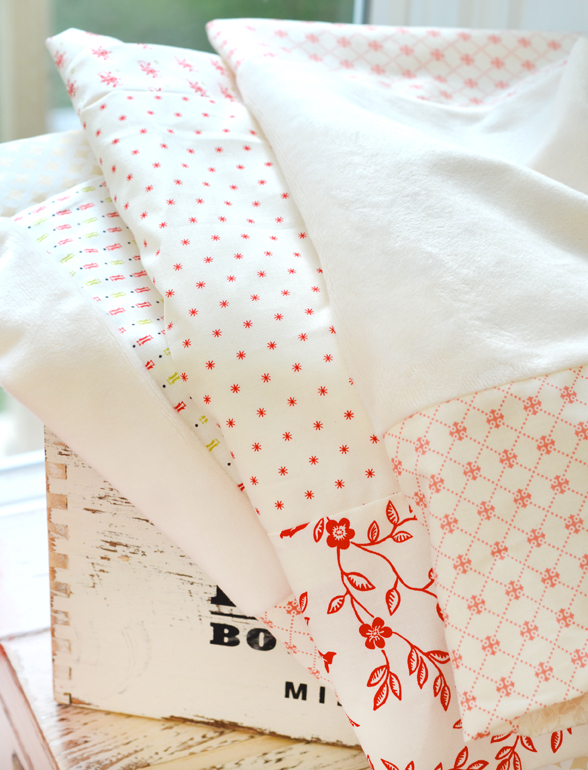
Step 2: Choose 8-10 creamy prints with little tiny bits of reds and/or maybe greens.
Step 3: Add in some cream “Snuggle” [that is the official name of MODA’s minky type fabric] or “Minky” or if you can’t get your hands on any of that, maybe even fleece or good quality creamy white flannel. You just want something that is soft and cozy and a texture to add into your prints.
Step 4: Choose how you want to finish your squisy winter patchwork. Options include tying each corner with red embroidery thread, fabric covered buttons in each join, or sewing a large “X” through each corner to secure. Once I get to that part, I will let you know what I decide to do! In the past I have made buttons, but I am thinking I might just sew an “X” this time… not totally sure yet!
TO MAKE
Step 5: Cut a total of (35) 10″ squares. I mixed a variety of cream prints with cream Snuggle squares here and there for a mix of prints and cozy! I did use the kit we have available in the shop for most of my fabrics but added in a few of my old favorites here and there from my stash.
Step 6: Lay out into a 5 x 7 patchwork. Sew together. This should give you a patchwork that is app. 48″ x 67″. TAKE CARE WHEN PRESSING THE SNUGGLE/MINKY. It is not cotton but polyester and will melt if you iron it on the same setting as your cotton. Ask me how I know :-)!! Press the whole patchwork well.
Step 7: Measure your final patchwork and cut your backing to that size exactly. Pin together RST, all the way around. I used cream Snuggle for the backing. It is a little rolly/wobbly but as long as I pinned it well all the way around, I was good to go. Next, sew together all the way around, leaving about a 2 foot opening on one side. Be sure to backstitch and secure on both sides of the opening. Turn the patchwork RSO through the opening, push the corners all the way out/
Step 8: Insert the down throw. Stitch the 4 corners into the corners of the cover so that they stay put. This is something that I highly recommend and it comes from years of making these little throws. If you skip this, you will forever be trying to fix the corners after the down throw slips around inside your patchwork cover.
Step 9: For the opening, you can either stitch the opening closed or just finish the opening by turning the edges under and sewing all the way around, leaving the opening and then adding some ties or velcro or even buttons if you like. It all depends on how permanent you want this to be.
What do we do? We sew it shut but with a slightly larger stitch. When it is time to change the cover for another season, I use my seam ripper and seam rip out the opening and wash the cover on gentle and save it for next year and then trade it out for the next season’s patchwork. Its not high tech but since this is usually one of those projects I want to do in one night, I don’t dedicate a lot of time and energy to finishing the opening. So far we have a cover for Christmas, Summer, and now this winter cream one that will work fabulously all the way past Valentine’s Day. This is literally the couch throw that my kids fight over the most… and maybe even me and the hubby too… 🙂
More tomorrow on how I decided to finish it off this time around. And I will add some photos when there is actually some sunlight outside!
xoxoxo
Colleen Ross | 28th Dec 20
I missed something. I thought there was only 4 blocks posted for the winter solstice. Now I see 5 and 6. How many blocks and when are they posted, and end date.?? I was thinking 4 blocks times 2 for small wall quilts is what you were doing. Just need to know so I can have enough fabric. Thanks .. very pretty blocks. I’m excited to do this..
joanna@figtreequilts.com | 30th Dec 20
Scroll back to the intro post for all the info. Thanks!
Dee Knudsen | 28th Dec 20
Joanne, you mention pre washing your throw, but did you pre wash the cotton and cuddle fabric first also? Thx
joanna@figtreequilts.com | 30th Dec 20
I didn’t, but I certainly could have. In a throw like this, the precision is not so important but you could most certainly wash before!
Mary Jo | 30th Dec 20
Could you please explain step 8 in more detail. I’m not sure how you stitch the four corners of the throw into the corners of the cover. I ordered one of your kits for this and plan to make one as soon as it arrives. Thanks.
joanna@figtreequilts.com | 30th Dec 20
Anyway of tacking them down is fine. You can stitch a diagonal line from side to side or you can just tack it down with a bit of embroidery thread or you can sew a small “X”… basically anything to keep it in place is fine.
Melanie Kerr | 31st Dec 20
Is there a follow up after the ‘more tomorrow on how I decide to finish it up’? Hopefully with pics? I’ve never done anything like a temporary throw cover, so finishing stitches you can rip out plus securing corners etc is brand new to me.
joanna@figtreequilts.com | 31st Dec 20
At this point, I haven’t done anything extra at all and the throw got stolen from me by my kids 🙂 so I don’t have anything to add for now. I literally stitched a diagonal line on the 4 corners with a slightly larger stitch length that I can easily remove when I decide it needs to be washed. I left a 1 1/2 ft”ish” opening, finished it off so it wouldn’t shred and tacked down the opening by stitching it in the middle of the opening with the same larger stitch I used in the corners. Since its temporary, it really doesn’t matter. I might add a tie or two… but for now this is all I have. I might add a quick post about it this weekend but for now… just enjoying the throw :-).
Holly Schelin | 5th Jan 21
I ordered a kit and have been online for an hour trying to find an I expensive down throw. The only one in stock was at IKEA in a twin size…I am discouraged, but thought maybe I could stitch then cut the twin to the right size after washing it…would that work??
joanna@figtreequilts.com | 6th Jan 21
I’m not sure how that would work… you would have to sew it several times in the same location to keep all the feathers but I think it could work. You could also use a few layers of high loft polyester batting from the craft store… it will give you a similar feel. Good luck!