
VINTAGE BOWTIE SEW ALONG: WEEK 6

Welcome to the **FINAL WEEK** of the VINTAGE BOWTIE FANCY SEW ALONG! It has been a joy for me to watch so many of your jump on board with this SEW ALONG and join us in making bowties in every possible color grouping, different layouts and styles. If you haven’t visited the Facebook Group or the IG hashtag… you really should to be inspired by all the creativity!
……
SCHEDULE
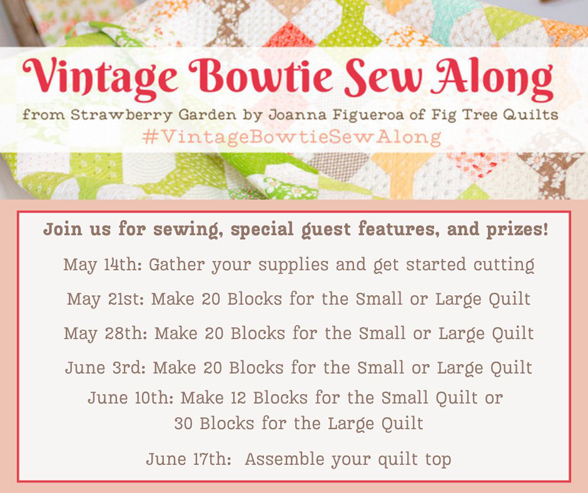
THIS WEEK: ASSEMBLY
It’s time to put your quilt together! As the blocks themselves do not have a lot of seams, I suggest pressing your rows in opposite directions so they “nest” as you sew them together. Then, press all your rows in one direction.
……
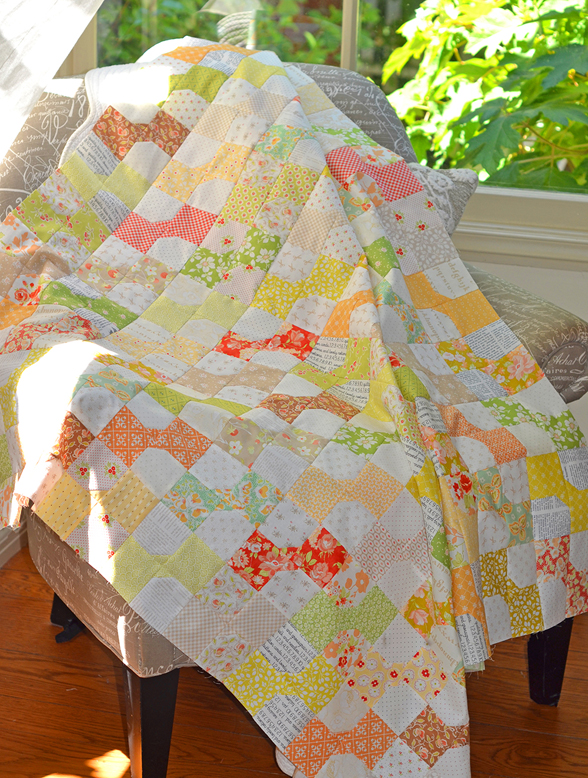
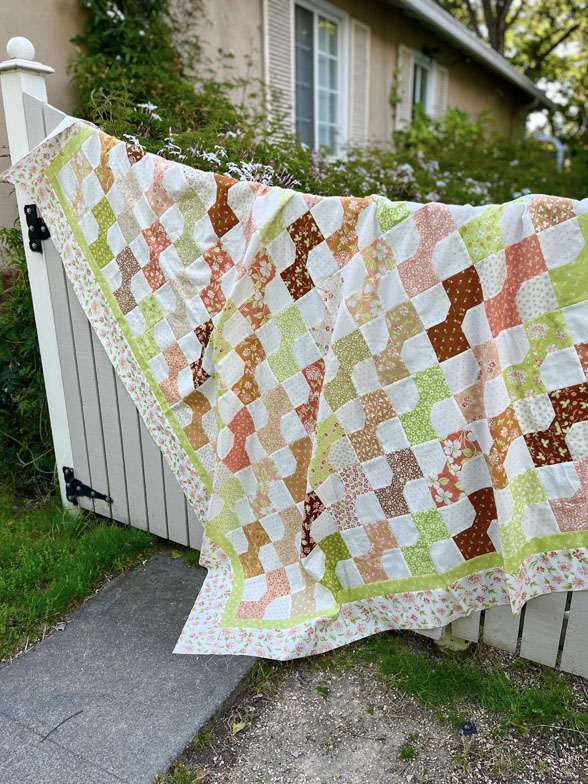
MY QUILT FINISH SO FAR


……
I am so happy to have gotten to this point… usually I run out of time to sew with you all in a Sew Along as design deadlines take over! I have a feeling this is going to be new favorite summer quilt with all of its soft scrappy vintage vibe. I am in love!!
I am still trying to figure out my border… thinking scrappy cream leftovers from the backgrounds of the Bowties but not completely decided yet. I will keep you all posted in the Facebook Group for sure.
……
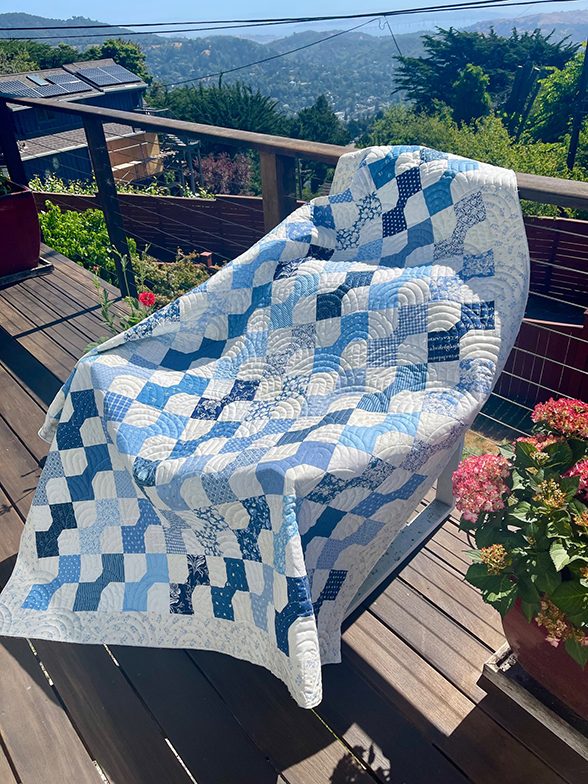
SUSAN’S FINISH


So lovely in all orange prints, this one color version is a great example of how much interest can be had even with just one color!

…..
Here are two more examples of a single color palette that turned out so well! Cheryl’s red quilt with SO MANY different red fabrics from some classic Fig Tree collections and Jeanie’s blue one with a mix of Fig Tree and Minick and Simpson and others thrown in for good measure!
…..

……
TIPS/TRICKS/HINTS
CHOOSING BORDERS…you will see that our scrappy and one-color [green] quilts from the STRAWBERRY GARDEN BOOK both have a low volume cream border print. This allows the bowties to really be the star of the show!
As I mentioned above, I might decide on a scrappy cream border for a few reasons. 1- I love a good scrappy border and 2- I have a lot of squares already cut and I think I just want to add them in instead of adding to my scrap basket!
If you are note sure what you want to do, to audition whether or not a print “adds” or “takes away” from the quilt, you can simply lay your quilt top out, and fold your border yardage selections to be about the same size as a border and lay them around the quilt. Personally, I always make sure to add it around a corner so I can really see what it will look like as a frame to the quilt.
Then, take a step back and look at your options -or- take a photo with your camera for a different view. If you are still not sure, you can always ask in our FACEBOOK GROUP, too! Our members are all so very helpful.
Alternatively, I have seen several finished tops with a colored border, which is equally as beautiful. I’ve also seen a few of you who have added a second border to make the quilt larger. And finally… going borderless is always an option as well… sometimes a borderless quilt adds to the vintage vibe in my opinion.
You are all so very creative – be sure to view some of our sew along participants’ progress below for so many different looks!
……
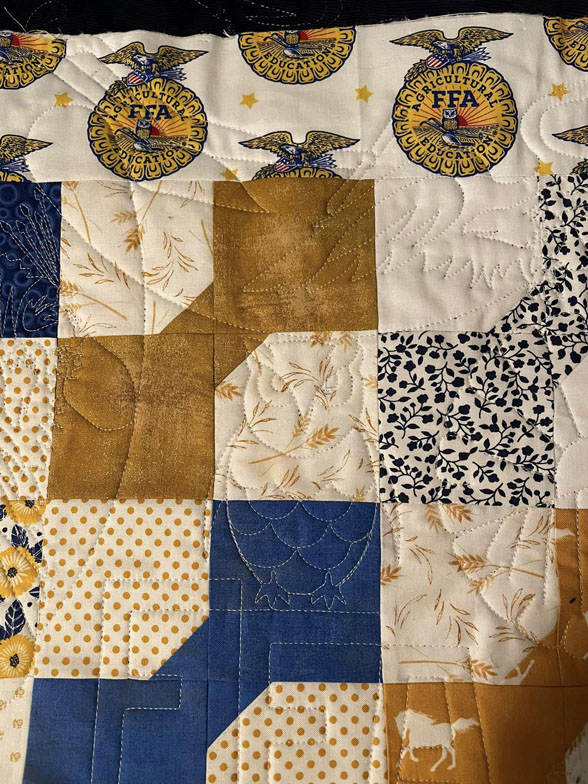
JUST A FEW FACEBOOK GROUP PROGRESS SHOTS


……
INSTAGRAM GIVEAWAY
To celebrate our final week in the VINTAGE BOWTIE sew along, we are going to do one last GIVEAWAY on Instagram so be sure to join me THERE later today. It will be a GOOD ONE!
……
THANK YOU
Check back on Thursday for our final FIG FRIEND FEATURE…Lacey Poirier with her GEESE IN THE GARDEN QUILT (pg. 88). We’ll also feature the (3) coordinating pillows: GOING TO MARKET, CRISS CROSS, and THREE BERRIES.
Happy Sewing!
-Joanna