
GIFT WEEK 2023: SEWING NOTIONS
Welcome back to Part 3 of our 2023 GIFT WEEK. Today the goodness continues with the ever-amazing Susan [@thefeltedpear] and the topic this week is “Sewing Notion Gifts”.
FROM SUSAN

Welcome back to our third day of Gift Week. I hope you have enjoyed Day 1: All Things Kitchen and Day 2: Desktop Accessories, and have been inspired to make a few handmade gifts of your own. Be sure to let us know in the comments if you have made any of our projects or have any other tired and true handmade gifts!
Today, I am sharing all about some accessories that I made for a few of my sewing besties. These ladies are strong women – artfully balancing being a mom/grandma/spouse, jobs, health concerns, and being caregivers for others. They are the ones I know I can call or text when I am having a bad day to really listen and offer advice, and they are the first ones to celebrate my successes with joy. These ladies are always up for a cup of tea or coffee and sharing a new tip or technique. They model creativity, inspiration, and genuine kindness and I am honored to call each of them a friend.
As quilters, we are often the ones who are doing the making of gifts, rather than being on the receiving end of handmade treasures. Each year, I like to do something small that is handmade for each of them. They understand the time, energy, and love that went into their gift and appreciate them so much. Some years I opt for a pouch or a bag, but this year I decided to make a few things for their sewing rooms.
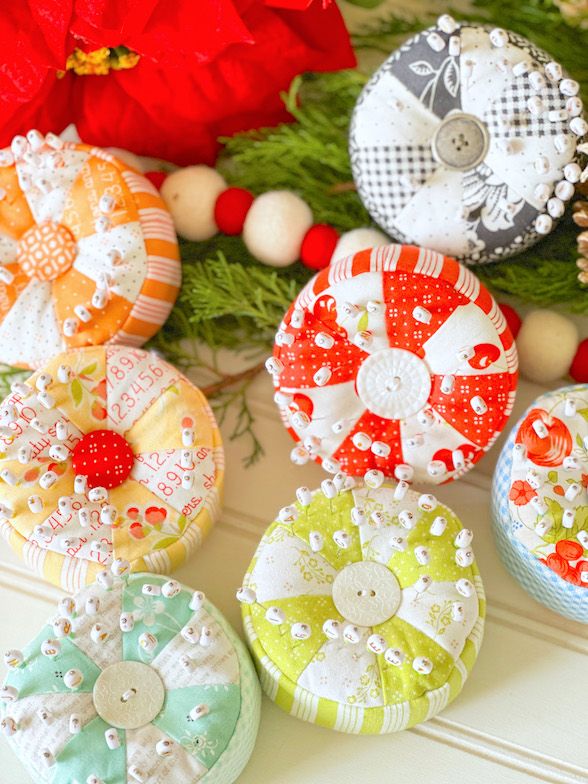
I started off making a whole Fig Tree rainbow of Joanna’s PETITE GATEAU Pattern. Gateau means “cake” in French, and they really look like small cakes all lined up. Although I hadn’t made these before, they have been on my “must make list” for years. They are so cute. With how easy and customizable they are, I know this won’t be the last time I make them!

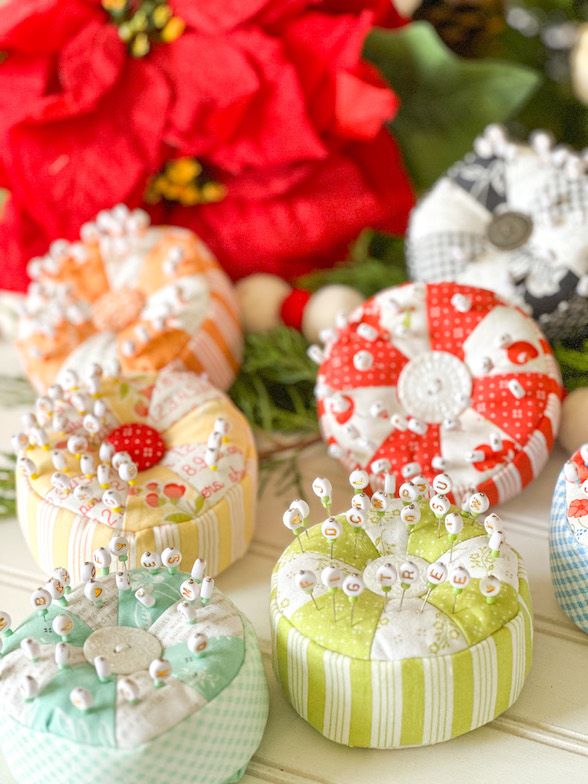
As I was stuffing the pincushions, I thought about how cute it would be to make a set of pins to coordinate with each pincushion. My daughter and I have made dozens of friendship bracelets this Summer and Fall, and our bead stash is beginning to rival my fabric stash. 😉 We used some of the letter and seed beads to make up these cute alphabet pins.

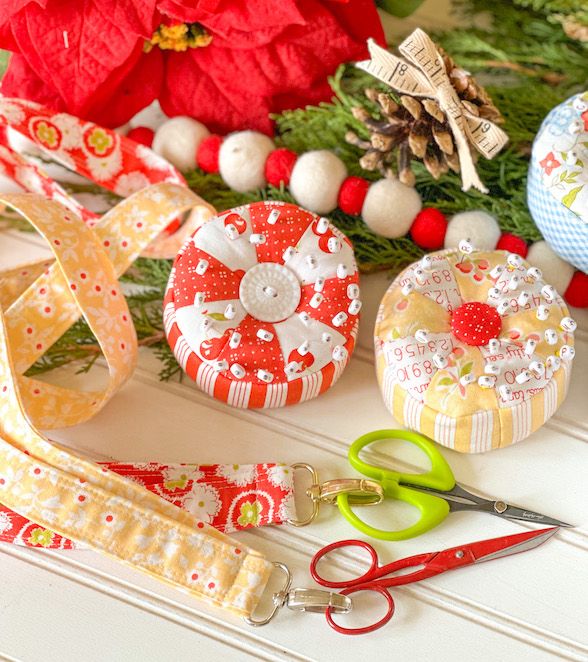
In addition to the pincushion, I made each person an additional color-coordinated sewing notion. I am forever losing the small scissors I use to snip threads and thought a chatelaine lanyard would be the perfect gift for my friends who are often in the same boat.
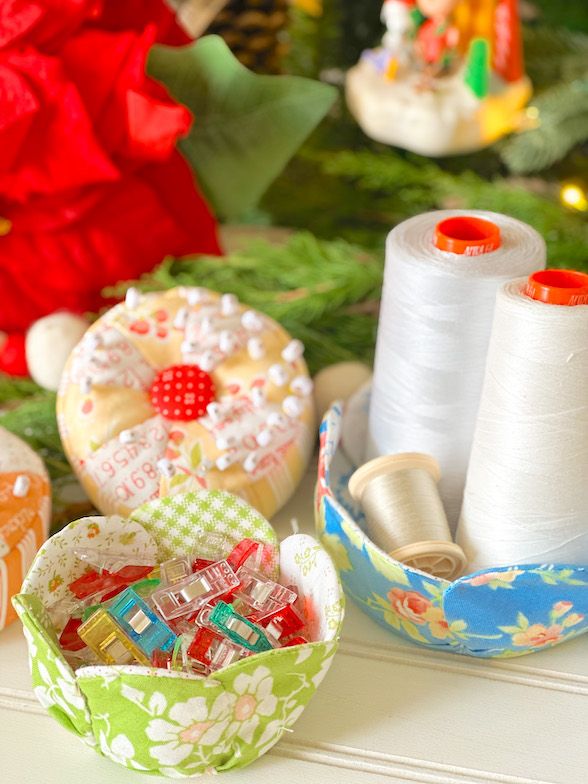
I used Joanna’s BON APPETITE Pattern to make up a few fabric bowls for holding things such as wonder clips or thread, and a few “binding buddy” notions to help keep them tidy while finishing up their projects.
I can’t wait to surprise them with a small package this week in the mail!
Don’t be afraid to use these two “sewing”-themed patterns for gifts for non-sewing friends. By filling the Petite Gateau pincushions with rice instead of crushed walnut shells, you can turn your pincushion into a set of handwarmers, perfect for chilly days. And the Bon Appetite pattern makes a great sized little dish to hold a few holiday treats!

……
To Make a Petite Gateau Pincushion:
Materials:
- 5” charm squares and scraps of fabric for gusset
- Fusible batting
- Doll needle
- Lizard litter (crushed walnut shells) for filling
- Decorative button or a button-making kit
Hints and Tricks:
-I assembled the pincushion according to the pattern instructions. I opted to line the top, gusset and back with fusible batting to help with stability and to keep the crushed walnut shells inside while I was stuffing it.
-I filled my pincushions with crushed walnut shells and added about a teaspoon of dried lavender. I love the light fragrance it adds. For best results, I found that filling my pincushion with a funnel until it was full, then giving it a light tap and filling it again, and then stuffing it with a small bit of cotton stuffing before hand-stitching it closed made the roundest and plumpest pincushions.
-Use a doll needle to create the tuft in each pincushion. This tool (which was introduced to me last summer by one of my Fig Tree besties) really is a game changer and it makes the perfect dimple each time.
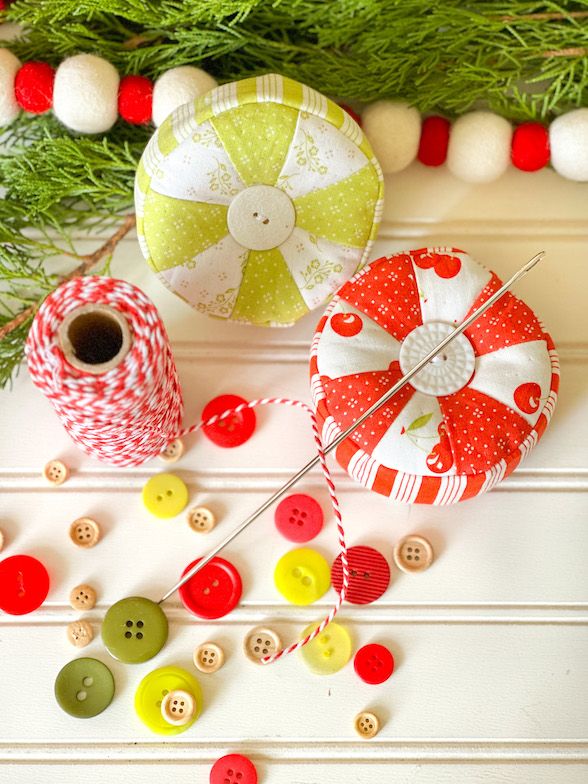
-I opted to use large buttons I had for half of my pincushions and made fabric covered buttons for the other half. For ease, I sewed pearl cotton through each button to give the appearance of being sewn, and then glued them in place.
……
To Make Petite Handwarmers:
-Follow the directions in the Petite Gateau Pattern, but if lining with batting make sure it is 100% cotton. Fill with dried rice grains and close shut. You can still tuft your little cakes but avoid adding embellishments to them that are not able to be put in the microwave.
*The pictures show the Petite Gateau pincushion “stylized” as handwarmers. When I made them for gifts, I opt to keep them embellishment free and not to tuft.
……
To Make Custom Letter Pins:

Materials:
- Alphabet letter beads
- Seed beads
- Long flat head pins
- E6000 glue
- Tray covered with freezer or parchment paper
We entered our “Fig Tree Era” as we made these cute pins (…are you a Swiftie?!). For each pin, we simply applied a bead of glue to the top of the pin and slid a letter bead and then a color coordinating seed bead onto the pin. Let dry overnight on parchment so it doesn’t stick to the tray.
Hints and Tips:
-If you want a full set of letters, pick out each letter before you get started making your pins. You will want to be able to work quickly when you start gluing.
-I made these assembly-line style one evening with my daughter and husband. One person checked to make sure the letter beads would not fall off the pin (this was our limiting factor), one added the color matching seed bead, and the other slid the beads down the pin, added a small dollop of glue and then slid the beads back to the top of the pin.
[*E6000 is a powerful glue. Please keep away from children or pets.]
-Set your pins flat on a tray lined with parchment or freezer paper and let dry overnight.
……
To Make Bon Appetite Bowls:

Materials:
- Fabric scraps – left over 5” charms work great!
- Yardage for backing
- Lightweight interfacing
- Small bit of template plastic or stiff interfacing
Hints and Tricks:
-I followed the directions as written for these fabric bowls. Go slow while sewing and be sure to start and stop where your marked lines are.
-Don’t be afraid to clip or trim a few seams as necessary prior to turning to help things lay flat.
-Once your bowl is turned, it might look a bit wonky. Don’t fret! Give it a good press and things will fall into place.
-Pin the petals together with wonder clips before you blind stitch them together.
-I didn’t have template plastic for my base and used a stiff, interfacing circle instead.
……
How to Make Fabric Chatelaine Lanyard:
Materials:
- 4” by WOF strip of fabric
- 1” x 36 inch strip of fusible interfacing [I used Pellon SF-101]
- Lanyard Hardware
Hints and Tips:
-There are several nearly identical tutorials online for making fabric lanyards. I used a 4”x WOF strip and folded both long sides in half to meet in the middle. I tucked into one of the sides the strip of fusible interfacing, and then folded the fabric on top of itself creating an interfaced 4 layer 1” x 36” strip.
-Slip your strip through the lanyard hardware and slightly offset the strip from itself prior to stitching it closed.
-This would also look adorable pieced! Simply sew together 4” wide scraps of fabric until the desired length and then follow the same steps as above.
……
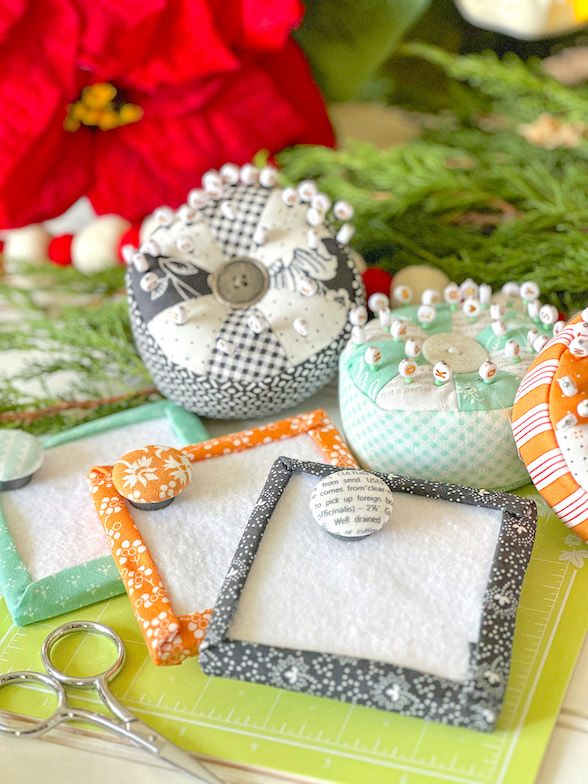
How to Make Binding Buddies Set:

Materials:
- 3 ½” square of foam core board
- 3 ½” square scrap of batting
- 2” x 15” strip of fabric for “binding” accent
- Tacky or hot glue
- 1 1/8” fabric button kit
- 2 ½” square scrap of fabric
- Strong disc magnets
I made one of these a few years ago during gift week for my friend Amy, and promptly made one for myself too! This tiny design board is the perfect to keep next to you while you are binding to “catch” all the loose threads and keep them off your clothing. The fabric covered button coordinates perfectly with your mini design board and serves as a spot for you to rest your needle on, so you don’t lose it when not in use.
Hints and Tips:
-There are lots of tutorials online for making design boards and these are made the same way. I used a 3 ½” square scrap of foam core, and glued batting on to the top. Pro tip: Use “Tacky Glue” instead of hot glue for a smoother result. (We used hot glue because that is what we had at home the day my daughter and I were crafting.) Glue fabric binding around the edges for a smooth finish, lightly overlapping the ends where they meet.

-To make a needle minder, use the 1 1/8” fabric button kit with a fabric scrap and make your fabric button. Cut off the shank of the button with pliers, if needed and glue a magnet on with E6000 glue.
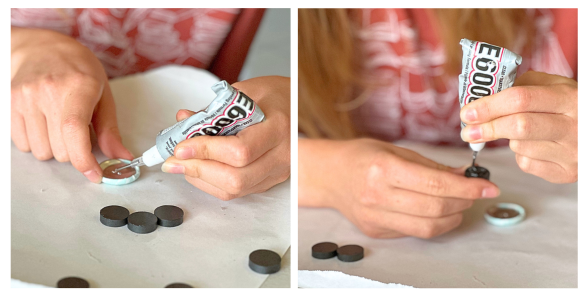
[*Some magnets are quite strong and can be a choking hazard to kids and pets. Keep out of the reach of children, watch your fingers when you are pulling them apart, and do not wear or use if you have medical devices such as a pacemaker.]
……
Check back this Thursday for our final Gift Week Post!
-Susan