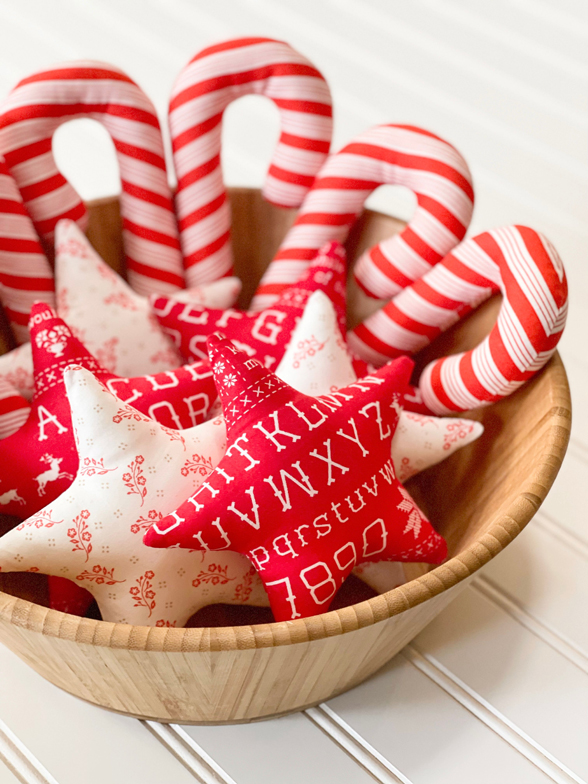
NEW PATTERN SHEET: CANDY CANE & STAR GARLAND
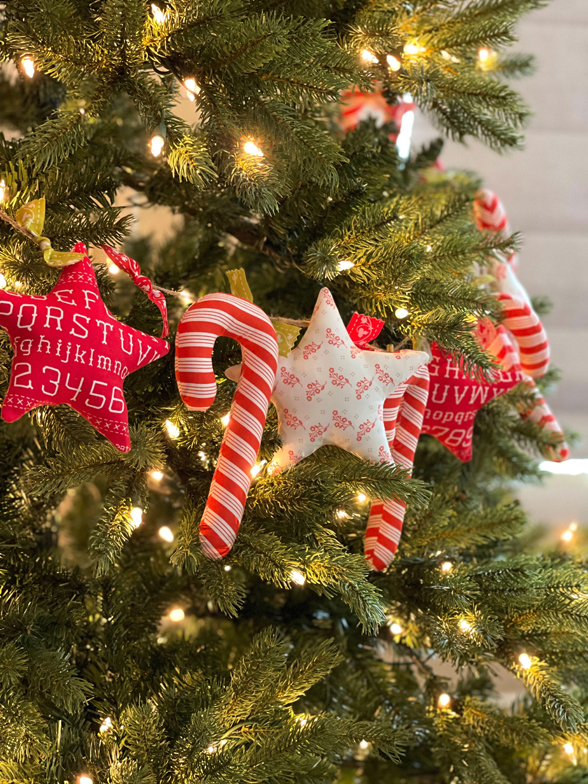
During our annual 12 DAYS OF CHRISTMAS SALE, we offered a limited kit to create your own Christmas CANDY CANE & STAR GARLAND. The kits sold out quickly, and you guys loved it so much, so we wanted to offer the pattern sheet on its own so more of you could enjoy it for the upcoming holiday season! You can find it HERE.
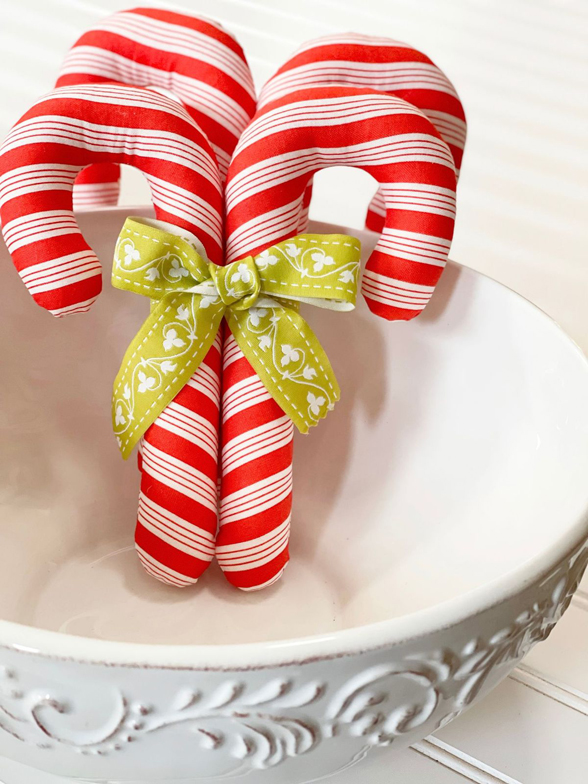
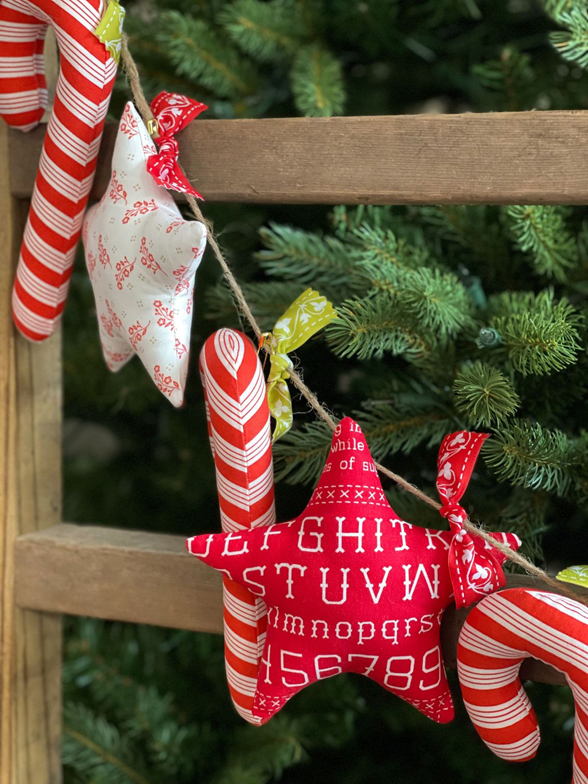
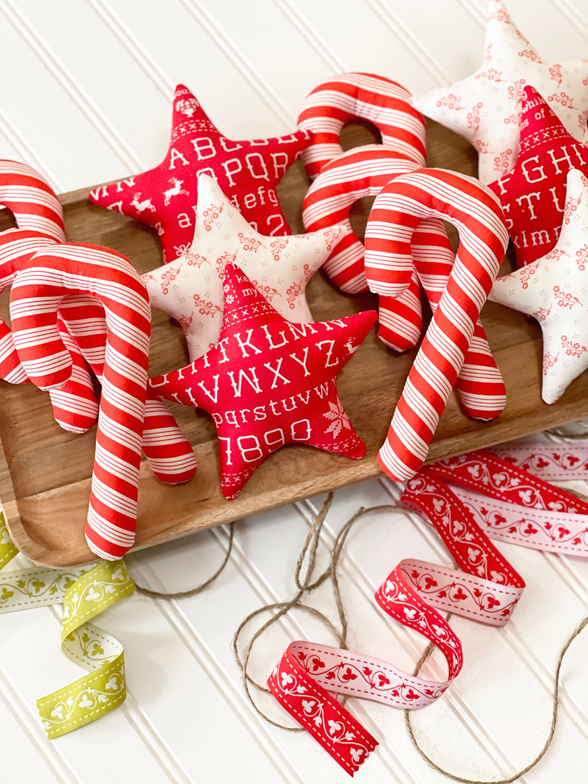
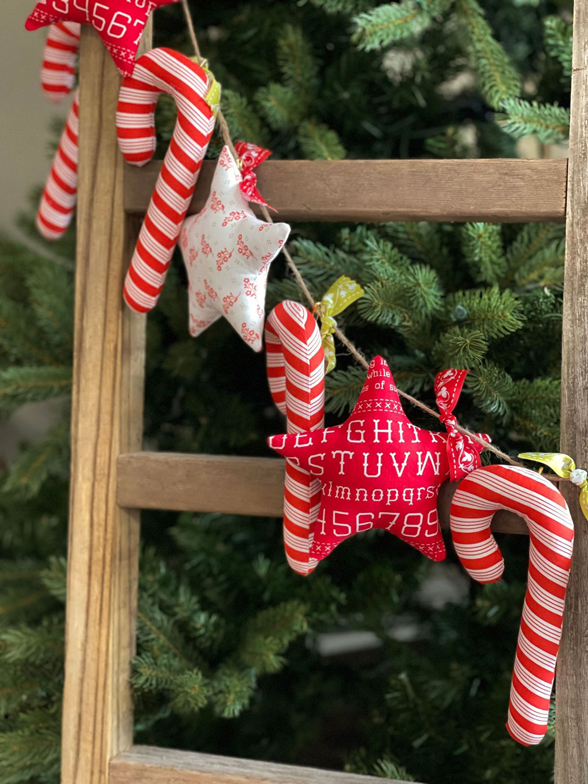
Grab some of your favorite striped fabric for the candy canes, and any fun coordinating seasonal prints to create your chunky stars! And what’s more…you can make these into a garland, a set of sweet ornaments, -OR- bowl fillers for some coffee table decorations.
MATERIALS:
In addition to your general sewing supplies, you will also need:
- Candy Cane & Star Garland Pattern Sheet
- Fabric
- Stripes for the candy canes – we used the red stripe from our FRUIT COCKTAIL collection
- Coordinating prints for the chunky stars – we used a red sampler print from CHRISTMAS STITCHED and a cream low volume from our new collection LINEN CUPBOARD
- Marking Pen (we prefer FRIXION PENS)
- Stuffing of Choice
- Ribbon Accents
If making your ornaments into a garland, you will also need:
- Twine
- Safety Pins
HINTS & TIPS:
Definitely pay attention to the positioning of your opening for stuffing, especially on the candy cane! Follow the markings depicted in the pattern to give you the easiest time stuffing both the cane and the curved portion of the ornament.
A 1/2 yard of fabric will easily make at least (6) chunky star ornaments. We used a red, directional sampler print for some, so we paid attention to that as we moved through the ornament-making process. If you aren’t picky about print direction, you can get creative with your template placement and likely get several more stars from your available fabric.
If making your ornaments into a garland:
- We opted for a 6′ length of twine and made: (6) candy canes and (6) stars – 3 red/3 low volume. Feel free to make it as long or as short as you’d like to fit your space!
- For the ribbon accents, we used the Fig Tree 1″ reversible ribbon in both the red and green colorways. We used a pinking shears to cut strips approx. 5″ in length. We then added a dab of clear nail polish to the ends to prevent fraying and tied them between each of the ornaments to add a little handmade, vintage-y flare.
ENJOY!
-Joanna
Margaret | 9th Dec 23
I can’t bring pattern up. 😕
joanna@figtreequilts.com | 17th Dec 23
The link to the pattern was broken, it is now fixed. Apologies!
cori Walkden | 16th Dec 23
the link is broken
joanna@figtreequilts.com | 17th Dec 23
Thank you! It’s now fixed. 🙂