
PROJECT IDEA #3: SUMMER’S END CHEATER PRINTS – PROJECT BAGS
Today we are going to talk about project bags. You might know by now that we have fallen in love with creating project bags. We have several tutorials – both written and video – right here on the blog. Just type “project bag” in the search bar and you’ll find them!
And in case you missed our previous PATCHWORK CHEATER PRINT project posts, click the below links:
- PROJECT IDEA #1: Summer’s End Cheater Prints – THROW QUILTS
- PROJECT IDEA #2: Summer’s End Cheater Prints – PILLOWS
……
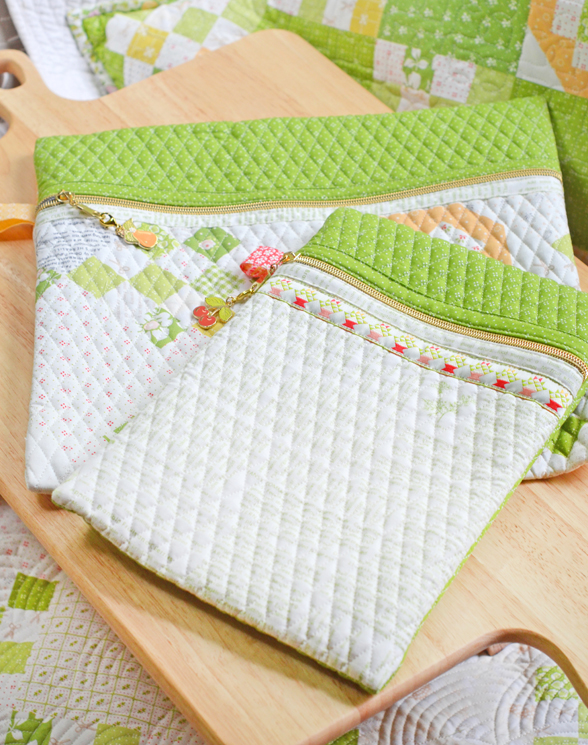
PROJECT BAGS [SUSAN @thefeltedpear]
This time around, we are featuring a new style of project bag that forgoes exterior binding! I think many of you will love this method as it makes the process a bit quicker. Special thank you to Susan [@thefeltedpear] for her below tips and tricks!
……
TUTORIAL
SIZING:
You can make your project bags be whatever size you like depending on what kinds of projects you are using them for. For example:
- A 16″ square one is perfect for holding fabrics that I am collecting for a project or a collection of larger blocks.
- A 13″ x 14″ one holds a medium size cross stitch, embroidery, or English Paper Piecing project. It fits a good size hoop and floss ring or the papers, thread, and supplies I need for English Paper piecing. The items are not crammed but don’t get tangled because they are “swimming” in their space.
- I just started making some that are about 8 1/2″ x 11 1/2″ and I have to say they are VERY versatile! It’s just big enough for a small project and allows me to put a printed pattern in without folding it.
……
QUILTING/INTERFACING:
You can quilt (or not!) your project bags with many different types of middle layers.
- Use a heavyweight interfacing for a light but floppy feel.
- Use fusible fleece or lightweight batting for ease, convenience, affordability, and light structure.
- Use Soft & Stable or foam batting for a squishy, structured feel.
I have done all three depending on what I had at home, but my personal preference is to use a foam batting (Soft & Stable, Bosal, Pellon) and quilt the panels on my long arm. I like to try to do as much of the assembly beforehand, and have one large panel to quilt.
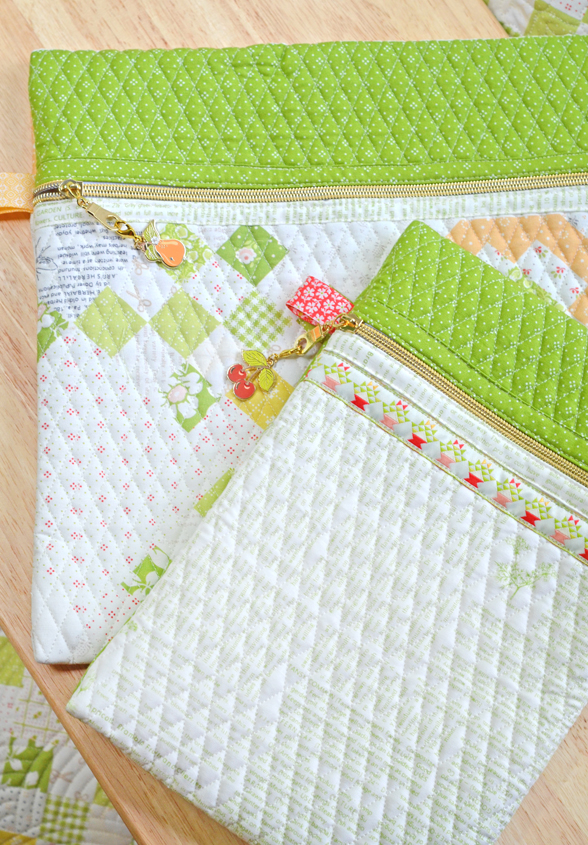
I like to quilt with either a square or diamond cross hatch, or Joanna’s classic zig zag. I like some quilting for structure, but not so much of a quilting design you take away from the fabric/patchwork panel.
……
……
ASSEMBLY TIPS:
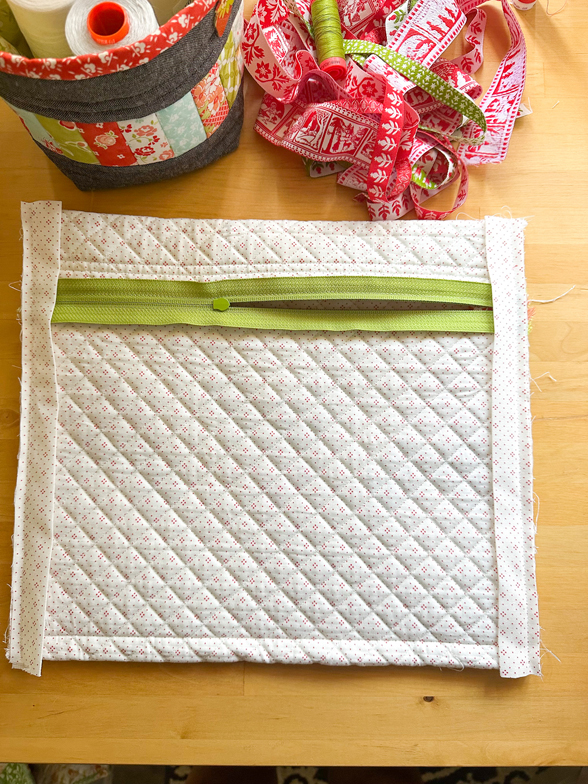
- I like to piece my project bags into one long piece – the flap, the back and then the front and quilt them as one unit. If you do this and are using directional fabric, be sure to rotate them as needed before you begin sewing!
- I like to attach my zipper binding to the LINING side of the project bag first, and then machine stitch to the top. I get a more even binding that way.
- I don’t like the look of zipper tape, so I scooch my binding as close to the zipper as possible before tacking down. This is very much a personal preference because I don’t like worrying about keeping my seam straight on the tape. The zipper teeth act as a guide for a nice straight edge.
- Since I make one panel and attach it to each side, using zipper tape (zipper on a roll) or an extra long zipper is helpful. I like the By Anne’s or Sallie Tomato zippers for this technique. I also prefer a handbag zipper (#5).
- I haven’t been a fan of binding these days, so using one panel eliminates the need for binding on the top and bottom!
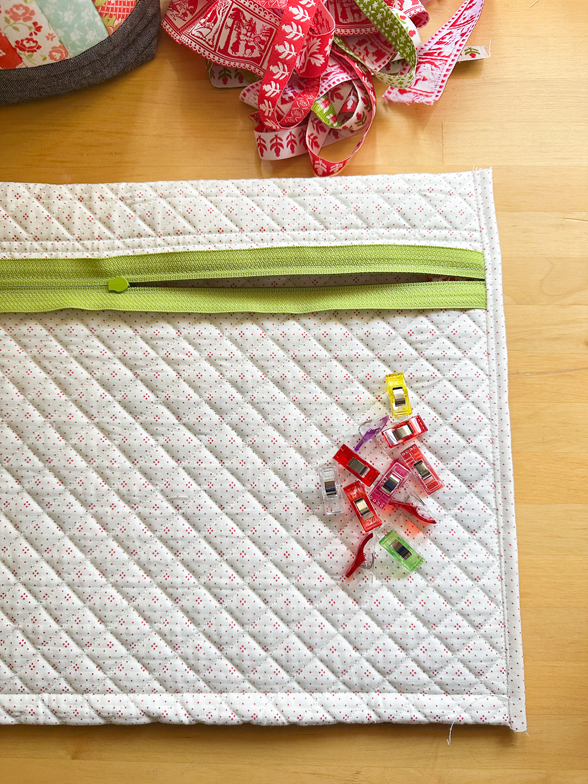
- I stitch a “line” where I want the fold of my bag to occur (so on the top and on the bottom).
- I like to keep my binding on the inside of my bag. To do this, once your zipper is attached, turn your bag inside out (right sides together). Flatten the bag, keeping the size above and below the zipper the same on both sides. I usually aim for about 2-2 ½” of fabric showing above the zipper and the rest falling below the zipper. OPEN YOUR ZIPPER PART WAY and sew up the sides, back tracking as you go over the zippers. Bind the inside side edges of your bag just as you did the top and bottom of your patchwork pieces/panels. Turn right sides out and you have a complete bag!

……
Happy Sewing,
Joanna & Susan
Leave A Comment