
TUTORIAL EXTRA: SPOOKY TREES BED RUNNER
I love seeing how you all interpret Fig Tree patterns…from using different colorways to more advanced pattern mashups and everything in between.
We recently released the MIDNIGHT MANOR quilt pattern as part of our LITTLE BOX OF FIGS subscription – check out the full pattern showcase blog post HERE. It’s now available for everyone to enjoy – check the SHOP!

……
Lacey [@laceypoirier] created a beautiful bed runner using the SPOOKY TREE component of the MIDNIGHT MANOR pattern and shared it in our FIG TREE QUILTS FRIENDS FACEBOOK GROUP.
It’s just so good.
I asked if she’d be open to sharing a tutorial on her finishing, and she agreed, so here it is in case you’d like to make one of your own.
NOTE: You will need the MIDNIGHT MANOR quilt pattern for the tree instructions. You will also need additional yardage, as this project extra is not covered in the materials list/fabric requirements of the original pattern.
……
FROM LACEY
Hello again! I am happy to be back on Joanna’s blog to share this fun bed runner project with you.
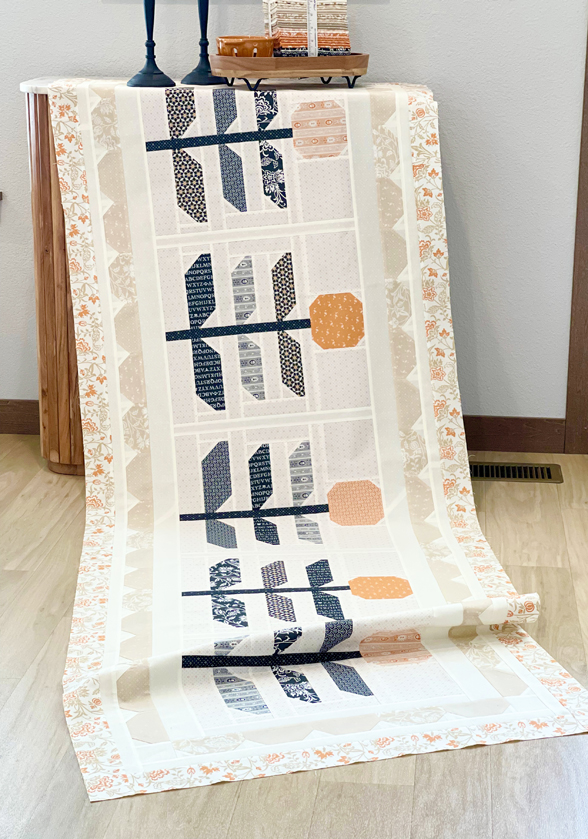
From the moment I saw the Midnight Manor quilt, I was drawn to those Spooky Trees. I knew I wanted to create a runner of sorts, and then it just started growing from there! I can’t wait to have this quilted and on my bed for the upcoming spooky season!
I hope you join me and make one of your own! This beauty finishes at approximately 30 1/2″ x 86 1/2″, so it will fit a queen size bed quite generously.
……
TUTORIAL
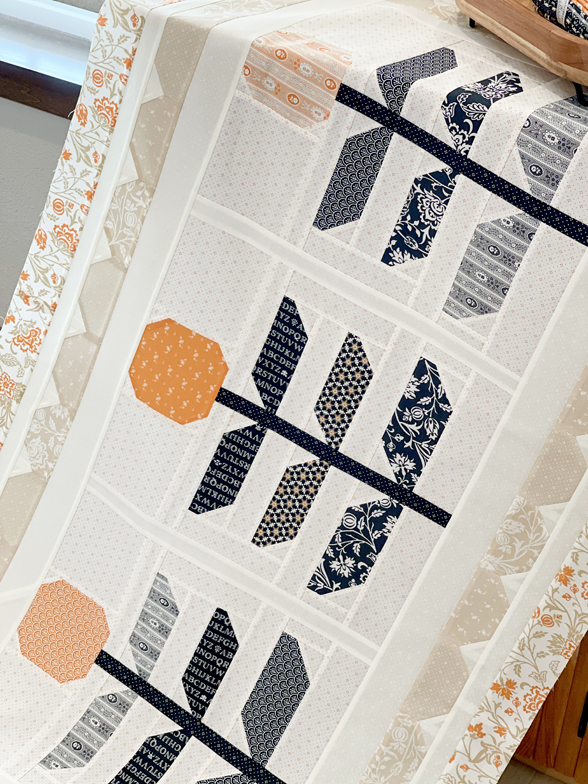
- Using the Midnight Manor quilt pattern, make (5) Spooky Tree blocks.
- NOTE: You will not need to cut or assemble unit [i], so skip Step 10, subsection 7 & 8 in the pattern instructions.
- You will need (6) 1 1/2″ x 16 1/2″ vertical sashing strips. Add a vertical sashing strip between each tree block and at the beginning and end of your runner row.
- You will need (2) 2 1/2″ x 76 1/2″ horizontal sashing strips. Sew to the top/bottom of the tree runner row.
- NOTE: These are a bit wider than the vertical sashing in order to fit the scallop border – discussed next!
- Using the SEW & FLIP Method and the following cut pieces, create (48) total scallop units.
- From your tan/taupe prints, you will need (48) 2 1/2″ x 4 1/2″ rectangles. From your chosen background, you will need (96) 1 1/2″ squares and (4) 2 1/2″ squares [for cornerstones]. Add a 1 1/2″ square to the top left and top right on the LONG side of each tan/taupe rectangle. Trim and press.
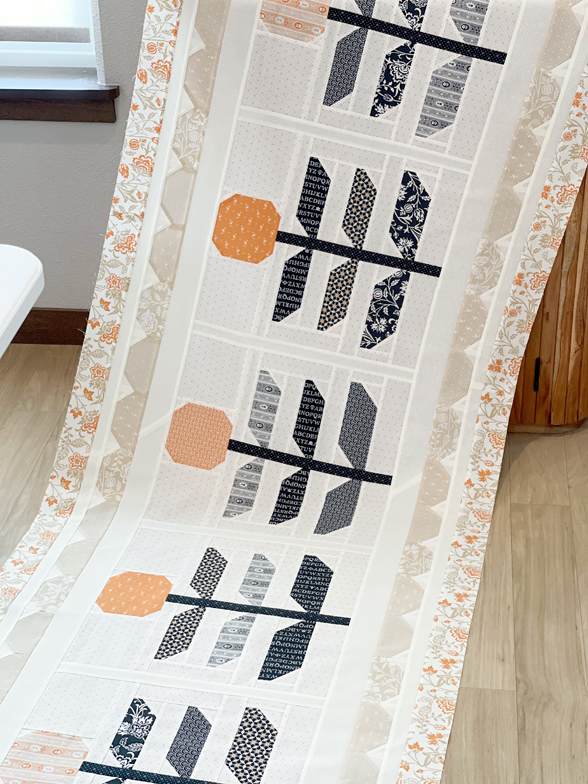
- Arrange (2) rows of (19) scallops each for the top and bottom of the tree runner row. Piece and attach.
- Arrange (2) rows of (5) scallops each with a 2 1/2″ cornerstone square to each end. Piece and attach to the left and right of the tree runner row.
- From your tan/taupe prints, you will need (48) 2 1/2″ x 4 1/2″ rectangles. From your chosen background, you will need (96) 1 1/2″ squares and (4) 2 1/2″ squares [for cornerstones]. Add a 1 1/2″ square to the top left and top right on the LONG side of each tan/taupe rectangle. Trim and press.
- Add additional sashing to ensure all your hard work on the scallops is nice and visible before that final outer border! I tried to skip this step and go straight to the outer border…and I ended up ripping it out. 🙂
- You will need (2) 1 1/2″ x 24 1/2″ left and right sashings, and (2) 1 1/2″ x 82 1/2″ top and bottom sashings. Attach L/R first, followed by T/B.
- And finally, add your outer border. You will need (2) 2 1/2″ x 26 1/2″ left and right borders, and (2) 2 1/2″ x 86 1/2″ top and bottom borders. Attach L/R first, followed by T/B.
- Quilt as desired, and bind!
……
Happy Sewing!
-Joanna & Lacey