
BUON NATALE CHRISTMAS VILLAGE DOUBLE BORDER PRINT: MORE PROJECT INSPIRATION
I had so much fun designing the Christmas Village Double Border Panels for BUON NATALE [arriving to stores alongside the entire BUON NATALE fabric collection NOW!] and the project ideas kept on swirling around in my head as I worked on it.

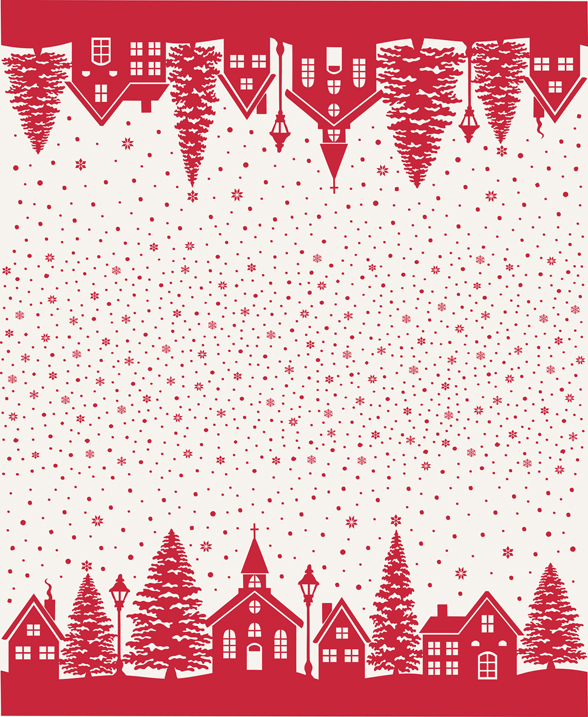
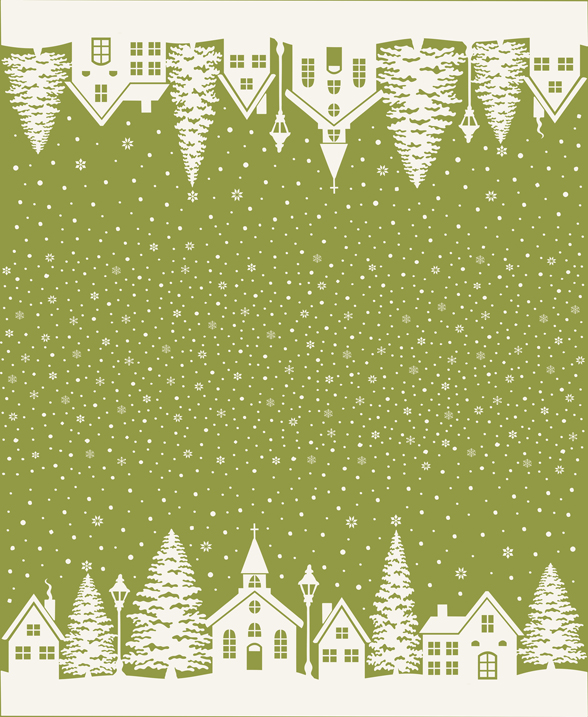
Purchased as running yardage on the bolt, the BUON NATALE VILLAGE PRINT comes in (3) colorways:
- Red w/ White Village [35407 14]
- White w/ Red Village [35407 24]
- Green w/ White Village [35407 24]

……
PROJECT INSPIRATION
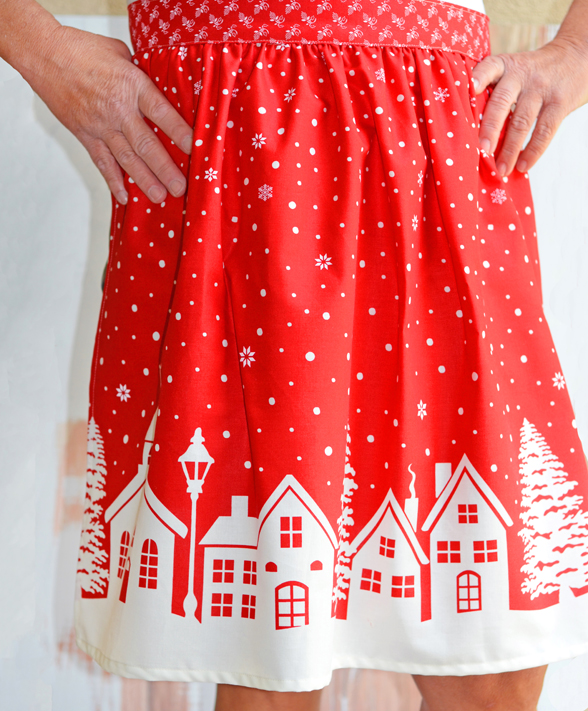
First, be sure to visit THIS BLOG POST for a free apron pattern and ruffle tea towel extra!

……
Since there are so many things you can make with this fabric, we asked my friend Susan to talk to us about some of the goodies she helped make for Quilt Market last year.
So today we have some projects from Susan [@thefeltedpear]…
BENCH PILLOWS
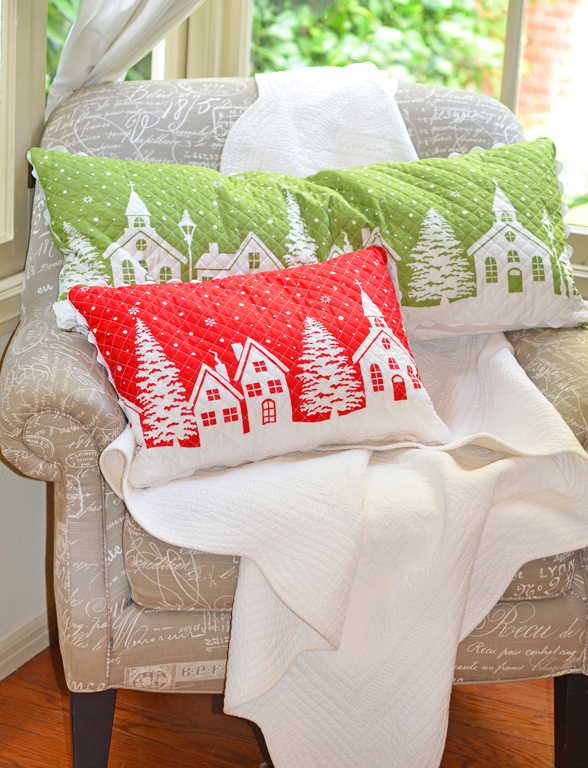
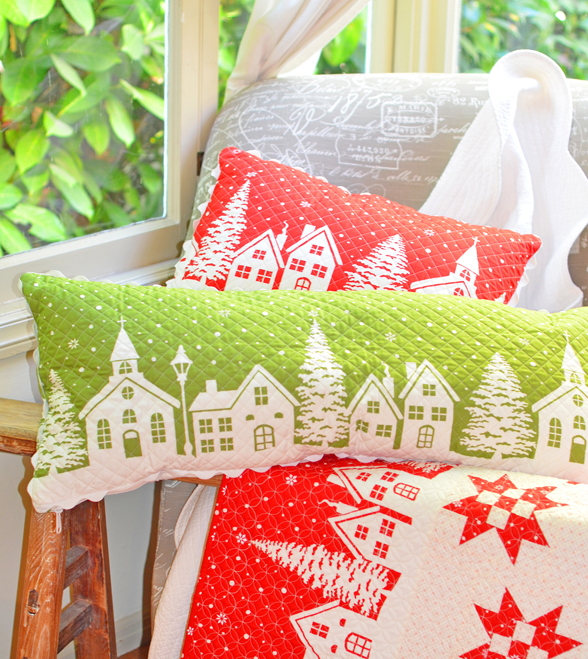

Pillow Dimensions: 13 1/2″ x 20″ [Small/Red] and 13 1/2″ x 30″ [Large/Green]
MATERIALS TO CREATE BOTH PILLOWS:
- 1 yd. each Red and Green Village Border Print
- Batting of Choice
- Quilter’s Tape [MODA Stock # 3412]
- (2) 3 yd. spools of Jumbo Rick Rack [Hobby Lobby SKU 769935 in White]
SIMPLE TUTORIAL:
- Cut out your front pillow piece based on the size of pillow you are making. We recommend cutting pieces approximately 15″ x 21 1/2″ [Small] and 15″ x 31 1/2″ [Large]. This allows a bit of extra room for shrinkage from your quilting and squaring up.
- Cut out your pillow backing pieces for an “envelope”-style finish. We like the idea of quilting these pieces on larger pillows for extra sturdiness. We recommend cutting: (2) 15″ x 14″ [Small] and (2) 15″ x 19″ [Large]
- Layer your pillow top with your batting piece. Quilt as desired. As this is a pillow, we did not use a separate fabric for the “backing” as it will be on the inside of your pillow and no one will see it. Feel free to do what you prefer! Trim to the finished size of your pillow – see dimensions above.
- Repeat this process with your pillow backing pieces. Trim to:
- For small: (2) 13 1/2″ x 12 1/2″
- For large: (2) 13 1/2″ x 17 1/2″
- Using any remnants or coordinating scraps, create (2) short binding pieces for one edge of each of your (2) pillow backing pieces and attach. This will create a nice finished edge for inserting and removing your pillow form.
- We cut ours 2 1/4″ x 13 1/2″ for both pillow sizes. Bind one side of your pillow back and finish it just like you would a quilt. This will give you (2) pillow back pieces, each bound on one short side.
- Place your quilted and freshly trimmed pillow top right side facing up. Using your Quilter’s Tape to help hold your Jumbo Rick Rack, affix the decorative trim around all (4) edges. You want to position it about half way so that enough is tucked inside and the rest is outside.
- Lay your (2) pillow back pieces on top of your finished pillow tip, with finished edges toward the center and right sides together. These edges should overlap one another by approximately 4″ near the pillow center to create your pillow back opening. Pin or clip in place so that the pieces don’t shift and sew all the way around.
- Turn your pillow through the overlapped pillow back opening, tug your rick rack out and press if needed and VOILA… its pillow time!
……
SANTA SACK

I want Santa to bring me all of my presents in this kind of bag, am I right?? In fact, honestly, I am hoping to switch over to “reusable” handmade Christmas wrapping. I was totally inspired by Susan who already does this. Each year, her family opens their presents in any number of lovely handmade packages and then the “packaging” is returned for use the following year. I love this idea so much!

MATERIALS LIST:
- EASIEST ACCESSORY PATTERN
- Use the “Laundry Bags” Instructions
- 1 yd. Red Village Border Print
- 1 yd. Lining [Holly Eyelet]
- 1/2 yd. Accent Fabric
- Ribbon -or- Twill Tape for Ties/Accents
Susan used the largest bag in the EASIEST ACCESSORY PATTERN bag but you could of course also make the smaller sizes for gift bags… wouldn’t that be so cute?
The Accent Fabric is the bottom of your bag in this sample and then the village print is the remainder of the bag.
To prepare your village fabric, trim off just the selvedge and then use the border print starting from that point up to the measurements needed in the pattern. Since it is a directional print, be sure you are adding each side as needed so your village is in the right spot!
……
Stay tuned for even more BUON NATALE project goodies…stockings, anyone? Perhaps a fun countdown to Christmas project?
Happy Sewing,
Joanna