
GUEST TUTORIAL: LACEY’S VERTICAL FLAG WALL HANGING PART #1
The moment that my friend Lacey [@laceypoirier] told me about her idea of how she wanted to use our latest annual Americana bundle, I was all in! It is such a simple idea and such a good one. She has been sharing her progress on the project over in our Facebook Group and I thought it was time to give it an official spot here on the blog.
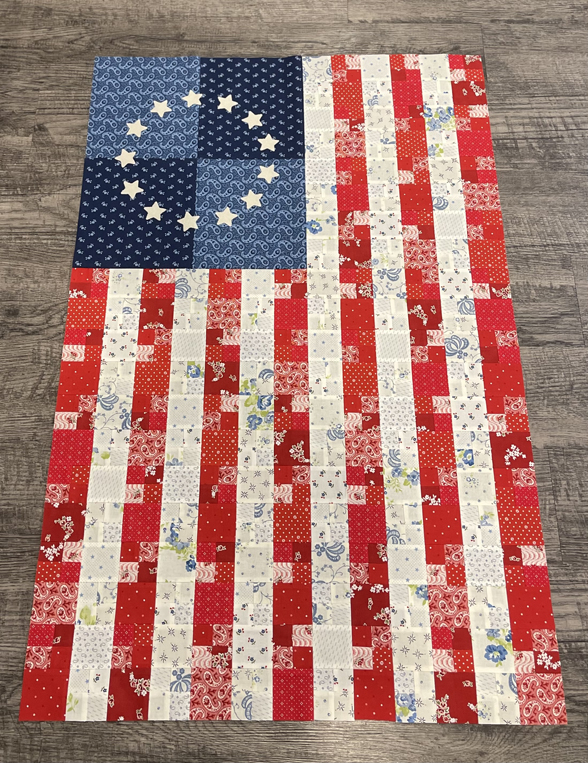
She took our 2025 CLASSIC AMERICANA BUNDLE [usually available once a year in late Spring, now sold out – but visit THIS BLOG POST to see it!] and created a scrappy, patchwork FLAG WALL HANGING with some wool star accents to display for any of the summertime holidays! You can of course use any good grouping of red, white and blue fabrics.
Scroll down for the supplies and a few simple steps if you’d like to create one of your own!
Finished Size: 26″ x 40″
……
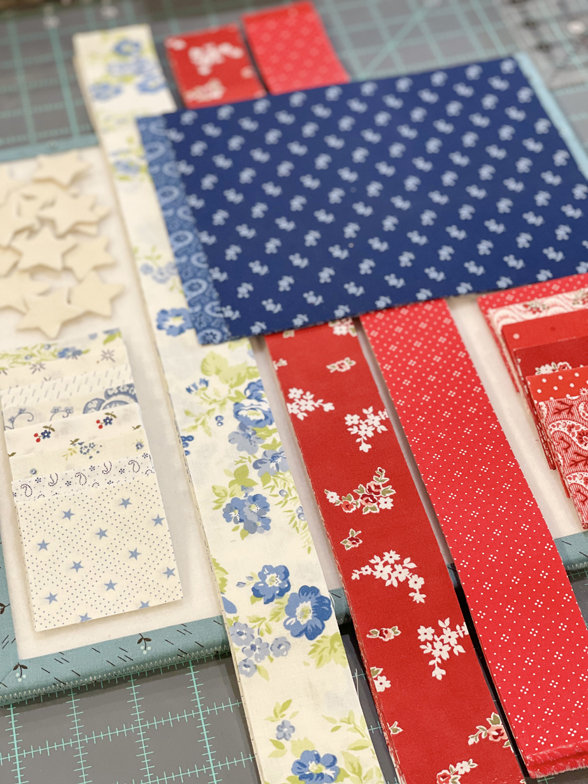
FABRIC REQUIREMENTS:
- Use any grouping, collection or scraps of red/white and blues. Lacey used
- (6) 1/4 yds. REDS [stripes]
- (8) 1/4 yds. CREAMS/LOW VOLUMES [stripes]
- (2) 1/4 yds. BLUES [field/star background]
- Backing
- 1 1/2 yds. your choice of backing print
- Binding
- (1) 1/3 yd. your choice binding print
- White Wool [13 Stars]
- The Betsy Ross version!
- Google search a star template that measures approximately 1 1/2″.
ADDITIONAL APPLIQUE SUPPLIES*:
- Thread/Floss
- Applique Needle
- Thin Permanent Marker
- Wool Scissors
- CLOVER Wonder Fuse [Item #4090] – available HERE
*Be sure to check out the latest WOOL TUTORIAL BLOG POST for hints and tips for prepping and working with wool applique.
……
CUTTING NOTES:
- From EACH of (6) red prints:
- Cut (2) 1 1/2″ x WOF strips. Set aside to be used for strip sets to create your four-patches.
- Cut (1) 2 1/2″ x WOF strip. Cut (9) 2 1/2″ squares [54 total squares].
- From EACH of (8) cream/low volume prints:
- Cut (1) 1 1/2″ x WOF strip. Set aside to be used for strip sets to create your four-patches.
- Cut (1) 2 1/2″ x WOF strip. Cut (6) 2 1/2″ squares [48 total squares].
- From EACH of (2) blue prints:
- Cut (1) 7 1/2″ x WOF strip. Cut (2) 7 1/2″ x 8 1/2″ rectangles [4 total rectangles].
……
PIECING INSTRUCTIONS:
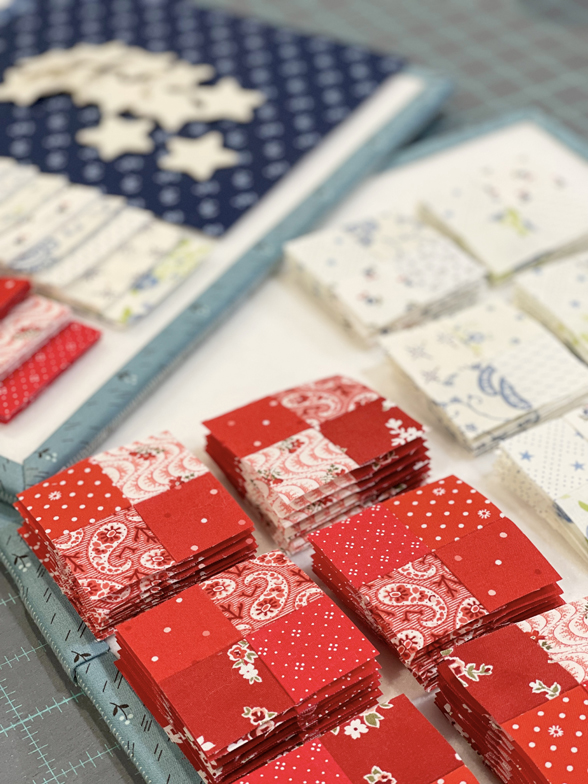
FOR FOUR-PATCHES (Both Red and Cream/Low Volume):
- Pair (2) strips together & sew together to create a 2-patch strip set. Continue with all remaining strips [Red = 6, Cream = 8].
- Subcut your 2-patch strip sets into 1 1/2″ x 2 1/2″ units each.
- Totals are (108) Red and (96) Cream.
- Combine your 2-patch units together to make a 4-patch, measuring 2 1/2″ x 2 1/2″
- Totals are (54) Red and (48) Cream.
FOR BLUE FIELD/STAR BACKGROUND:
- You are basically creating one large 4-patch unit that will measure 14 1/2″ x 16 1/2″.
…..
ASSEMBLY INSTRUCTIONS:
FOR SHORT STRIPE UNITS
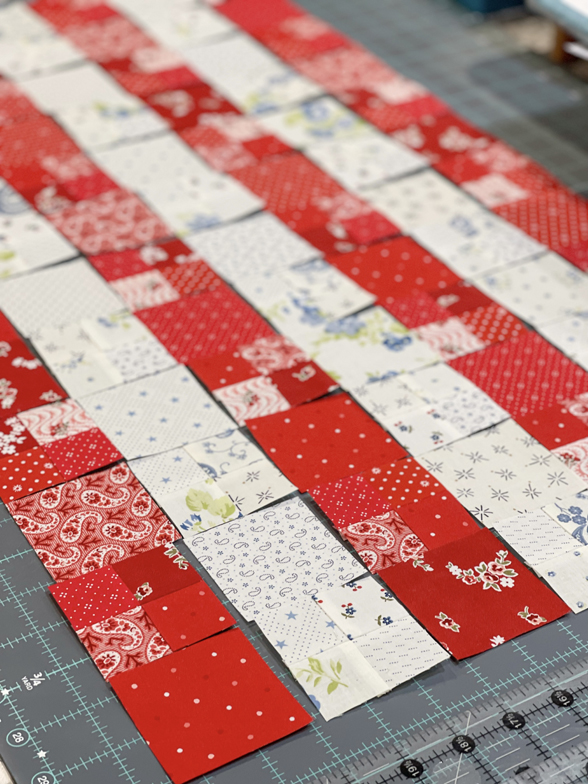
- Alternating between squares and 4-patches, make (4) red and (3) cream stripe rows that consist of (12) units each. If you start your red rows with a square, then start your cream row with a 4-patch so you can iron towards the squares and nest your seams.
- Your short stripe rows will measure 2 1/2″ x 24 1/2″.
- Join the RED and CREAM stripe rows together, this time alternating colors – RED, CREAM, RED, CREAM, RED, CREAM, RED – to create the first (7) stripes of the flag.
- This unit will now measure 14 1/2″ x 24 1/2″.
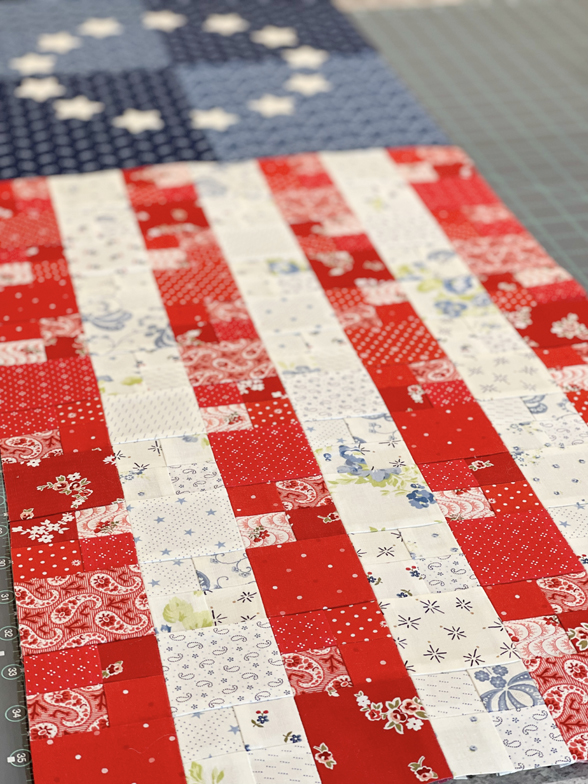
FOR LONG STRIPE UNITS
- Alternating between squares and 4-patches, make (3) red and (3) cream stripe rows that consist of (20) units each. If you start your red rows with a square, then start your cream row with a 4-patch.
- Your long stripe rows will measure 2 1/2″ x 40 1/2″.
- Join the CREAM and RED stripe rows together – CREAM, RED, CREAM, RED, CREAM, RED – to create the final (6) stripes of the flag.
- This unit will now measure 12 1/2″ x 40 1/2″.
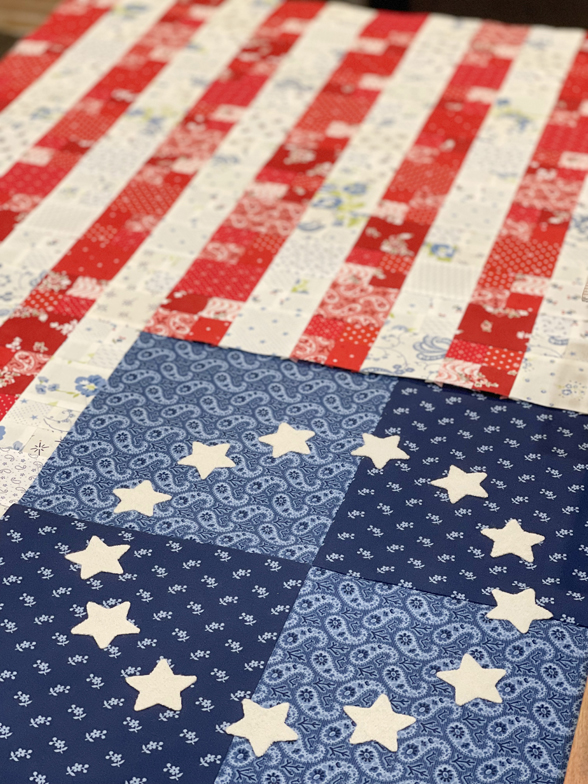
FOR BLUE FIELD/STAR BACKGROUND
- Find a circular object, such as a bowl, with an approximate 7 1/2″ – 8″ opening. Turn it upside down and center on your large blue four-patch unit. Using your prepared (13) cream wool stars, place the stars down around the bowl, leaving equal space between the stars all the way around. Pull the bowl up and out of the way and ensure your stars still create a nice circle effect. Then, fuse the wool stars by pressing carefully with an iron [follow the directions on the WONDER FUSE packaging].
- TIP: Fuse stars (1) at a time and go slow! Once the stars are fused down with an iron, it’s difficult to remove without ruining your background unit or the wool stars you cut so perfectly!
- TIP: Fuse stars (1) at a time and go slow! Once the stars are fused down with an iron, it’s difficult to remove without ruining your background unit or the wool stars you cut so perfectly!
- Hand stitch the edges of the stars with coordinating thread and an applique needle.
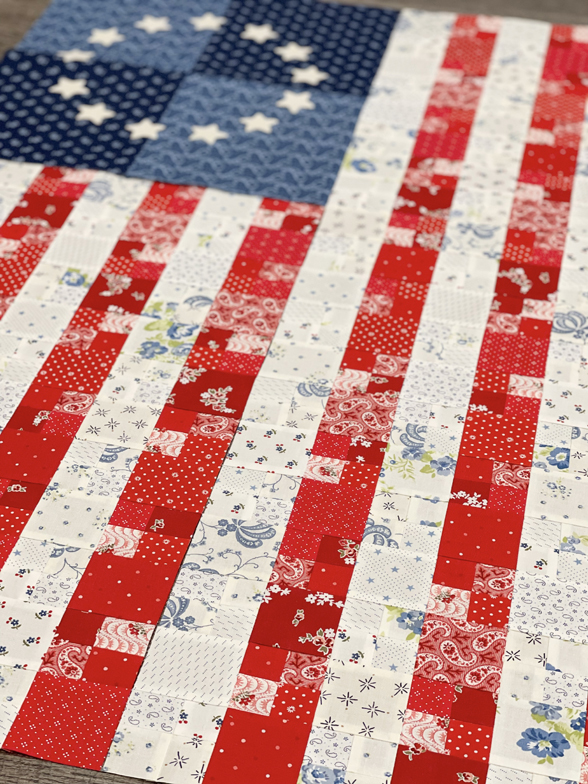
FOR FINAL FLAG ASSEMBLY
- Take your SHORT STRIPES UNIT and connect it to your BLUE FIELD/STAR BACKGROUND.
- Take your LONG STRIPES UNIT (cream/low volume stripe at top) and connect to the previous step to create your flag wall hanging.
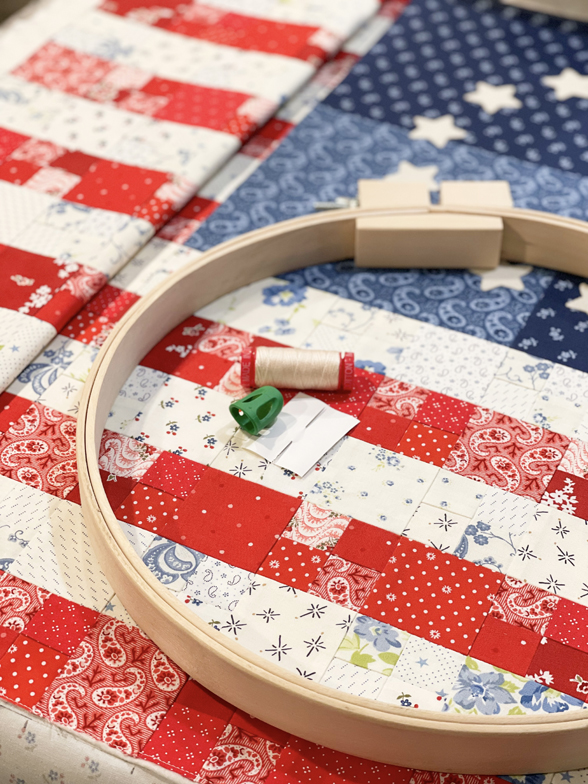
- Quilt as desired and bind using (4) 2 1/4″ binding strips.
- Lacey is opting to try her hand at “big stitch” quilting using 12 wt. thread.
……
We will be back next week for PART TWO of the VERTICAL FLAG WALL HANGING with a BONUS TUTORIAL from our friend Laurie Simpson [of Minick & Simpson] on BIG STITCH QUILTING – and an update on Lacey’s stitch progress!
Happy Sewing,
-Joanna & Lacey
Anita | 25th May 25
Love this! Can’t wait to see part 2!
Karen S | 26th May 25
That’s fabulous. Thank you for sharing the directions!