
WORKING WITH WOOL + NEW SPRING-INSPIRED PROJECTS
We’ve done a few wool tutorials here on the blog (dating back to 2016), but it’s time for a blog refresh!
To recap, you can find the original tutorials here:
Although this info is still very true for how I work with wool today, I will add one of the biggest updates here…
ROXANNE’S GLUE-BASTE-IT
For years I have used this glue, but my customers have turned me completely to these fabulous lightweight fusible sheets and I love them so much! It is so much easier and more simple than glue!
Before you cut out your pieces, press a larger square or rectangle of the fusible to the “wrong” side of your wool [peel off the paper and you will basically have wool that is backed with this soft web product]. You will then be ready to cut out your pieces.
Continue with the rest of the applique as instructed in our wool tutorials (linked above).
A few of my favorite fusible products are:
- CLOVER Wonder Fuse [Item #4090]
- 9″ x 8″
- 10 sheets
- Lightweight
- AVAILABLE IN OUR SHOP HERE
- BOHIN Adhesive Tape [Item #62515]
- Double-sided tape
……
GENERAL WOOL TIPS
A few more general tips that may be included in the original wool tutorials, but totally worth repeating:
- You can clip any stray wool threads after you cut the shape or after you applique it down if necessary. So don’t worry about any threads that might come loose during stitching.
- The best stitch to use, in my opinion, is a small, even whipstitch. Some people prefer to use a small blanket stitch for a more traditional look.
- When stitching, take care to go in far enough to catch a sufficient portion of the wool. If you are a cotton appliquer, remember that the wool edges are raw and might fray a tiny bit and you need to go in further than you would with cotton. I suggest app. 1/8″ into the wool itself.
- Take care around outside points, stitching more closely together and “defining the point” with your stitches.
- Overlap a couple of stitches at the end for strength.
……
We’ve also created a handy WOOL RESOURCE GUIDE…be sure to download that by clicking the link below!
WORKING WITH WOOL: A RESOURCE GUIDE (PDF)
……
SPRINGTIME WOOL GOODIES
In addition to our wool tutorials, we also have (2) past tutorials showcasing SPRINGTIME WOOL GOODIES with my dear friend Susan Vaughan (@thefeltedpear).
Be sure to visit these blog posts for all the details:
*NOTE: Our SPRINGTIME WOOL GOODIES kits mentioned in the blog post are sold out, as that post is from 2021. Feel free to see what new WOOL GOODIES we have in the shop now to get started – CLICK HERE!
And a tip on applique shapes…you can draw your own, look for free shapes online, and/or use ours as inspiration! It can be made uniquely yours!
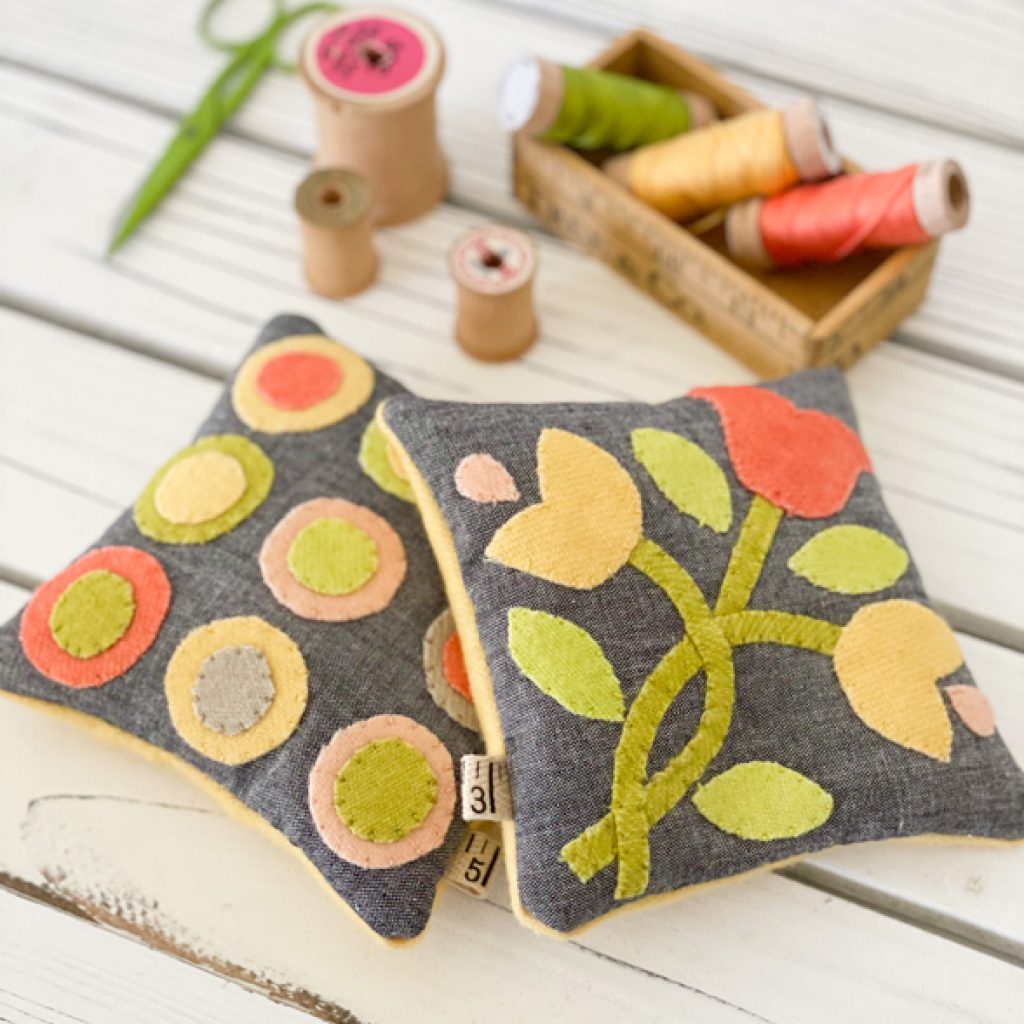
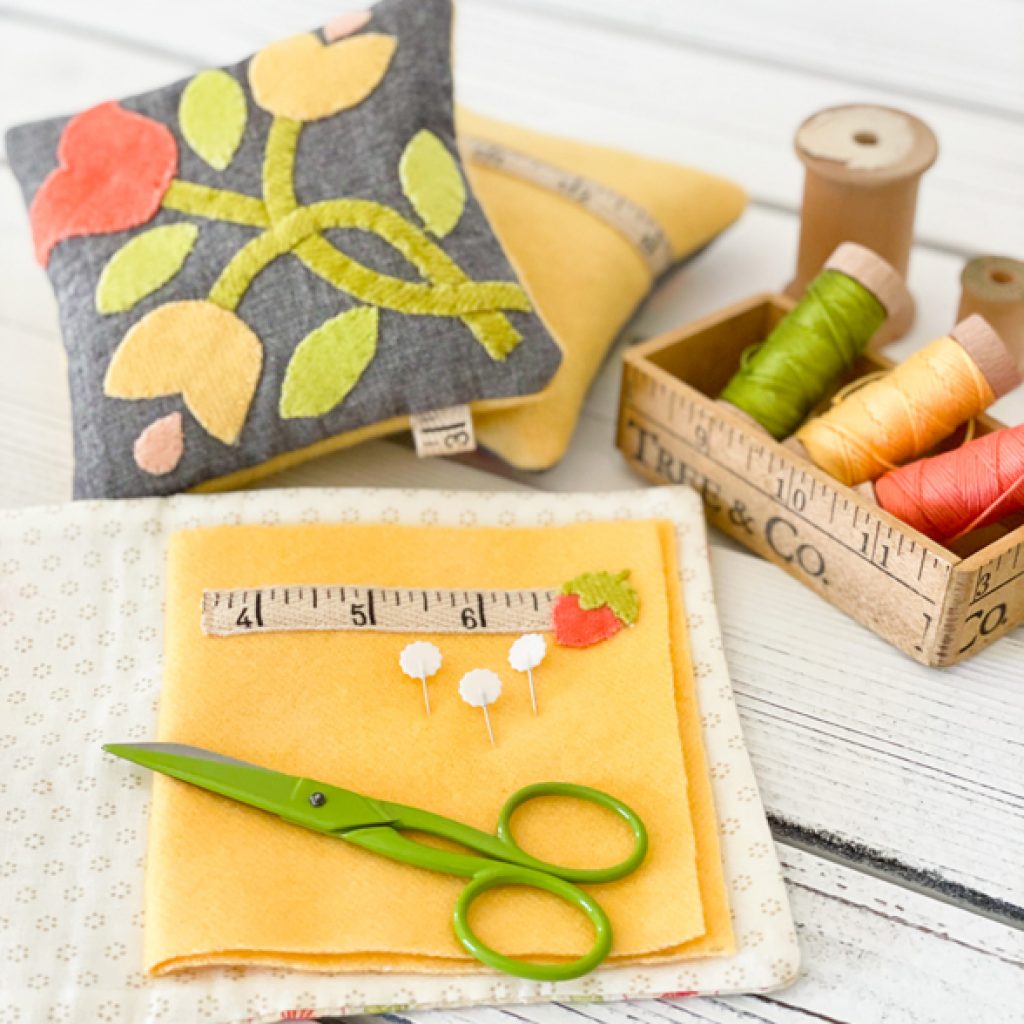
LATEST WOOL PROJECTS
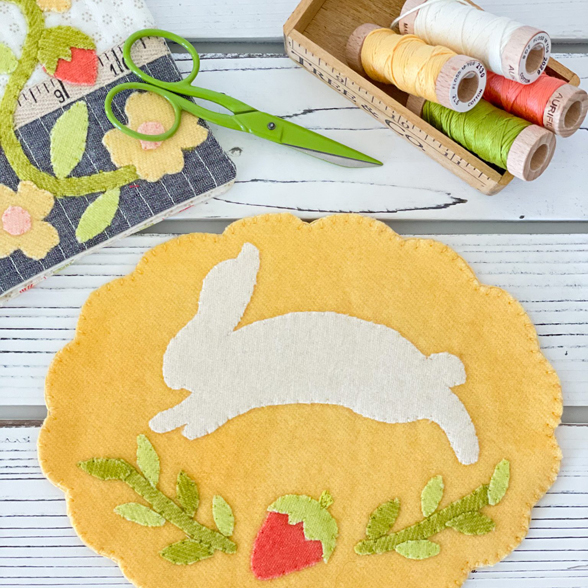
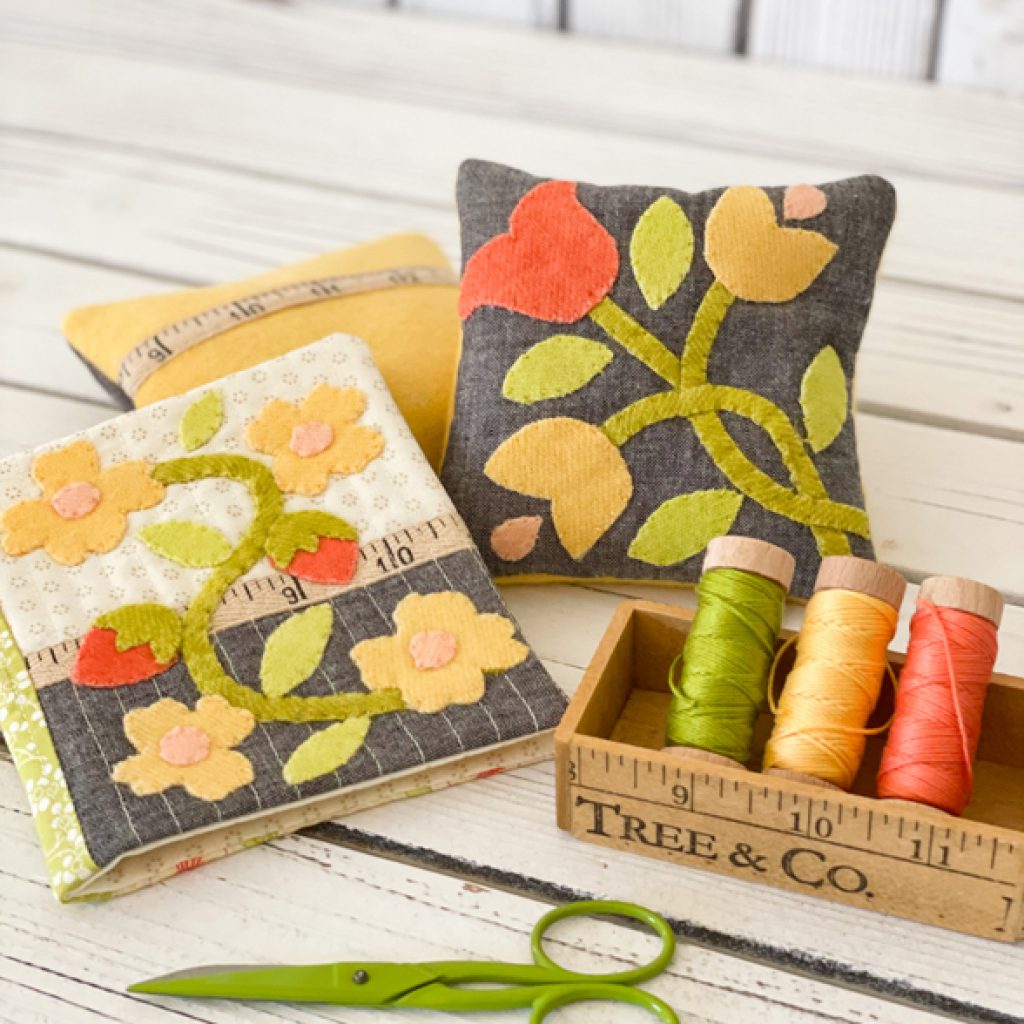
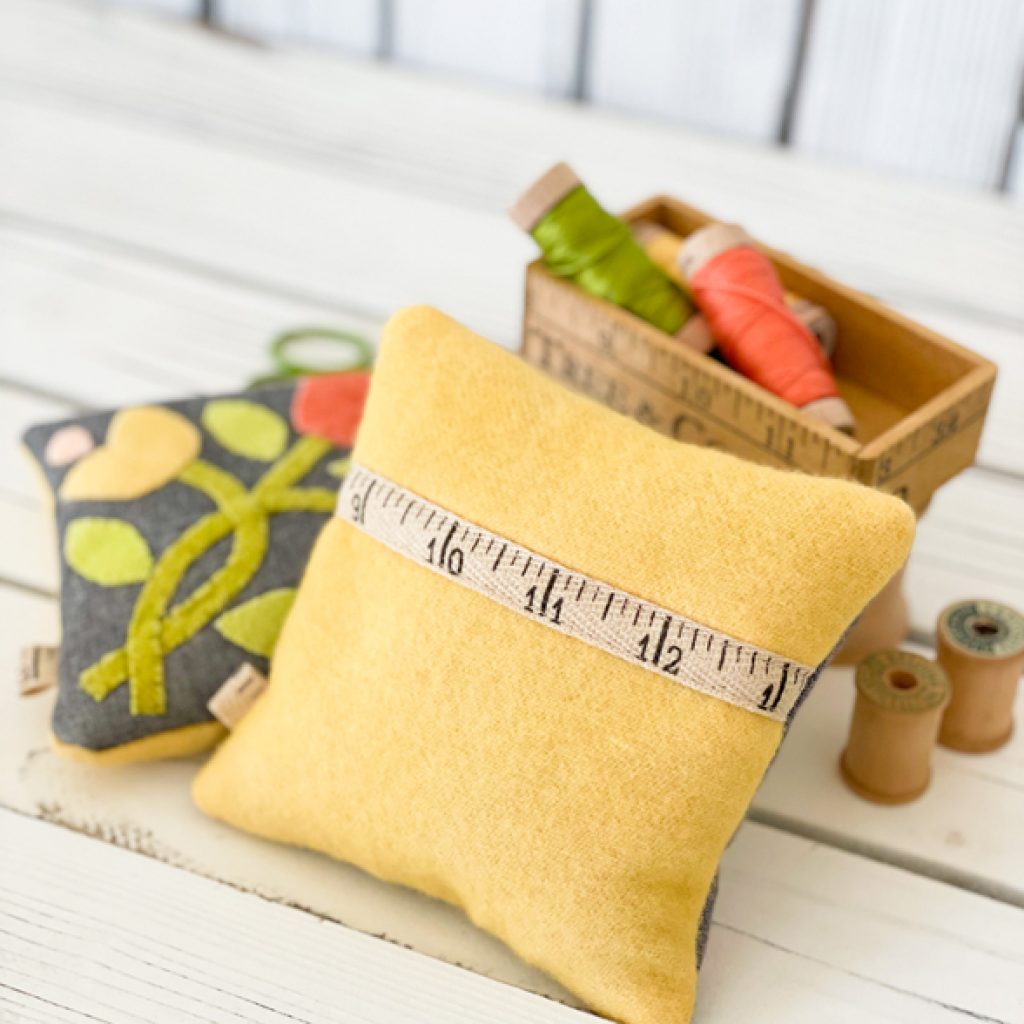
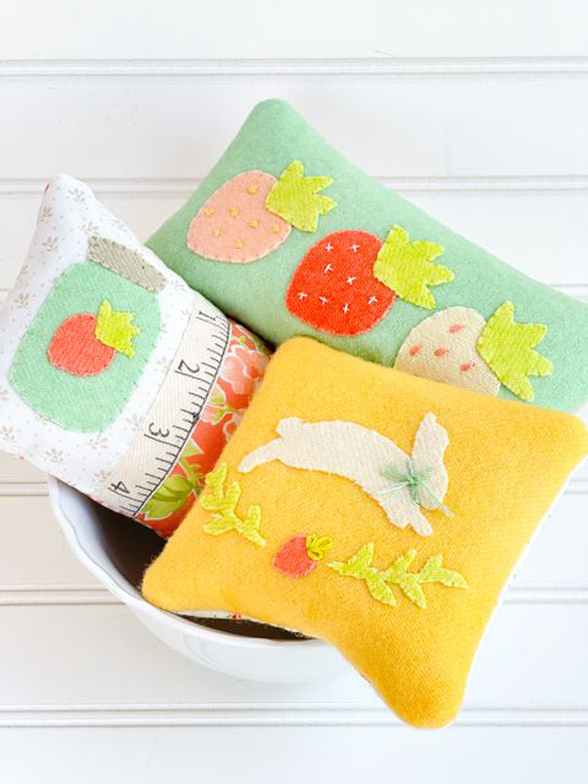
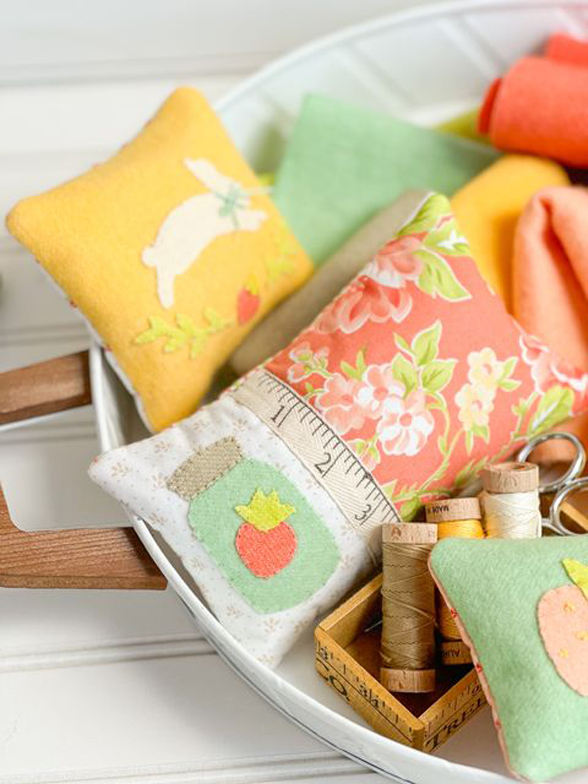
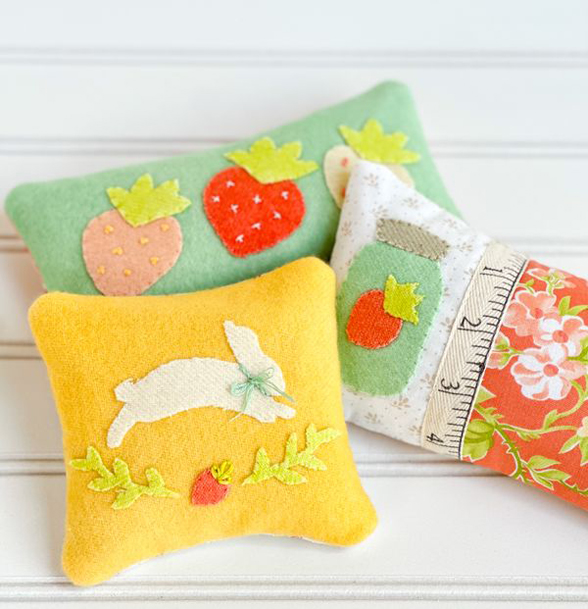
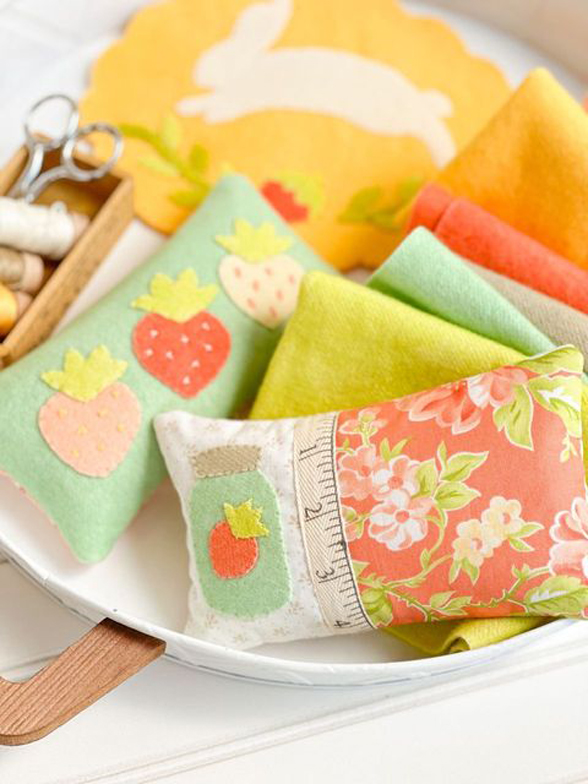
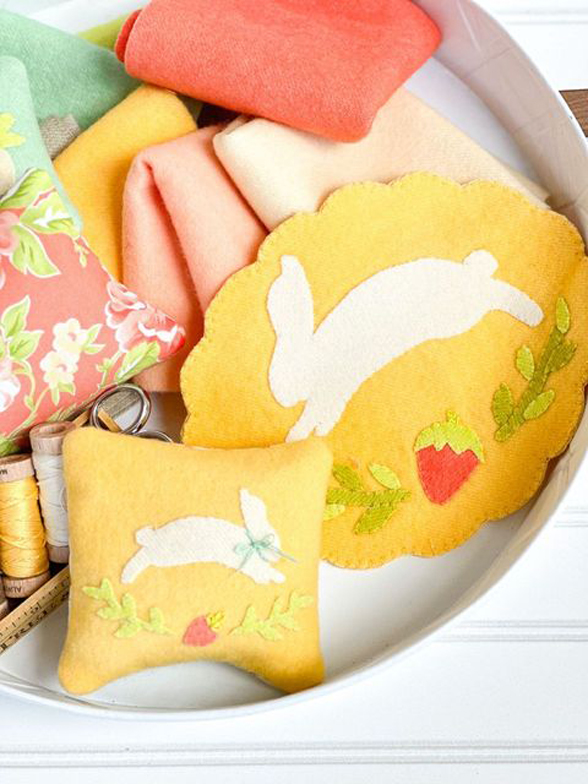
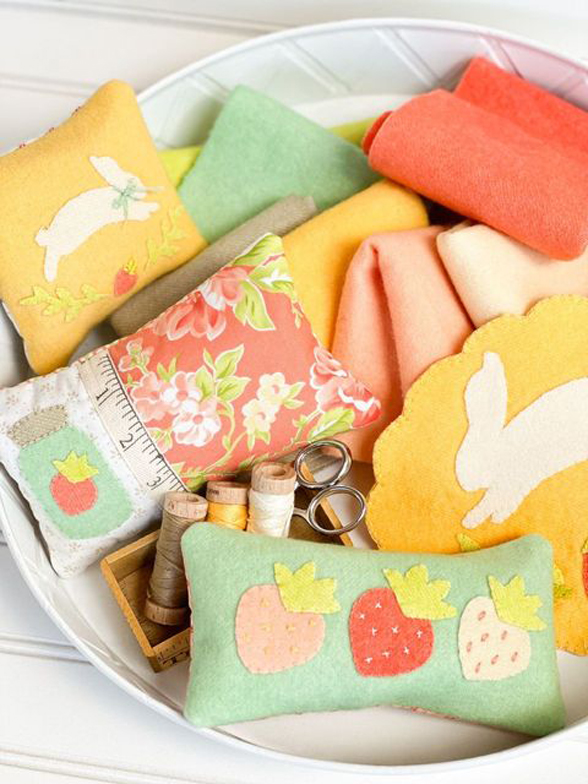
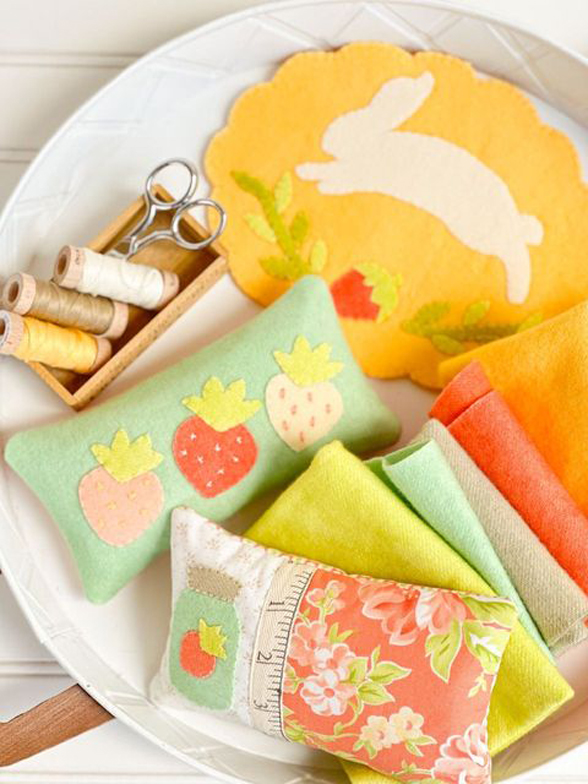
And here we are again – back at it! Aren’t these just the BEST?! Susan used inspiration from the BUNNY MAT tutorial mentioned above, as well as the MASON JARS flour sack towel pattern for inspiration on these (3) NEW sachets/pincushion/bowl fillers.
FROM SUSAN
- For the Wool Bunny:
- I photocopied the bunny I used in the 2021 tutorial at 50%…again, feel free to find your own images online…just so your bunny image is roughly 2 1/2″ long. Applique it onto a 5″ x 5″ yellow felt square. I added a STEM STITCH collar and embroidery floss bow for a bit of cuteness – then finished in the same manner as the above SPRINGTIME WOOL GOODIES blog tutorial mentioned.
- For the Trio of Strawberries:
- Trace the strawberries from the MASON JARS pattern at 100% and prepare your pieces using a light pink, coral, and ivory for the berries, and a green felt for the stems. Applique on a 4 1/4″ x 7 1/2″ piece of aqua felt background. I opted to embroider seeds on all of the strawberries for a bit of interest.
- Light Pink: Trio of FRENCH KNOTS
- Coral: X’s
- Ivory: CHAIN STITCH
- Finish off with your favorite method and be sure to add some dried lavender for a sweet-smelling sachet!
- Trace the strawberries from the MASON JARS pattern at 100% and prepare your pieces using a light pink, coral, and ivory for the berries, and a green felt for the stems. Applique on a 4 1/4″ x 7 1/2″ piece of aqua felt background. I opted to embroider seeds on all of the strawberries for a bit of interest.
- Mason Jar Strawberry:
- Photocopy the actual mason jar in the MASON JARS pattern at 50% and prepare wool applique pieces. Applique onto a background fabric that is approximately 4″ x 5 1/2″. Trim when finished to a 3 1/2″ x 4 3/4″ rectangle, being sure to center the design. Attach a 4 3/4″ floral cotton fabric square to the right side of the appliqued piece. For an added bit of fun, add a bit of your favorite trim to cover the seam. We love using TAPE MEASURE TWILL TAPE! Trim up your pillow to approximately 7 1/2″ x 4 3/4″ and finish using the same sized backing square.
……
WOOL KITS & BUNDLES
If you are interested in trying out wool in a small, manageable project, we may just have the right kit(s) for you – now in the shop…WHILE SUPPLY LASTS! If you click the link and nothing shows up, that -unfortunately – means we have sold out.
SEWING GOODIES

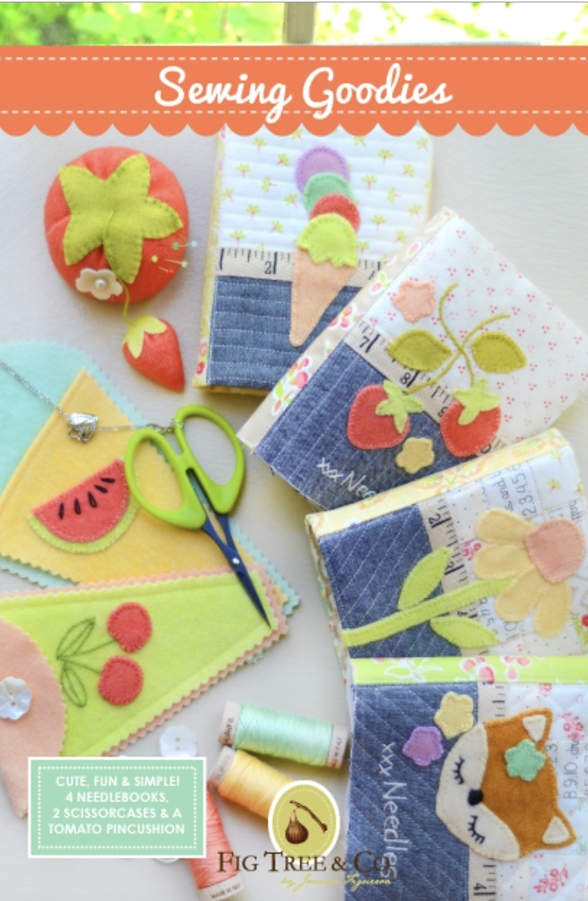
SEWING GOODIES STARTER KIT
SEWING GOODIES – PATTERN ONLY (PAPER – or PDF)
……
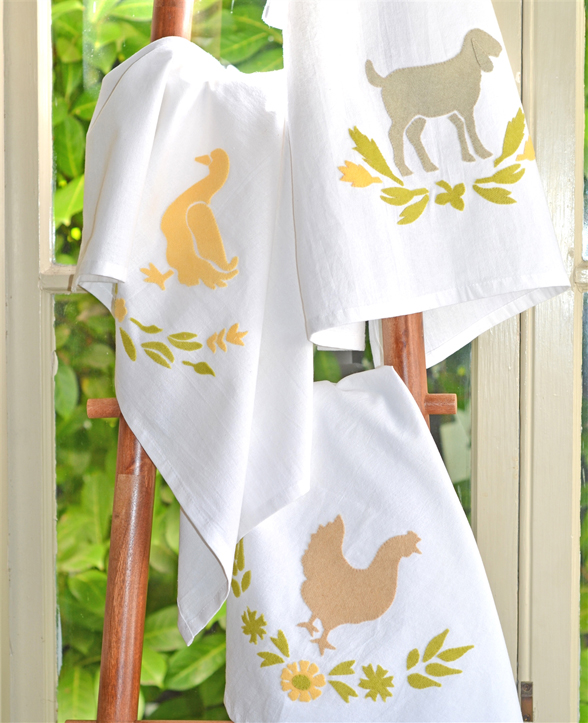
SPRINGTIME FARM ANIMALS
You know me and my love of the farm… so recently I just couldn’t help myself and made these fun Springtime baby farm animal towels. They were such a fun project to work in between quilt deadlines!
……
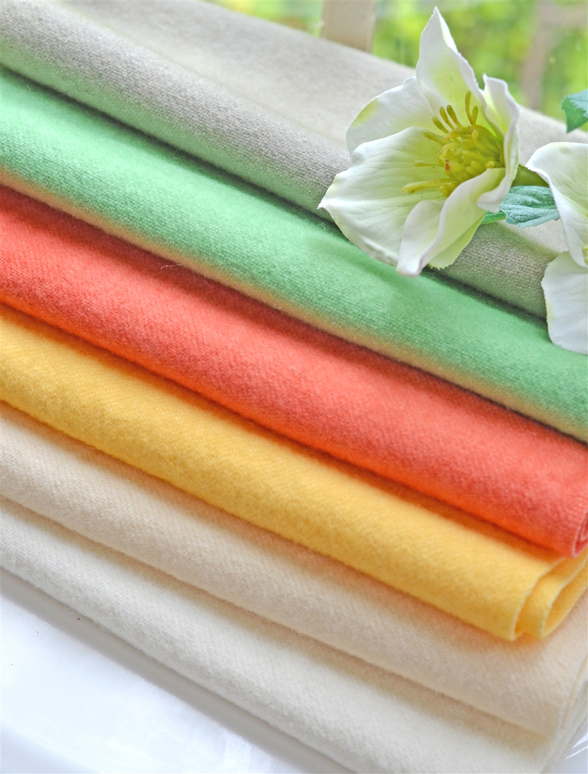
SCRAPPY SPRING WOOL
Just a few large pieces to get you started on a wool project…
……
I sure hope you decide to add some wool to your Spring and Summer projects this year… they are just such a great addition to our crafting lives! Happy Sewing!
-Joanna