
Springtime Wool Goodies
Spring is in the air here in California! The flowerbeds are bursting with colors, and my lavender plants are just beginning to bud. As I was walking by the fragrant bushes in my front yard, the inspiration hit to make some new sachets using some of the new hand dyed Weeks Wool that just arrived.
The sachets were so fun and fast to make and look so festive in a small tray on my dresser. I thought you might enjoy making them too!
MATERIALS NEEDED
- Wool Felt in butter yellow and various springtime scraps in peach, light green, dark green, coral and taupe)
- Fat Quarter Black Crossweave or Chambray
- Soft Fuse or your favorite fusible product
- Thread/Floss to match the wool
- Ruler Trim
THINGS WE HAVE AVAILABLE: Click HERE for some wool kits and HERE for some threads.
Step 1: Trace your wool applique shapes on to Soft Fuse or your favorite fusible product. If you aren’t familiar with Soft Fuse we love it and use it for all our fusible needs. It leaves the wool feeling soft, yet allows it to adhere to the background making handstitching a breeze! Once traced, rough cut around your fusible leaving a small margin and adhere to the back of the wool. Once fused, cut your shapes out directly on the drawn lines.
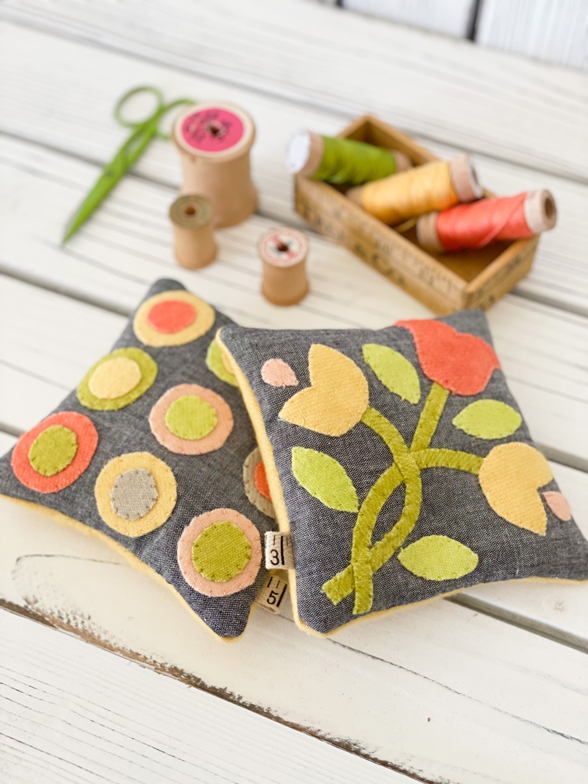
For the Penny Circles Sachet, we traced nine of the larger circles and nine of the smaller circles using all the springtime colors.
For the Tulip Sachet, we chose to make the larger tulip out of the coral, and smaller flowers out butter yellow with peach accents. We used the larger leaf shape in the lighter green to make the four leaf shapes.
For the vine, we cut three different stems from the darker green approximately ¼- 3 /16” wide by 1 ½” for the smaller stem, and two ¼”- 3/16” measuring by 3 ¾”.
Step 2: Cut your background crossweave at 5 ½”. Lay out your wool shapes in to the design and fuse into place.
For the Penny Circles Sachet, we layered a small circle on top of a larger circle and grouped them in to three rows of three circles.
For the Tulip Sachet, we arranged all of our shapes down, carefully tucking in the ends of the stems under the flowers.
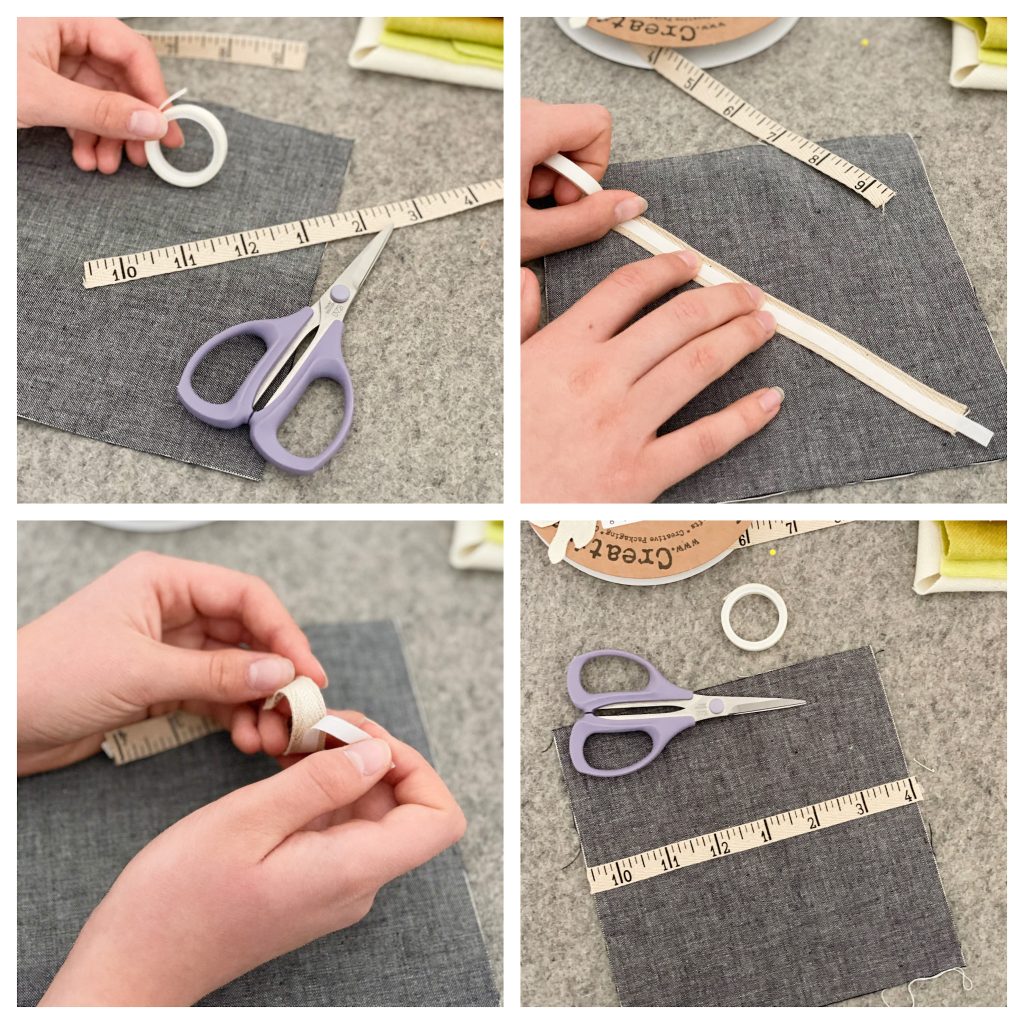
TIP: The vines can be a bit fiddly to tack down, so we often use a bit of Wonder tape to hold it into place. You just apply Wonder Tape to the back of the stem, and then gently press it on your background. The stem won’t move and its thin measurement makes it perfect for small skinny objects!
Step 3: Hand stitch your wool pieces down. We use a variety of threads and floss in a simple whip stitch. For extra cuteness, attach a small hang tag along the edge. We used about a 1 ½” piece of our favorite ruler trim folded in half.
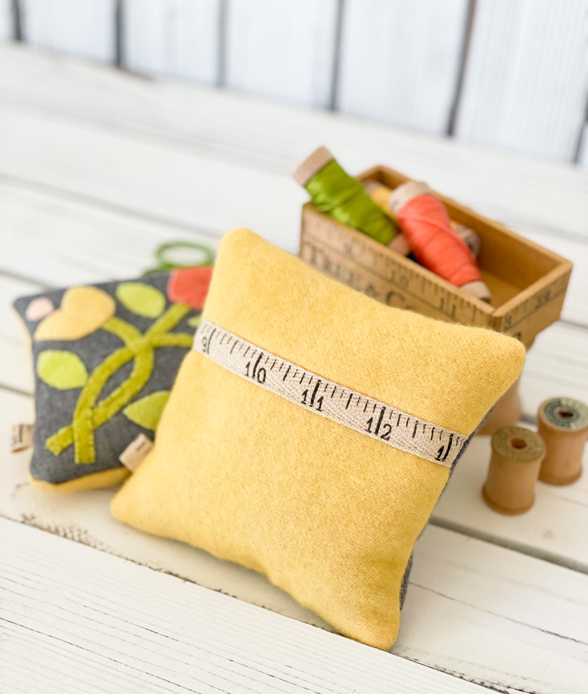
Step 4: Cut a 5 ½” square of butter yellow wool for the back. Layer the crossweave/chambray right sides down to the wool felt. Stich around the perimeter and leave a 2” gap along one of the sides for turning.
TIP: You can use up smaller pieces of wool for the back. We opted to seam one of our backs together and covered our seam with the decorative ruler trim. Use Wonder tape to hold down your trim while stitching- No pins needed!!
Step 5: Turn your project and fill with your favorite stuffing. We used a mixture of lavender I had dried from last year’s blooms as well as some crushed walnut shells. Cotton stuffing would also work well. Sew up the seam with an invisible ladder stitch.
We hope you enjoy making the sachets as much as we did and enjoy bringing a bit of springtime into your home!
If you make a sachet of your own we would love to see it! Be sure to tag us on Instagram or post in our Facebook Fig Tree Friends group.
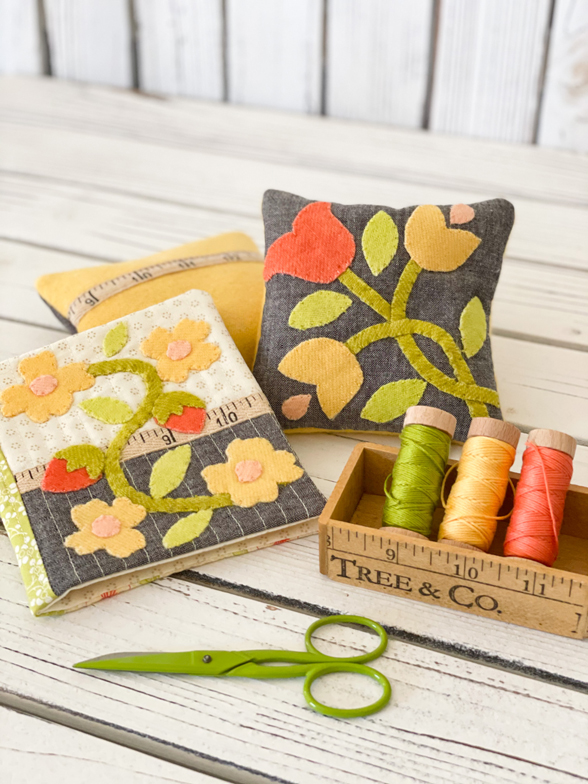
NOTES ABOUT THE NEEDLEBOOKS
The accompanying needlebook was just a new applique take on the needlebooks designs in the SEWING GOODIES pattern [available in our shop HERE]. If you purchased the Springtime Goodies wool kit, then you have all the supplies you will need to make it like we have shown it here. More info later this week on a separate post.
