
Springtime Wool Goodies: Bunny Mat
I couldn’t quite stop after making the lavender sachets – I had all sorts of springtime wool projects on my mind! While setting out our Easter decorations and changing out our springtime quilts, I thought what fun it might be to make a small wool mat to pair with a candle and a bouquet of fresh flowers on my kitchen table. I started doodling a running bunny with some strawberries and the Springtime Wool Bunny Mat was born.
We thought you might enjoy making a bunny mat for your spring décor too!
If you purchased our SPRINGTIME WOOL GOODIES, all of the shapes are in the kit. If not, you can draw your own, look for free shapes online and/or use ours as inspiration! Click HERE for some of the wool goodies we have.
MATERIALS NEEDED
- 9” x 17” Hand dyed Weeks Wool in Butter Yellow.
- Wool scraps of white, light green, dark green and coral
- Soft Fuse or your favorite fusible product
- Thread/floss in matching colors to applique your wool down
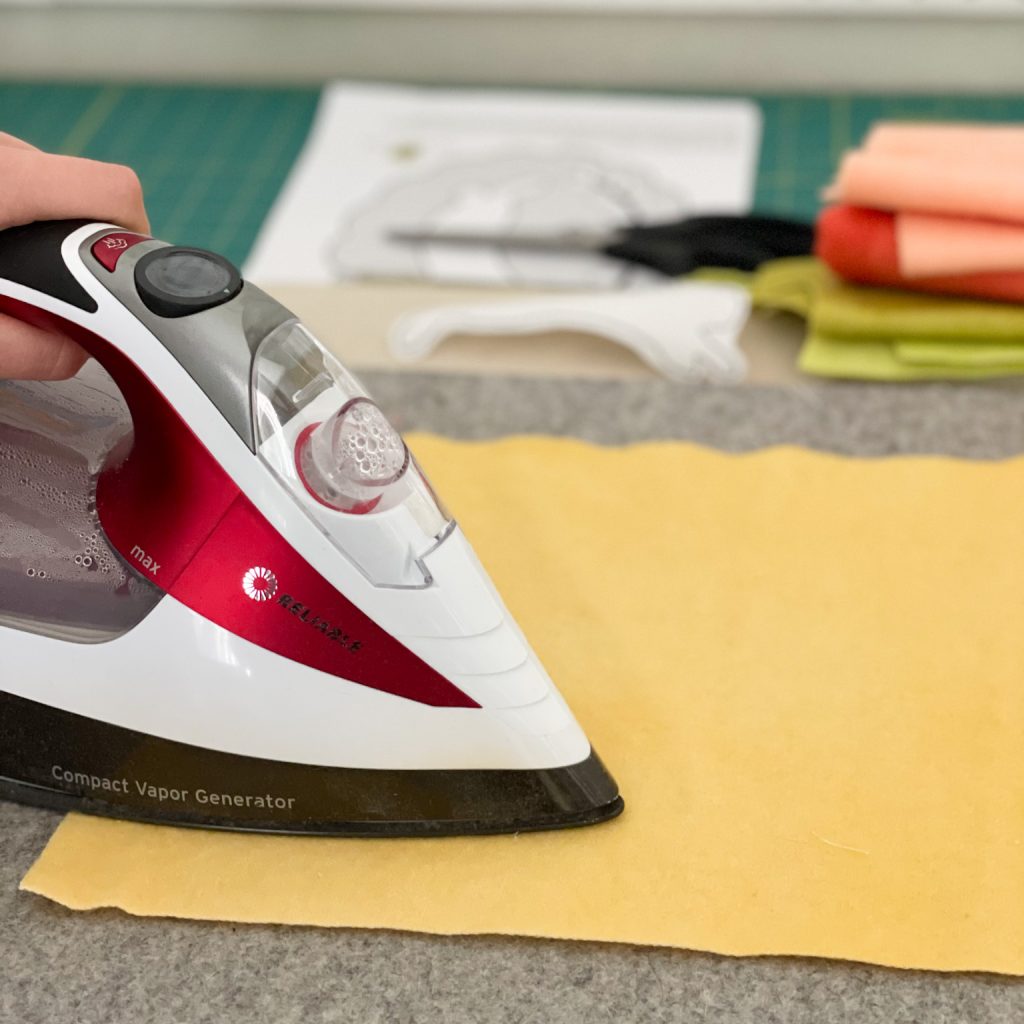
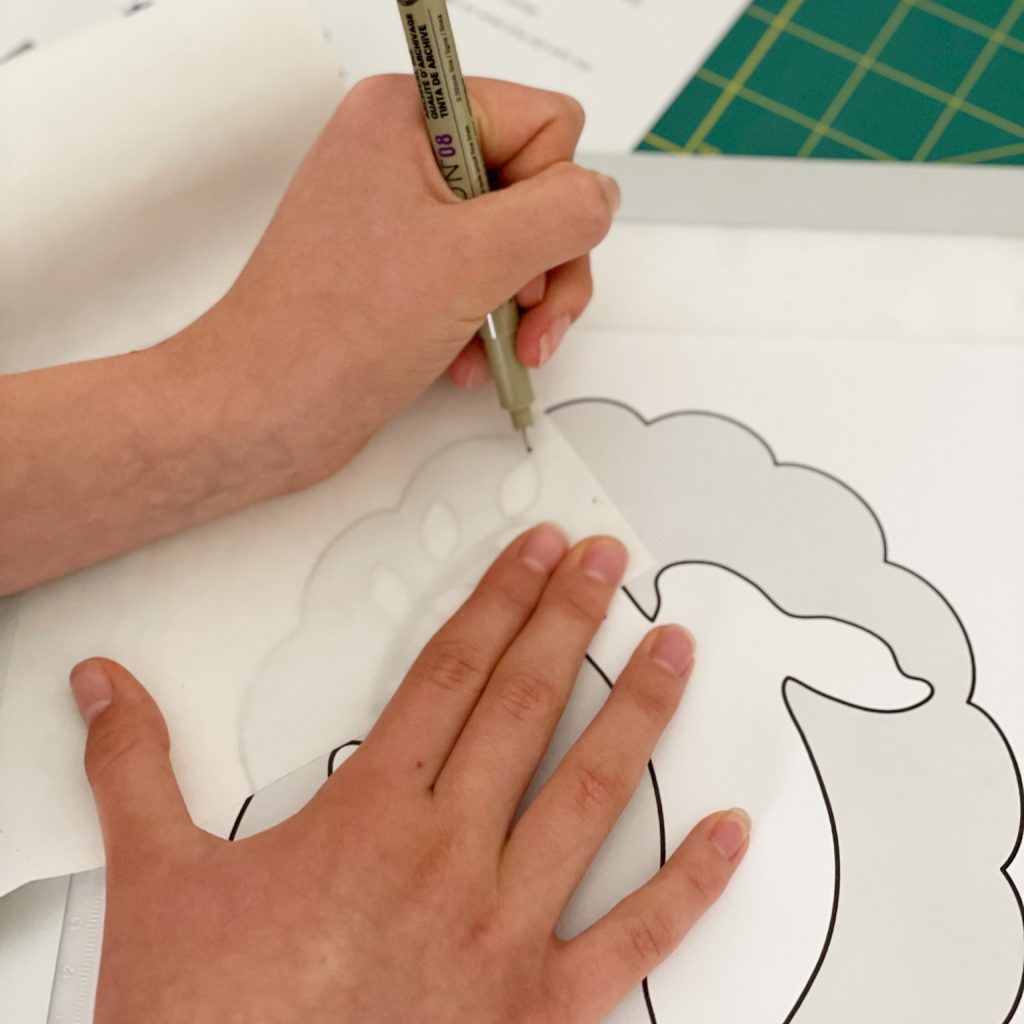
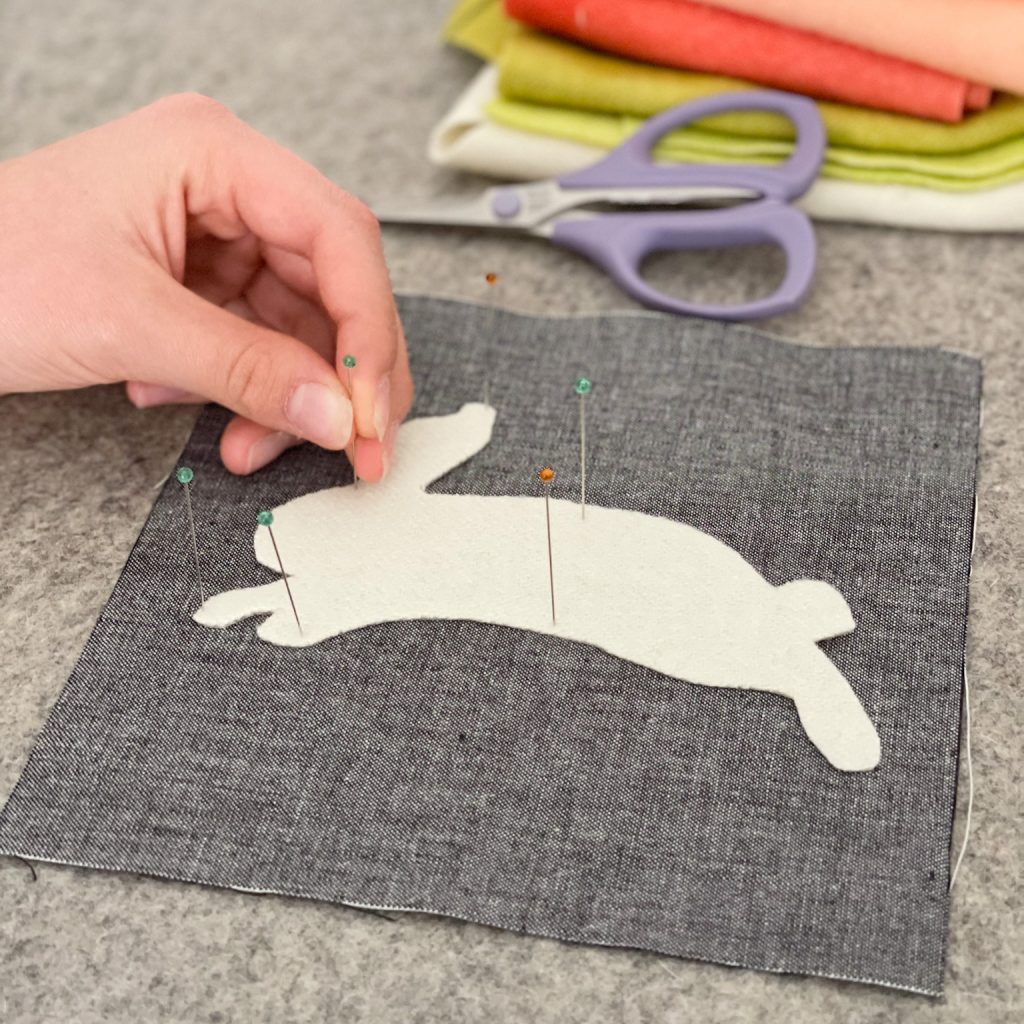
Step 1: Prepare your background of yellow wool. Give it a good press to help the fibers shrink together and cut your wool piece in half along the long side. Carefully trace the scallop design onto Soft Fuse and rough cut around the edges. Feel free to cut out the center leaving just a thick border around the edges for an even softer feel. Carefully fuse the scallop shape to the back of one of the wool pieces. You might find it helpful to pin your fusible before you start fusing as it can be prone to shift while pressing. Set aside the second piece of the wool for now.
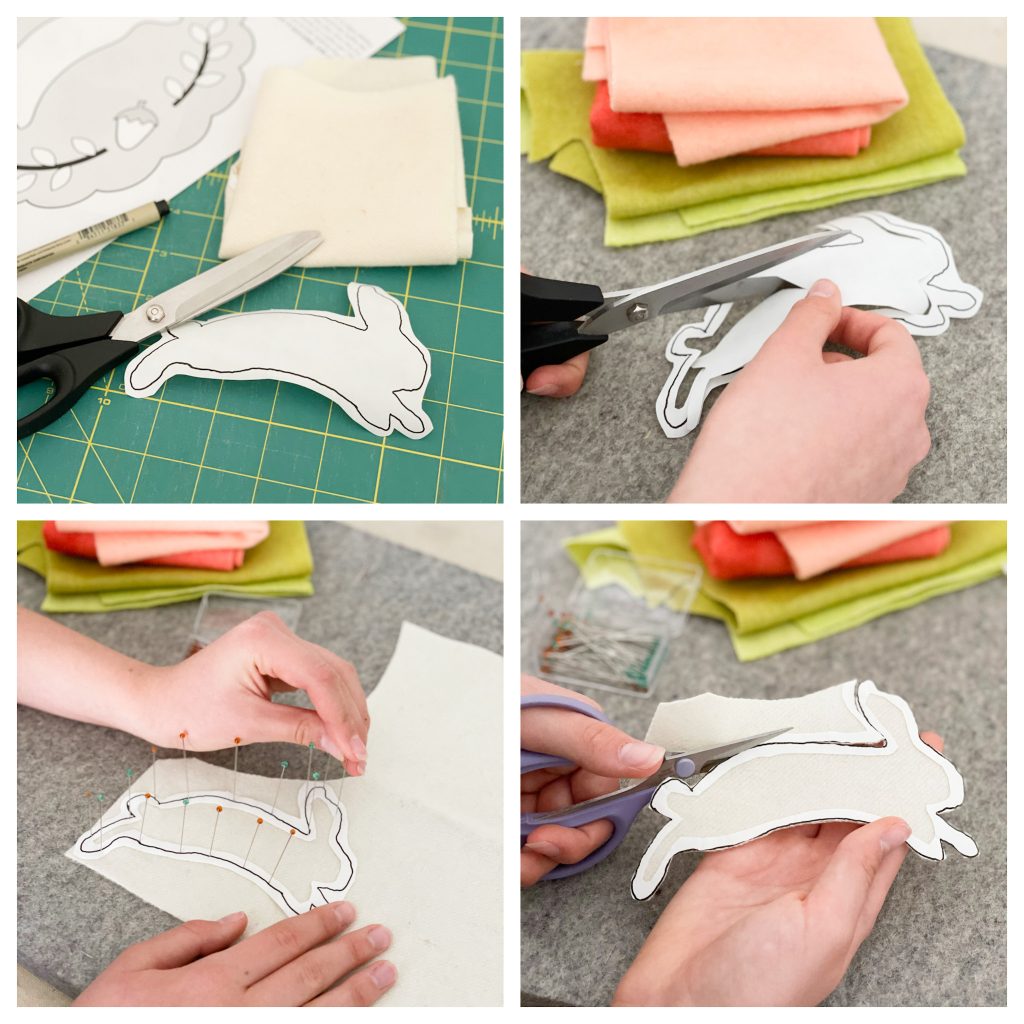
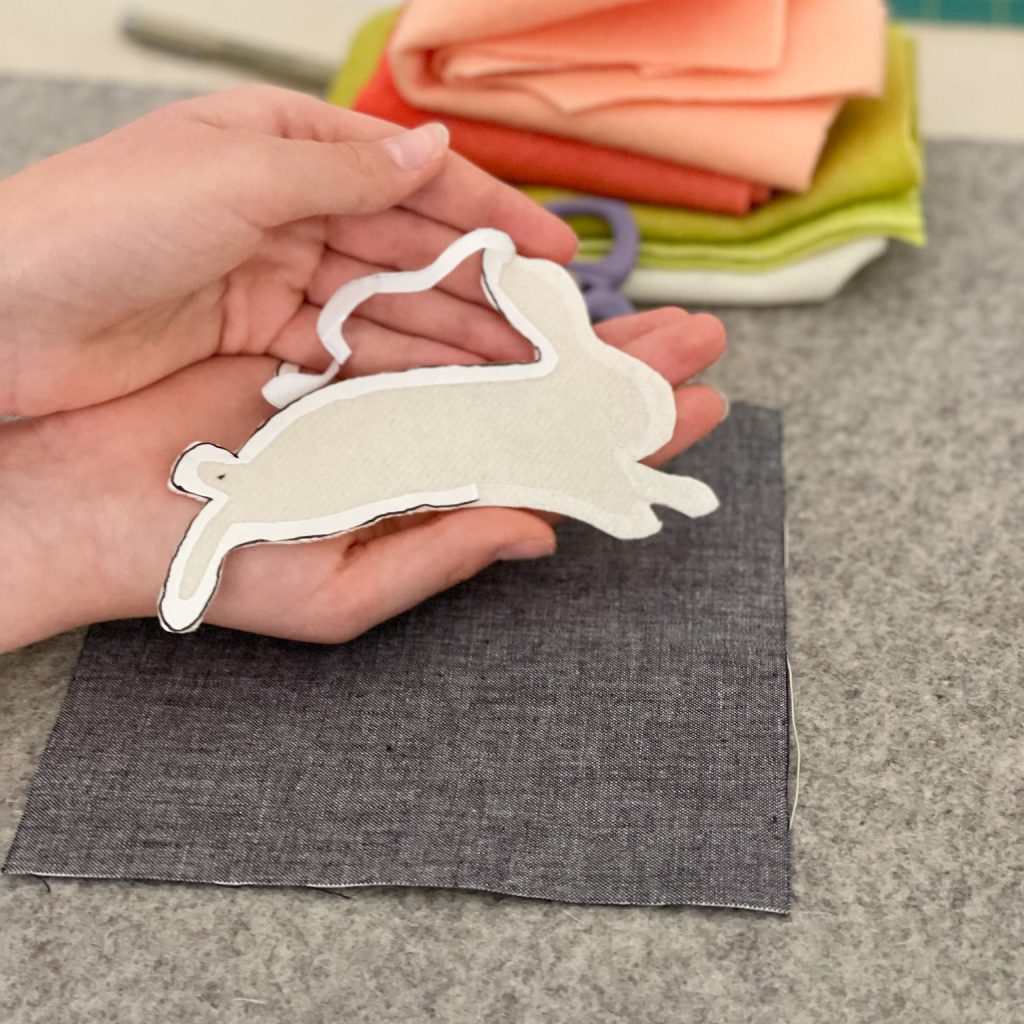
Step 2: Prepare your wool shapes for applique. Trace the designs on the back of the Soft Fuse, remembering to trace a mirror image of any of the designs that are not symmetrical (we reversed the bunny and strawberry). We chose a soft white for our bunny, coral for our strawberry and a variety of spring greens for our vine.
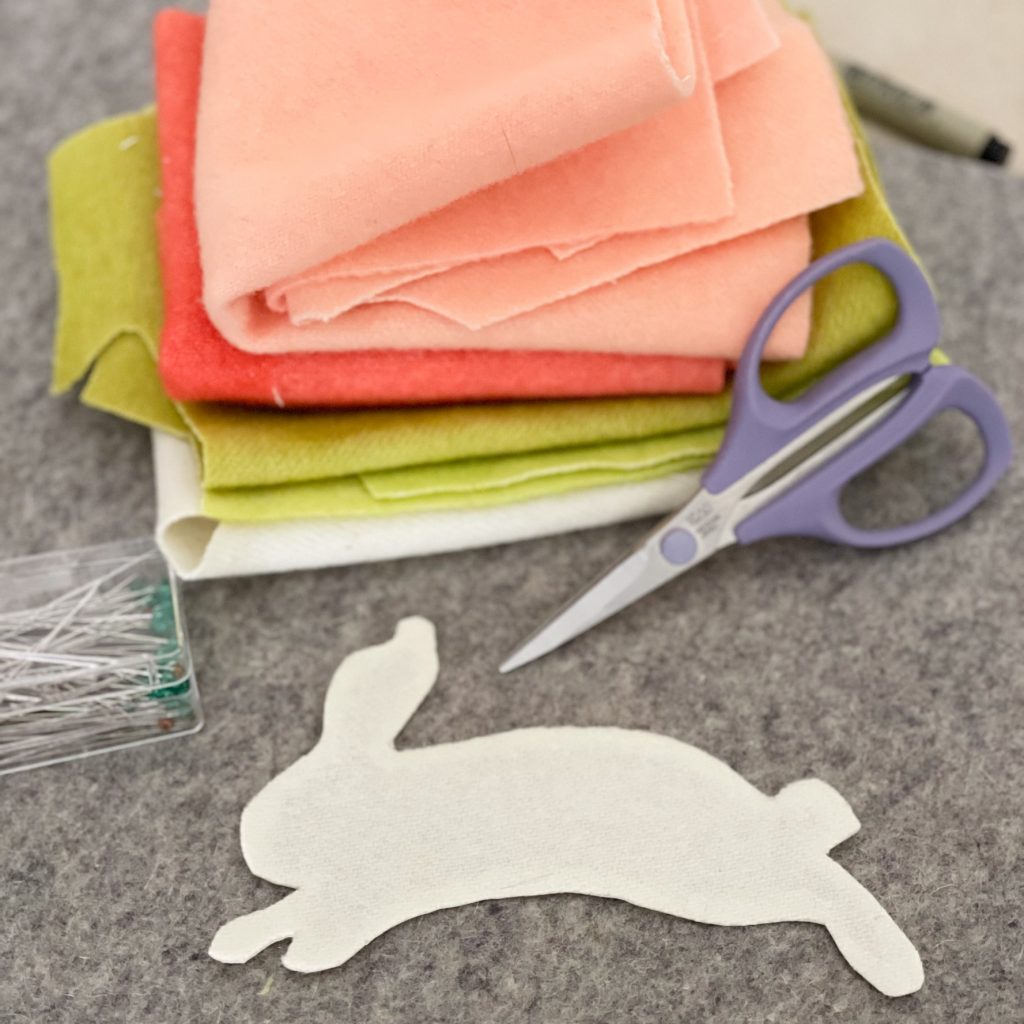
TIP: When constructing the bottom vines we used the darker green for the stem and a mixture of the greens and the smaller leaf as our pattern. We cut our vines approximately ¼” – 3/16” wide and approximately 2 ¾” long and prepped it with Wonder Tape to make the applique a snap!
Step 3: Lay out your shapes on the cut scallop yellow background and fuse into place. Hand stitch around each shape using a matching thread or floss using a whip stitch.
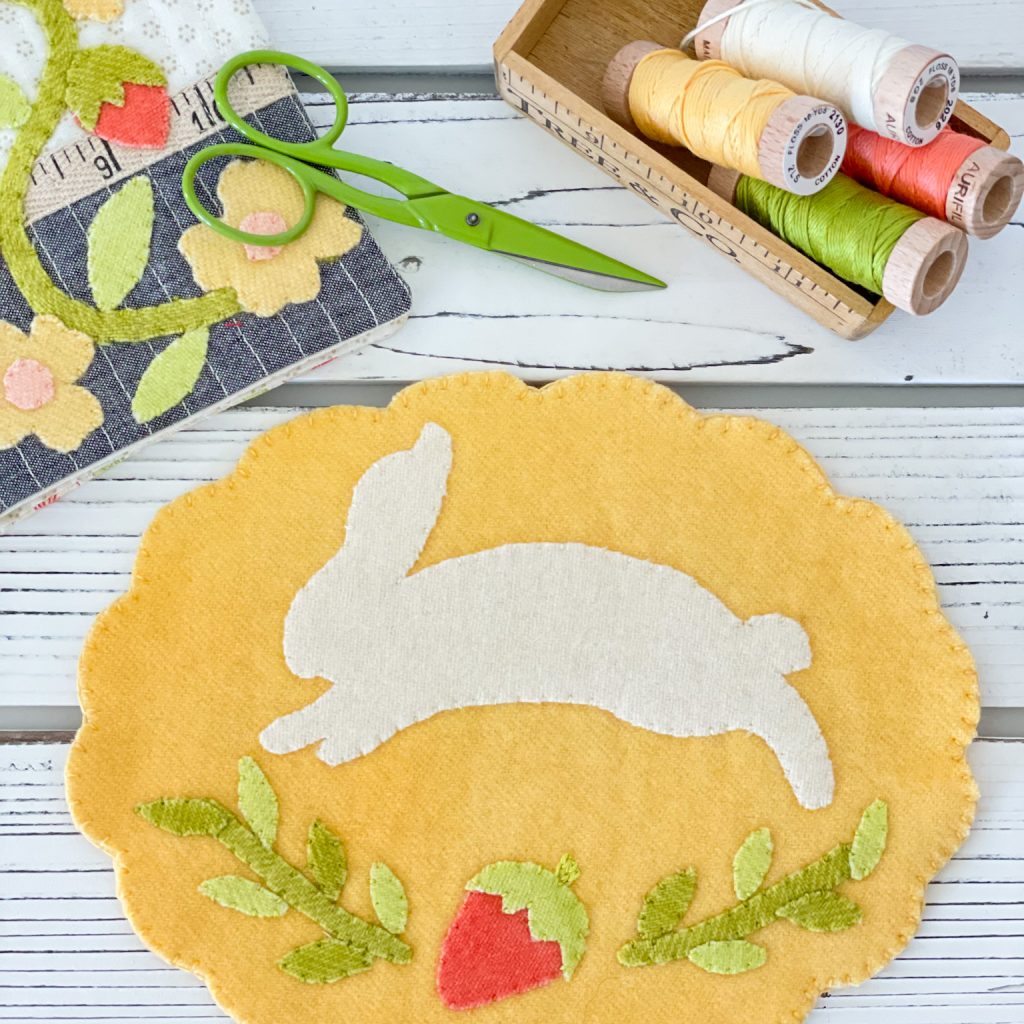
Step 4: When you have finished your applique and added any embroidery details you might want too (we think that French knots in yellow on the strawberry would be very cute!) Lightly fuse the scalloped top to the untrimmed back. Once adhered, carefully cut away the backing to match the scallop border.
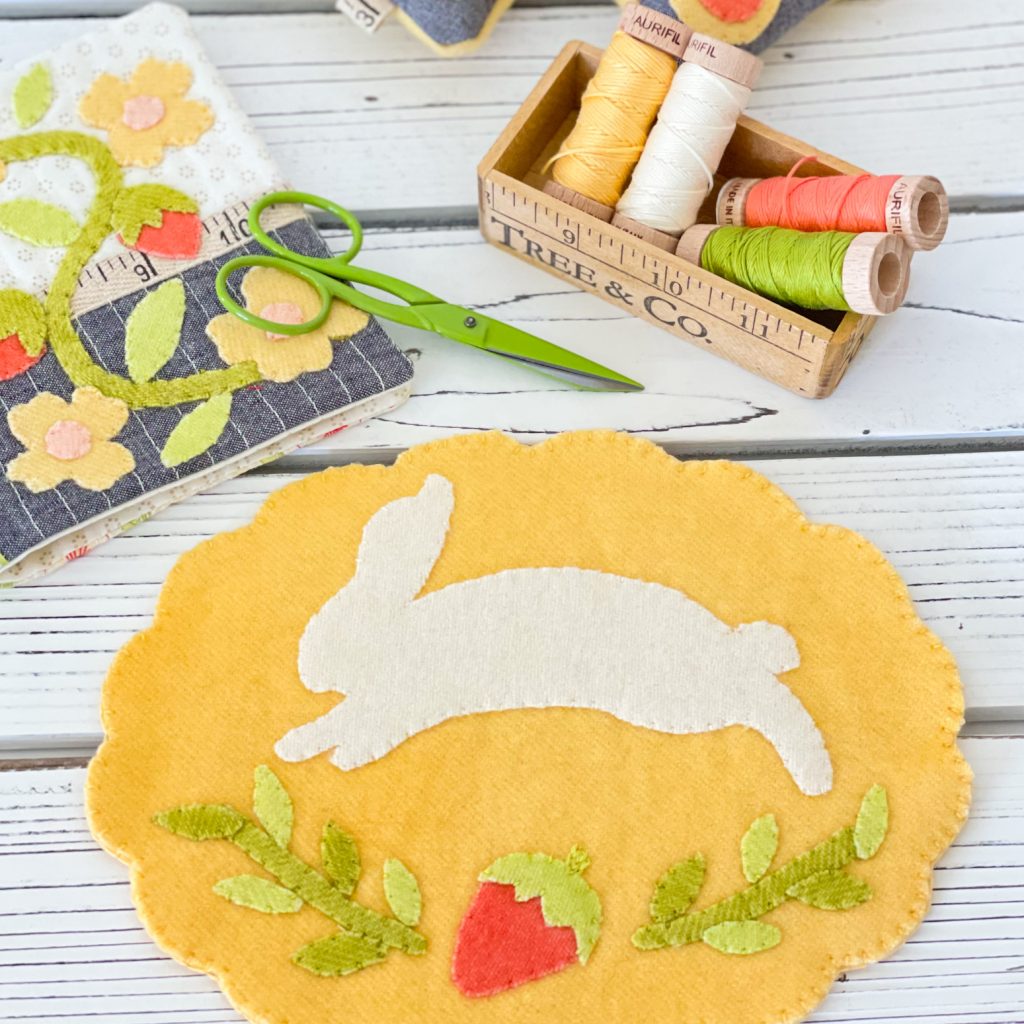
Step 5: Hand stitch with a buttonhole stitch around both layers of yellow wool to complete your project.
We hope you enjoy making a Springtime Bunny Mat of your own! Tag us on Instagram or show off your Springtime wool goodies in our Facebook Friends group here.