
Moda Blockheads: Block #18
Welcome to Week #18 of the MODA BLOCKHEADS SEW ALONG!
Hello on this beautiful Friday in Northern California! We finally have a day of sunshine after many gloomy chilly ones!
This week we are back around to the infamous Jan Patek with her fabulous primitive styled applique. Check out her lovely applique block through her link HERE and download the pattern directions.
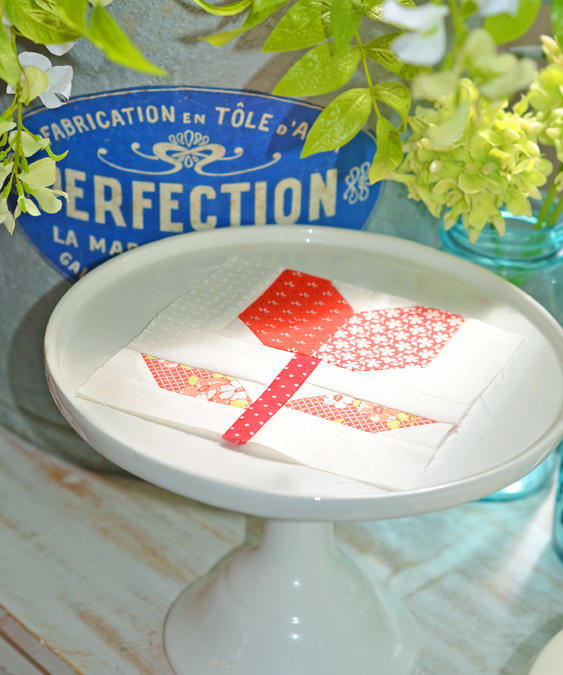
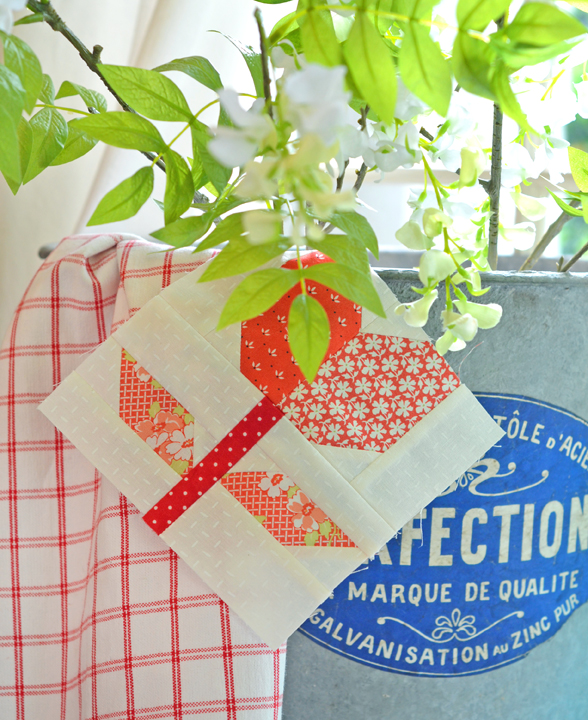
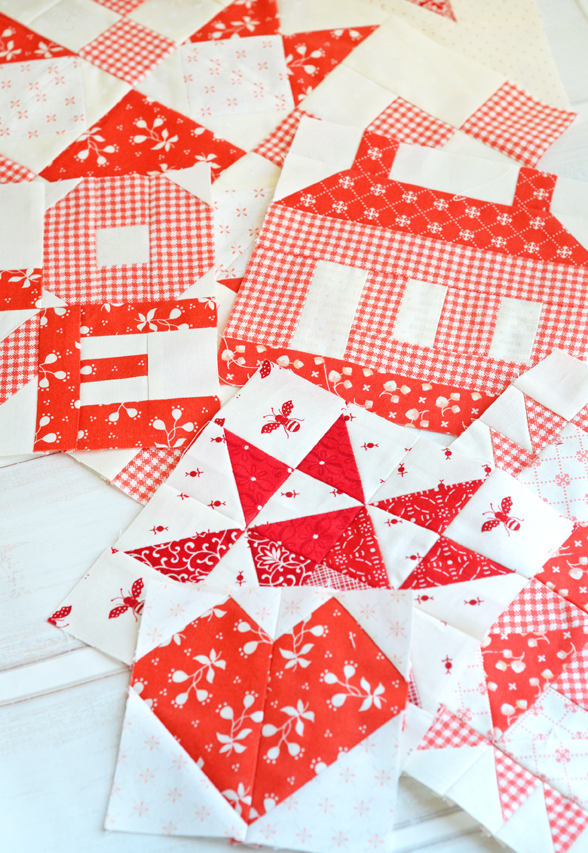
If applique just isn’t your thing or you just don’t have the time or energy to work on a technique that is not “in your wheel house”… we did a cute little alternate block this week! Our version called TULIP BLOOM…
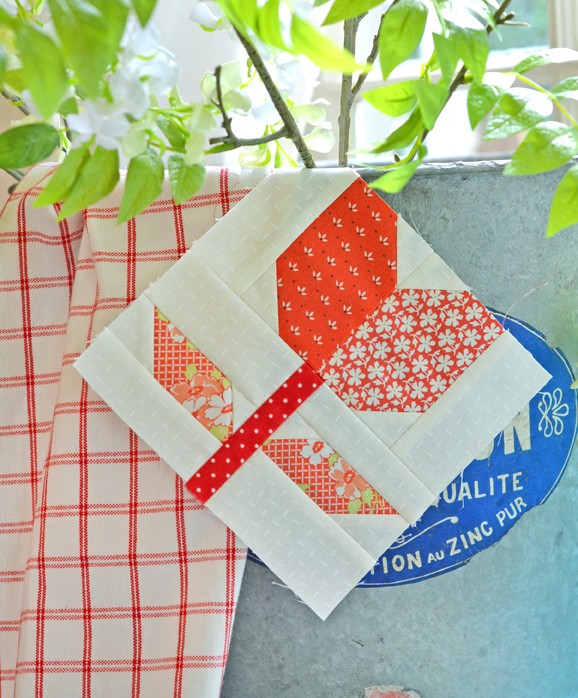
We decided to stay with the blooms motif like Jan but thought I would just go with a simple pieced flower using simple piecing and my favorite SEW&FLIP method. We made the 6″ flower and think that this is the perfect size for this block so that it is not too giant and not so small that it is crazy hard to piece.
But of course I know that many of you will need it in other sizes. For a 12″, you would do (4) of this block and lay it out as a quartet. ALSO I WILL BE ADDING ADDITIONAL MEASUREMENTS for an 8″ size THIS WEEKEND as that is the first chance I will get to sit down and do some extra math.
CUTTING INFORMATION FOR 6″ BLOCK
- Petals: (2) 2 1/2″ x 3 1/2″ [a] [I chose 2 different prints]
- Stem: 1″ x 3 1/2″ [b] [ I chose a darker red print]
- Leaves: (2) 1 1/2″ x 3 1/4″ [c] [ I chose the same floral print for both]
- Background for tulip: (4) 1 1/2″ x 1 1/2″ squares [d] and (2) 1 1/2″ x 3 1/2″ [e]
- Background for leaf set: (2) 1 1/4″ x 3 1/4″ [f], (2) 1 3/4″ x 3 1/4″ [g], (2) 1 1/4″ x 1 1/4″ [h] squares and (2) 1 1/2″ x 1 1/2″ [i] squares.
CUTTING INFORMATION FOR 8″ BLOCK
- Petals: (2) 3 1/4″ x 4 1/2″ [a] [I chose 2 different prints]
- Stem: 1 1/4″ x 4 1/2″ [b] [ I chose a darker red print]
- Leaves: (2) 1 3/4″ x 4 1/8″ [c] [ I chose the same floral print for both]
- Background for tulip: (4) 1 3/4″ x 1 3/4″ squares [d] and (2) 1 3/4″ x 4 1/2″ [e]
- Background for leaf set: (2) 1 1/2″ x 4 1/8″ [f], (2) 2 1/4″ x 4 1/8″ [g], (2) 1 1/2″ x 1 1/2″ [h] squares and (2) 1 3/4″ x 1 3/4″ [i] squares.
CUTTING INFO FOR 12″ BLOCK
- Use the info for 6″ blocks above and make (4) identical blocks.
PIECING & ASSEMBLY INFORMATION
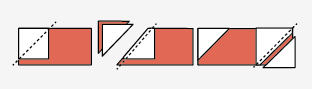
FOR THE FLOWER Add the (d) squares to 2 opposite corners of each of the petals [a]. Use the SEW&FLIP method. Be sure that you are adding the squares mirror image from each other. Press out. Join those 2 petals together. Add [e] to each side.

FOR THE LEAVES: For each leaf, add the smaller [h] square to the corner closest to the stem. Use SEW&FLIP and press out. Add the larger [i] square to the corner on the outside of each leave. Use SEW&FLIP and press out. For the RIGHT LEAF, add [f] to the top of the leaf and [g] to the bottom and press out. For the LEFT LEAF, do the opposite and add [g] to the top of the leaf and [f] to the bottom. Sew and press out.
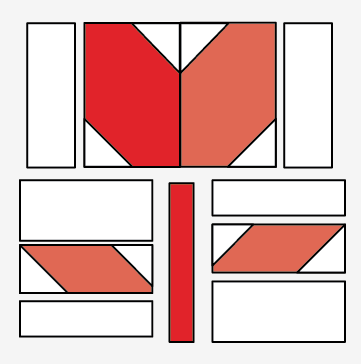
FOR THE STEM: Add RIGHT LEAF to the right and LEFT LEAF to the left of the stem. Press toward stem. Add the stem section to the bottom of the flower section Press open. Enjoy!
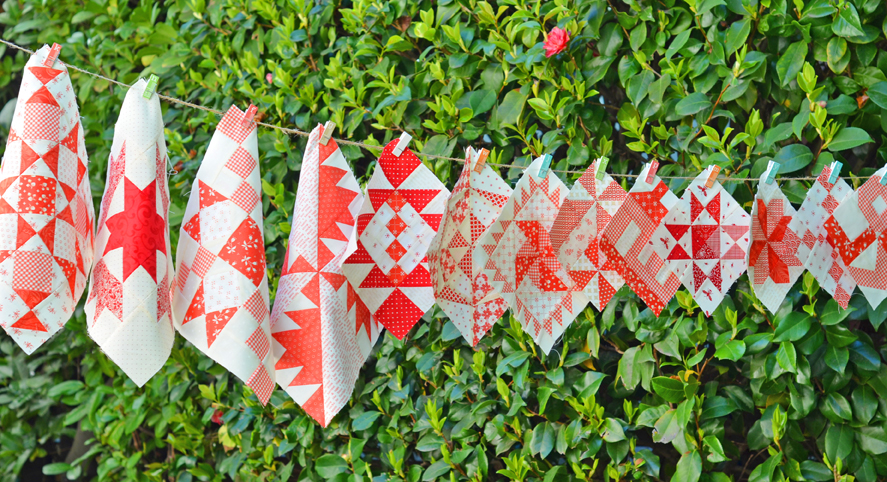
In case you missed it, here is our little VIDEO HERE of our first 14 Blockhead blocks from the first round!

=========================================================
BLOCK RESOURCE
CLICK HERE FOR THE ARCHIVE OF ALL OF THE MODA BLOCKHEADS 3 BLOCKS WE HAVE HAD SO FAR!
This Archive will be updated each week by MODA, in descending chronological order, with the newest block at the top. This is such a fabulous resource! We will keep this link in each week’s post here ON OUR BLOG as a resource.
If you have any questions at all, ask me in the comments below. Happy sewing friends!
=================================================
IMPORTANT DIRECT LINKS THAT YOU MIGHT WANT TO KNOW
LINK TO INSTAGRAM HERE. Instagram is the main social media that we use. I post photos every day, talk about my latest projects, show inspiration photos and generally post about my fabric and farm love with all of you!
LINK TO OUR FIG TREE FACEBOOK GROUP HERE. Our Fig Tree Friends Facebook group is a new addition in the last year and it is a great place to see what others are working on with Fig Tree fabrics, see people’s progress on our programs and follow along on general Fig Tree Facebook updates all in one place.
LINK TO SIGN UP FOR OUR EMAIL NEWSLETTER HERE. Newsletter comes out each week on Friday with latest goodies, upcoming releases, any sales or new kits and our $6 pattern of the week.
LINK TO OUR SHOP IN CASE YOU WOULD LIKE TO BROWSE HERE. Come check out our patterns, bundles and kits!
BLOCKHEAD DESIGNER LIST
Here is a list of all the designers participating this year in the order that they have posted their weekly blocks. We are starting “round 2” so each designer already has one block on their block and we are now starting again at the top. Go check them out! They are a great group of ladies!
1.15 – Corey Yoder – https://corianderquilts.com/
1.22 – Sherri McConnell – https://www.aquiltinglife.com/
1.29 – Betsy Chutchian – https://betsysbestquiltsandmore.blogspot.com/
2.5 – Jan Patek – https://janpatek.blogspot.com/
2.12 – Brigitte Heitland – https://www.brigitteheitland.de/blog
2.19 – Lisa Bongean – https://lisabongean.com/
2.26 – Lissa Alexander – https://modalissa.com/
3.4 – Laurie Simpson – https://minickandsimpson.blogspot.com/
3.11 – Vanessa Goertzen – https://lellaboutique.blogspot.com/
3.18 – Stacy Iest Hsu – https://www.stacyiesthsu.com/blog/
3.25 – Robin Pickens – https://www.robinpickens.com/
4.1 – Janet Clare – https://janetclare.co.uk/blog/
4.8 – Jen Kingwell – www.jenkingwelldesigns.com/blog
4.15 – Joanna Figueroa – https://blog.figtreeandcompany.com/
Mary Ann Cooke | 17th May 20
Hi Joanna, I was able to create a pdf for this block and also your LOVE block #5 and it only took me about 10 seconds. I think the main thing is you have to have the Adobe pdf software, which I have. If you would like me to share these pdfs with you so you can share with others, I’m happy to do so. Email me!
Linda Burr | 18th May 20
Mary Ann Cooke…I would love it if you would be willing to share the pattern that you took the time to figure out and put on a pdf. Would be forever grateful…If you are willing, you may contact me thru facebook….thanks.
joanna@figtreequilts.com | 27th May 20
We will not be able to make it into a PDF but you can print out the whole post if you like. Thanks so much,
Diana | 19th May 20
I am having problems with the eight inch block.
The tulip part was great but the bottom part is not measuring quite right. It comes out 1/4 to small vertically. Can you take a look at it? My engineering husband has figured it several times and it seems something is off.
Thank you
joanna@figtreequilts.com | 27th May 20
Someone wrote these up for me so I just double checked them. The stem is the correct size. But it looks like you need to add a bit more to the background pieces on the top and bottom of the leaves. Try these measurements….
Background for leaf set: (2) 1 1/2″ x 4 1/8″ [f], (2) 2 1/4″ x 4 1/8″ [g], (2) 1 1/2″ x 1 1/2″ [h] squares and (2) 1 3/4″ x 1 3/4″ [i] squares.
Libby | 20th May 20
Is there a pdf file for this so I can print it very pretty and would like to add to mine your blog is wonderful
Shannon Stewart | 20th May 20
I have also had a problem with the 8 inch block. I ended up sewing a strip along the bottom of the block to get it to a full 8 1/2 inches. Other than that, it’s a fabulous block!
joanna@figtreequilts.com | 27th May 20
See answer below if you are looking to ever do it again.Thanks so much!
Diana | 27th May 20
Thank you for the new measurements. This block is so cute. I could see it repeated for a scrap quilt.
Thanks again for all the inspiration and great instruction. The Flip and Sew method is the way to go!
Thanks again!
joanna@figtreequilts.com | 1st Jun 20
Thank you so much. It is absolutely my favorite method!
Pat C | 28th May 20
Thank you very much for the explanation of Blockheads 3 and the alternates. I really understand now. And thank you for the instructions and measurements for the Tulip block today. You have gone above and beyond for me. Thank you from the bottom of my heart. I love your tulip block.
joanna@figtreequilts.com | 1st Jun 20
You are so very welcome 🙂
Janet Ward | 9th Jun 20
I am trying to find the written pdf for the Tulip Bloom. I am trying to get all the patterns as I can to print out so I can make them where possible . But I can’t form the pdf for this block. Please help me…
Sincerely & Thank You
Jan Ward
joanna@figtreequilts.com | 9th Jun 20
It is not a PDF, just a part of our blog. You could always screen shot the sections that interest you and make it into a pdf that way. Happy Quilting~