
MODA Blockheads: Block #11
Welcome to Week #11 of the MODA BLOCKHEADS SEW ALONG! This week is brought to you by the super lovely Robin Pickens. She is such a talented and creative soul and so full of energy & positivity. It has been a pleasure to get to know her a bit more during the last couple of shared events… like our big Chinese dinner after Road to California. Gotta love a huge… and I mean huge… lazy susan in the middle of the table, right Robin?! Check out her blog HERE. Go check out her fabulous block and her work. I think you will be inspired! It is called BLOOMING LOVE… and it is such a unique block. It was fun to work with the color placement on this one.
Go over to her blog to check out her pattern and get all of the directions, etc. CLICK HERE .
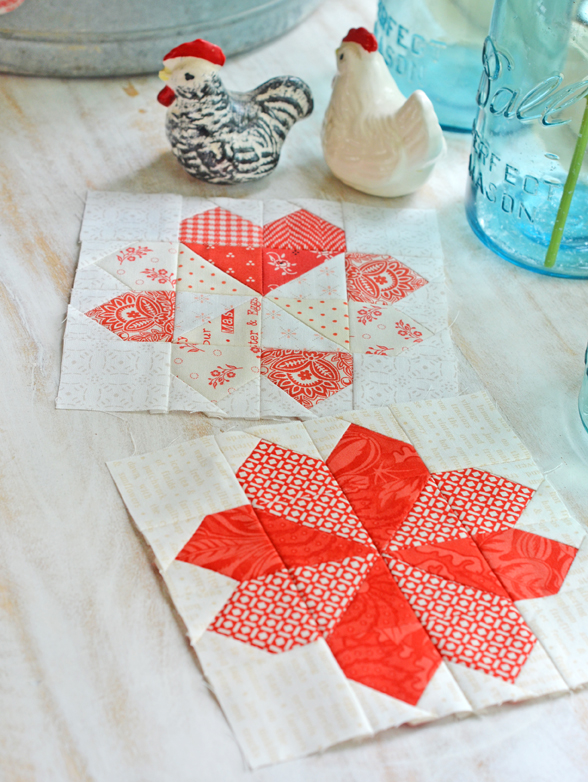
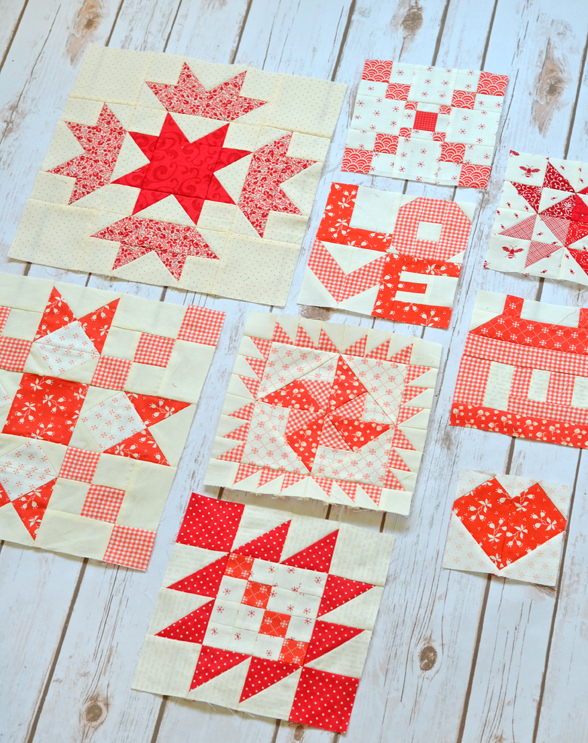
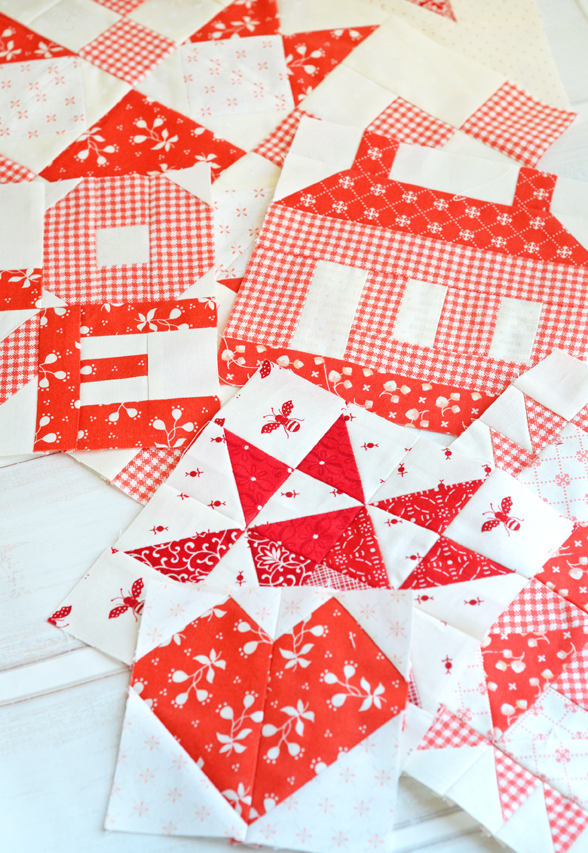
So as you can see we made 2 versions of this block. We chose the 6″ size and for the first attempt, we focused on the just the top heart and chose red fabrics to make it stand out. We did softer creams with reds for the rest to make them fade a bit into the background. But we weren’t sure about that version, so we tried it again.
This time we chose 2 reds, one much lighter than the other [purely by the amount of white mixed in], so that one set of petals would stand out against the one next to it. And voila… a blooming heart it is. We love this one but might just use both blocks in our final layout!
And those chickens are 2 of my favorite little flea market finds… boy and girl chickens. Love.
We chose to do the 6″ size and since we like to trim all of our 1/2-square triangles down, we ONCE AGAIN changed the size of each of the [d] squares to cut 2 1/2″ square, made our triangle squares and them trimmed each of them down to a perfect 2″ square, ready for pinwheel piecing. If you are doing a different size block and want to upsize the triangles a bit so you have room to trim… For a 4″ finished size block, cut your [b] 2″ square, for the 6″ finished block size, cut [b] 2 1/2″ square, for the 8″ finished block size, cut [b] 3″ square and for the 12″ finished block size, cut [b] 4″ square. The rest of the directions don’t change from the original.
LAYOUT
MODA has released the layout that we will be using as our choice, CLICK HERE for the PDF of the LAYOUT… we will be making option #2. Toward the end, we will make some final alternations but this will be our general layout throughout the program. We will also add in a few creative sashings at the end.
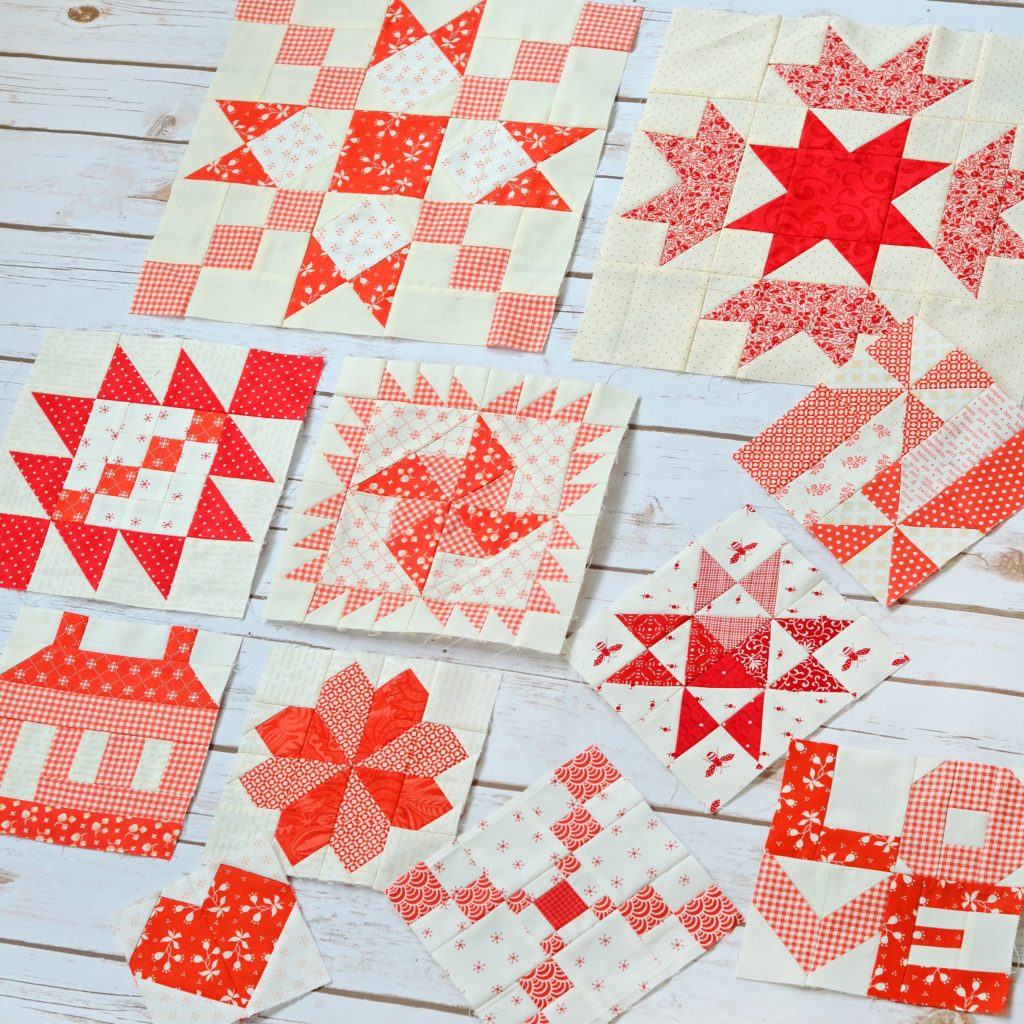
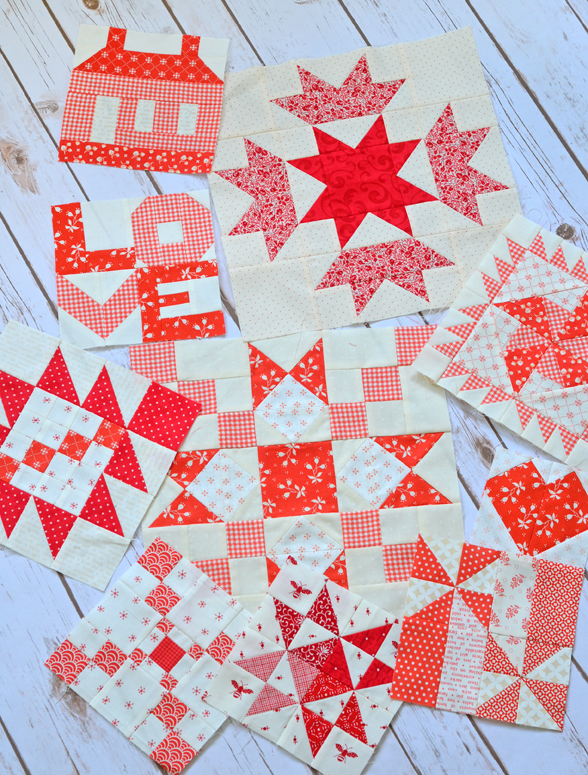
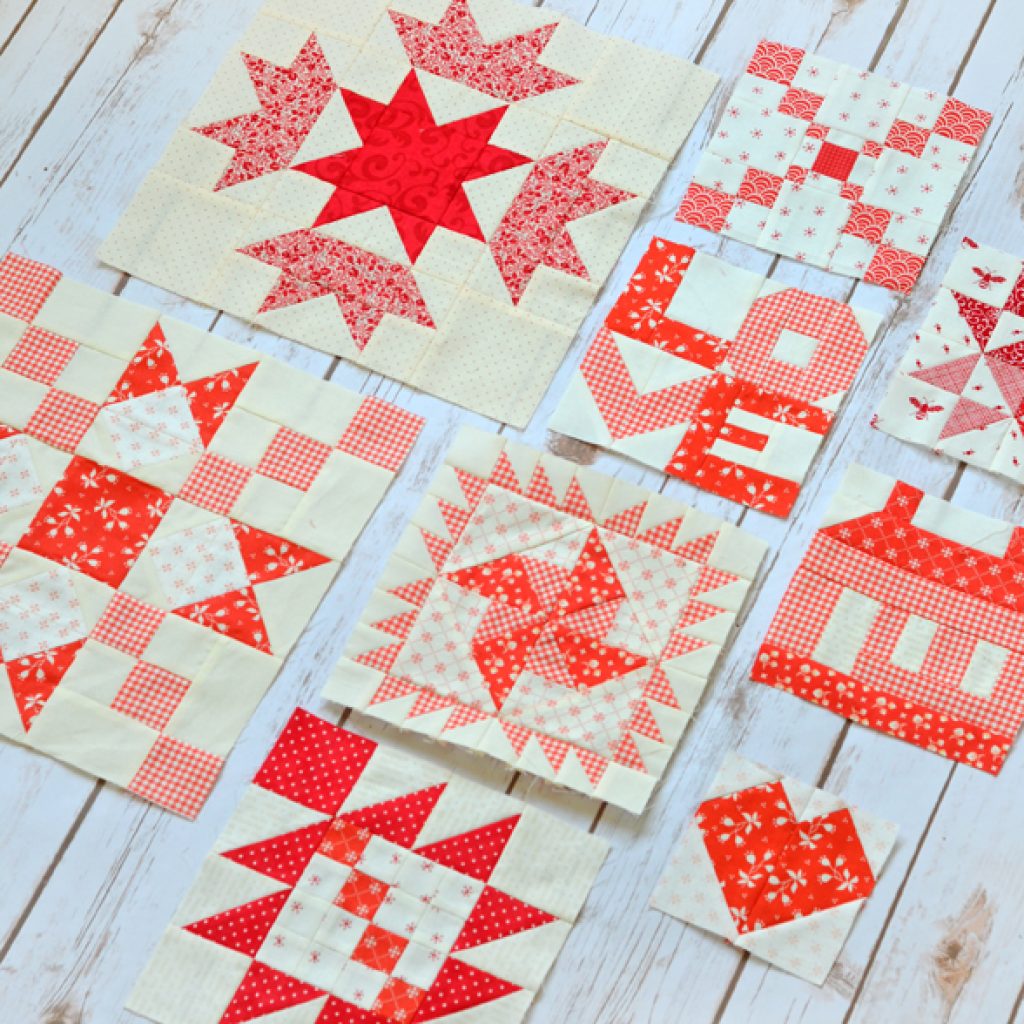
But for those of you who are wanting to work along with us, this is the tentative block breakdown [plus fillers] that we will be using:
12″ blocks: We will need to make 13.
8″ blocks: We will need to make 10.
6″ blocks: We will need to make 36.
4″ blocks: We will need to make 8 blocks. It is very likely that we might make a few more of Lissa’s sweet heart from last week.
Our quilt will be somewhere around 64″ x 72″… I say “somewhere” because once we add in a few filler rows, it might grow a little bit here or there.
BLOCK RESOURCE
CLICK HERE FOR THE ARCHIVE OF ALL OF THE MODA BLOCKHEADS 3 BLOCKS WE HAVE HAD SO FAR!
The Archive will be updated each week by MODA, in descending chronological order, with the newest block at the top. This is such a fabulous resource! We will keep this link in each week’s post here as a resource.

If you have any questions, ask me in the comments below. Happy sewing friends!
Here is a list of all the designers participating this year in the order that they will post their weekly blocks…
This week: Robin Pickens – https://www.robinpickens.com/
1.15 – Corey Yoder – https://corianderquilts.com/
1.22 – Sherri McConnell – https://www.aquiltinglife.com/
1.29 – Betsy Chutchian – https://betsysbestquiltsandmore.blogspot.com/
2.5 – Jan Patek – https://janpatek.blogspot.com/
2.12 – Brigitte Heitland – https://www.brigitteheitland.de/blog
2.19 – Lisa Bongean – https://lisabongean.com/
2.26 – Lissa Alexander – https://modalissa.com/
3.4 – Laurie Simpson – https://minickandsimpson.blogspot.com/
3.11 – Vanessa Goertzen – https://lellaboutique.blogspot.com/
3.18 – Stacy Iest Hsu – https://www.stacyiesthsu.com/blog/
3.25 – Robin Pickens – https://www.robinpickens.com/
4.1 – Janet Clare – https://janetclare.co.uk/blog/
4.8 – Jen Kingwell – www.jenkingwelldesigns.com/blog
4.15 – Joanna Figueroa – https://blog.figtreeandcompany.com/
kleg | 25th Mar 20
Just s suggestion to everyone…..you really don’t need to draw a diagonal line on all of those tiny sew-and-flip ( snowball) squares. It’s such a short distance to sew…, easy to get it right without the line. Try it!
joanna@figtreequilts.com | 25th Mar 20
I absolutely agree… I only draw a line on bigger squares. Use tape or something as a marker on medium size squares and eyeball the little ones like this one.
Paula Vohs | 25th Mar 20
You are such a good cheerleader for this sew-along. Thank you
joanna@figtreequilts.com | 25th Mar 20
You are so welcome. So glad to hear it is helping 🙂
Greg | 25th Mar 20
Your blocks are beautiful! Thank you for writing about the blocks with very specific details every week – this is very helpful when I create my own blocks.
joanna@figtreequilts.com | 25th Mar 20
Trying to write down anything we do to change them up. Glad to hear they are helping!
Deb | 12th Apr 20
Just a quick question on this block…if we just make the one block (second one), will we end up lacking a block at the final layout? Would you suggest we all make the 1st version also? Or not necessarily? Thanks!
joanna@figtreequilts.com | 13th Apr 20
We will just count one version so you are good with one.