
WINTER WALK IN THE WOODS: WEEK #6
We Welcome You Back to the Winter Walk in the Woods Sew Along Week #6- Our Last Week Together!
From Susan: Welcome back to the final week of our Winter Walk in the Woods Quilt Along!
Joanna and I hope you have enjoyed sewing with us these past five weeks and that this sew along has helped pass the time for you during the cold and snowy days of January.
If you haven’t gotten to go out for your own Winter Walk in the Woods, I hope you get to go soon!
Since I know so many of you are anxious to see the final quilt layout, we will get right down to work with our final quilt assembly.
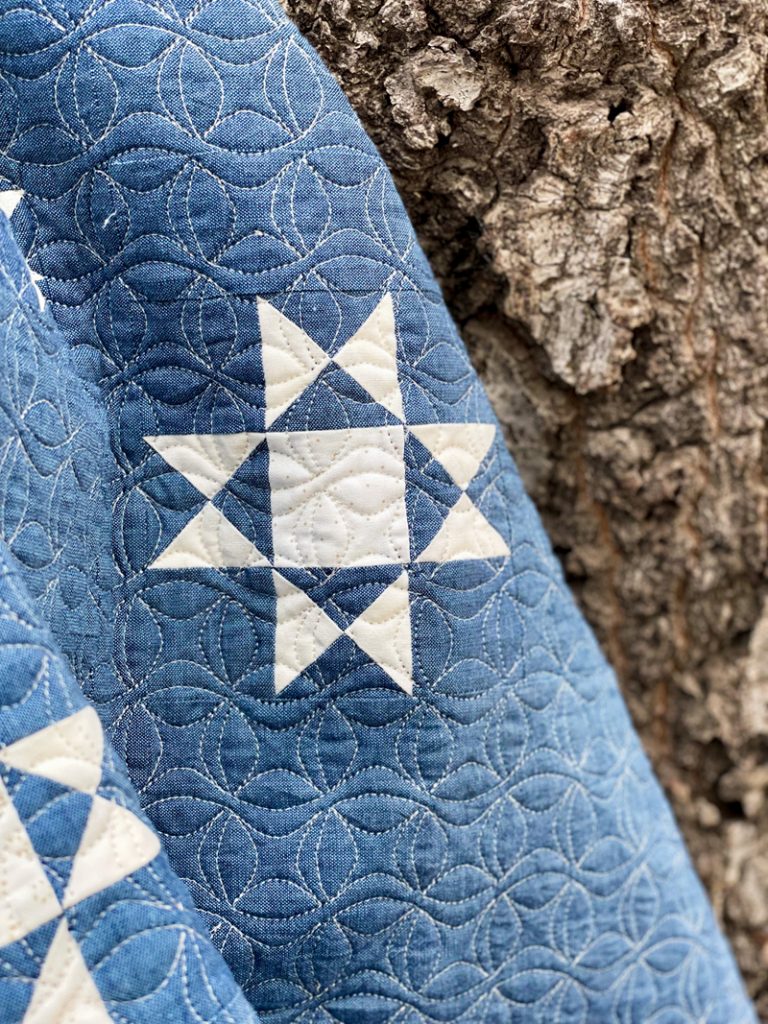
As Joanna and I have mentioned throughout this quilt along, there are many pieces that are similar sizes and shapes and it is easy to get things mixed up with your final assembly.
Be sure to cut your pieces carefully according to the notes below and label them as soon as you have cut them. I kept my labels pinned to each section while I sewed my quilt center and I found that, because I wasn’t second guessing which piece went where, it made the final assembly go very quickly.
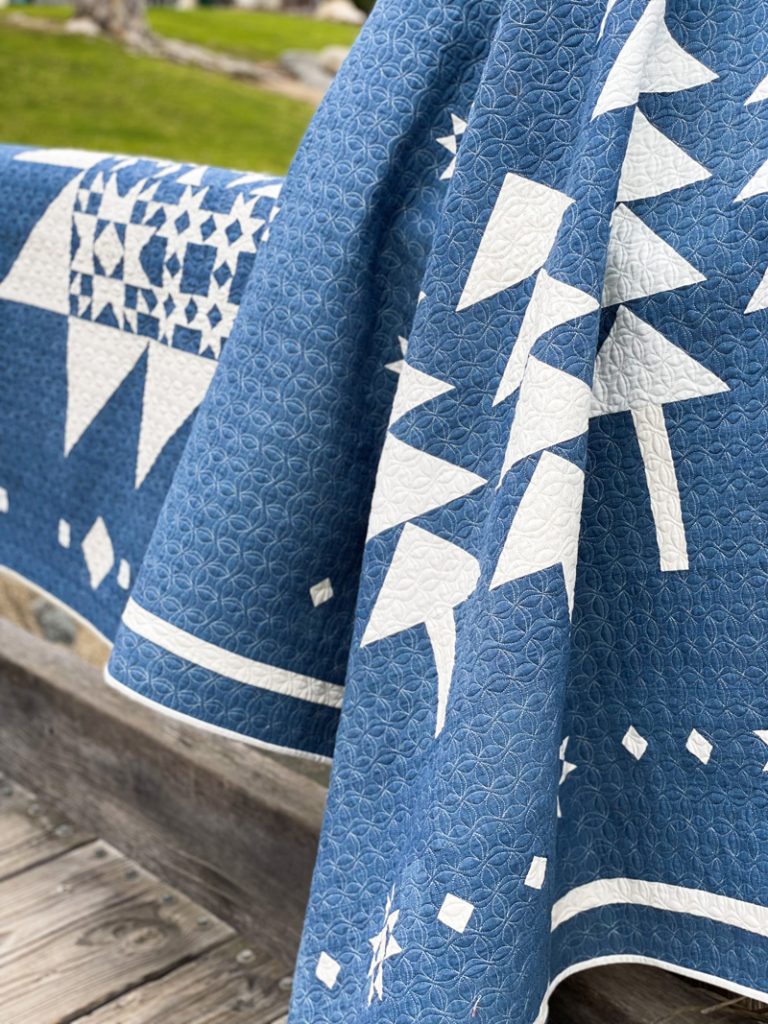
Lastly, take note of the size of each border as you cut and add them. Some of the border sizes vary in order to ensure the pieced borders fit.
EDIT: WINTER WALK PATTERN WILL BE AVAILABLE BEGINNING OF JAN 2024
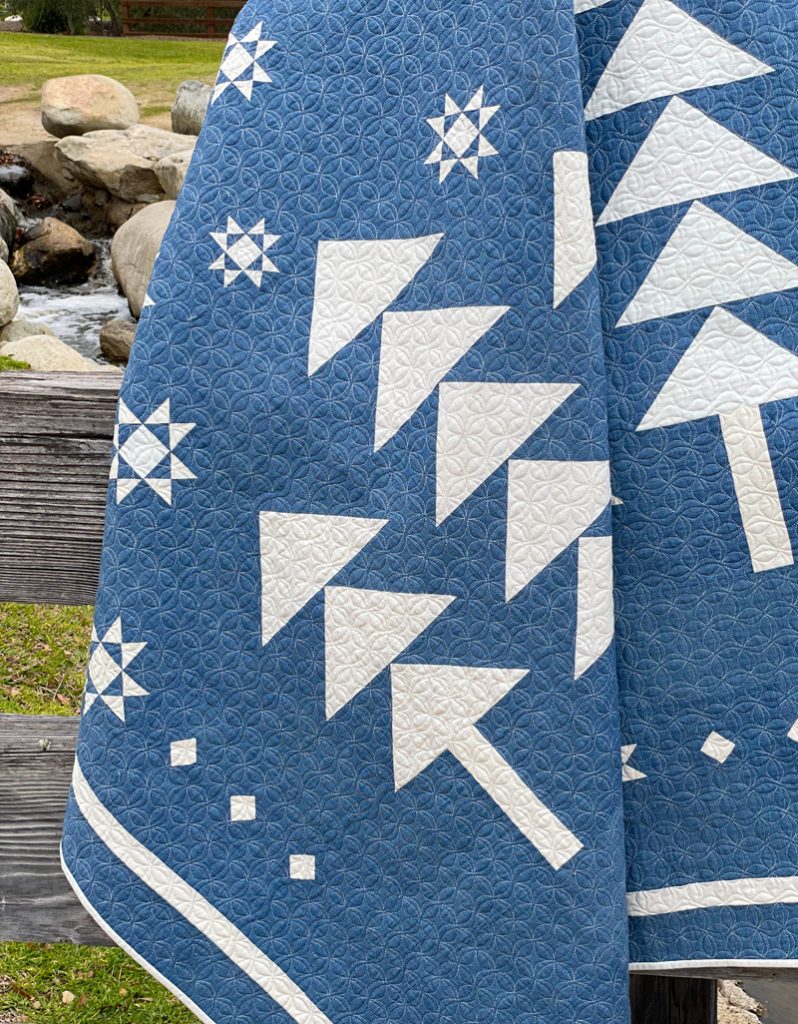
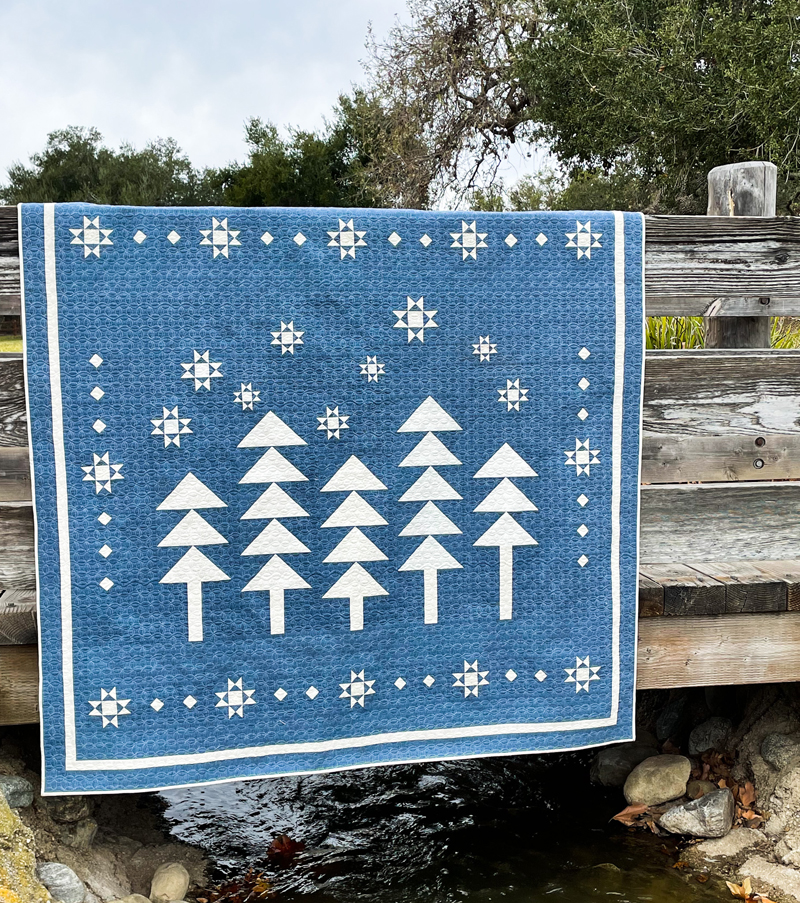
The final result is a soft, bold and striking design worthy of any winter decorating scheme, don’t you think?!
We’ve noted that Winter Walk in the Woods is a generous size throw quilt but wanted to keep the final dimensions as part of the mystery until the final week since we love a good surprise!
The quilt measures 69” x 69” and you will need 4 1/3 yard for your backing. I chose one of the small-scale cream backing sets Joanna offered in the shop for my quilt and I love the results!
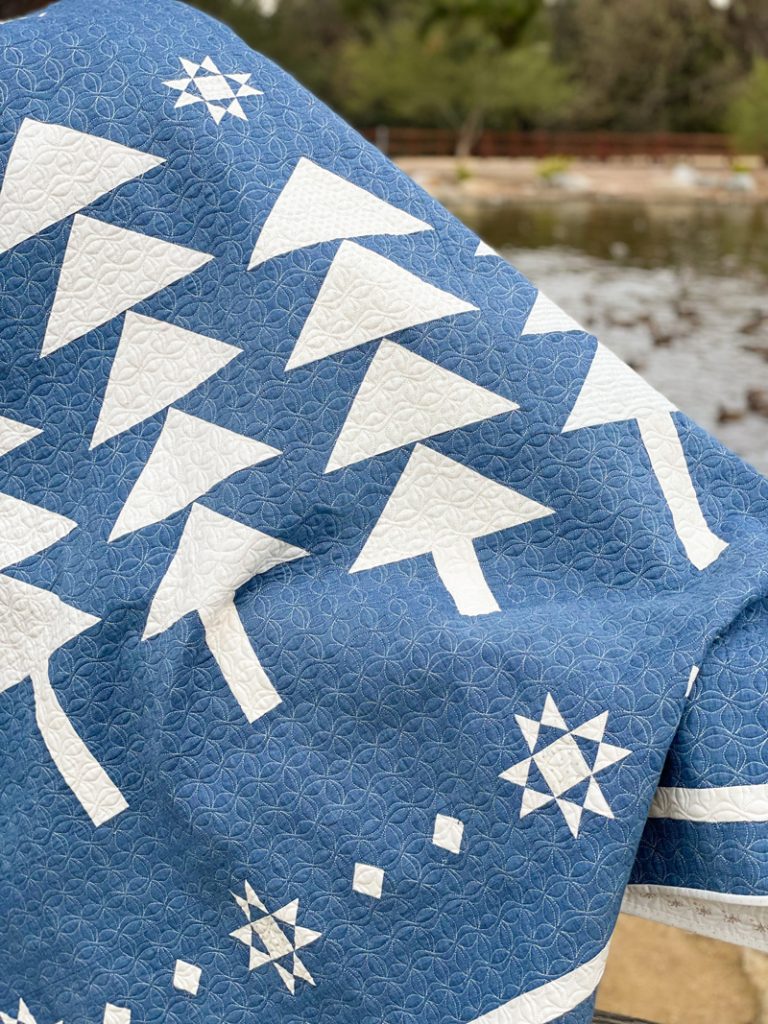
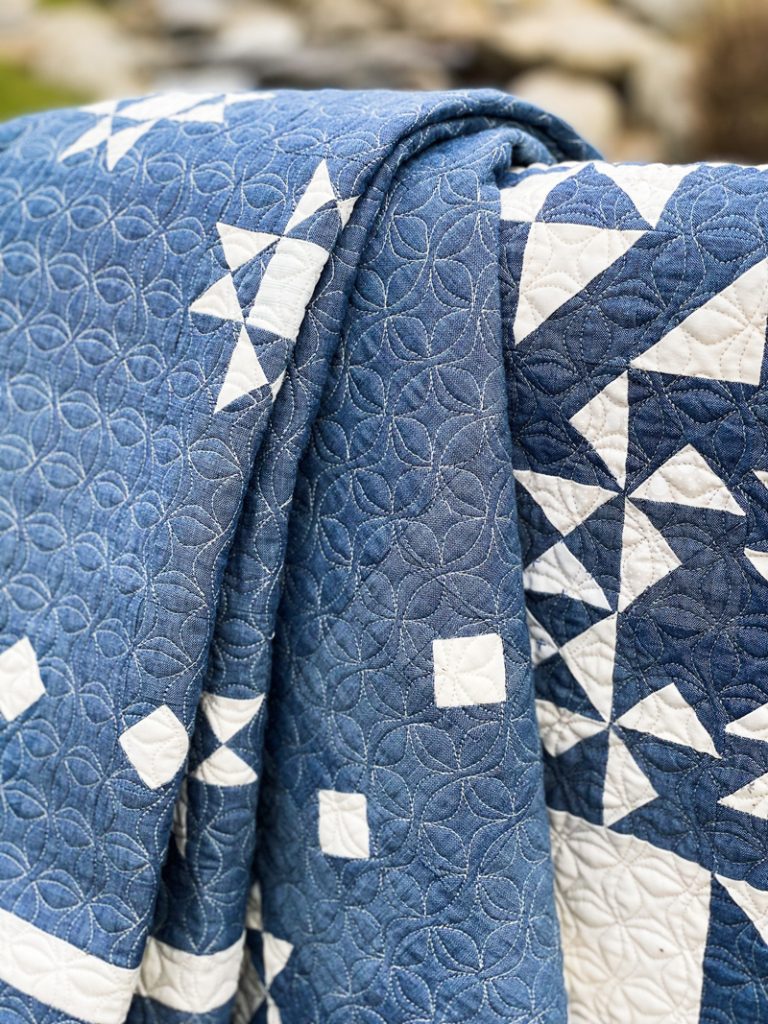
Step 11: Quilt as desired. We opted for a small-scale edge to edge design to create texture without taking away from the overall design. (Sample shown in Bread Basket by Apricot Moon)
Step 12: Bind using (8) 2 ¼” strips of a small ivory print of your choosing.
xoxox
Susan and Joanna
Please continue to tag Joanna or I on Facebook or Instagram with your final quilts. We love seeing all the background colors and textures you have chosen and the special details you have added to make your quilts your own.
Come follow along in our FACEBOOK GROUP to see all of the different versions that people are working on. There are SO MANY!! CLICK HERE to come and check it out!
Find all of the previous Winter Walk in the Woods posts here:
Karen S | 1st Feb 22
That is SO lovely!! What a great design! Thank you, Susan and Joanna, for another wonderful winter quilt!
Deborah | 1st Feb 22
👏👏Love the final product and am excited to work on the final step. Thank you for great instructions, pattern and experience!
Carol McC | 1st Feb 22
Ooh! This is dreamy and I can see me making it again in another color way! Thank you for such a fun graphic project in a wonderfully supported group!
Carolyn McIntosh | 7th Feb 22
This project was s much fun! Will there be a design for those bonus half square triangles we sewed?
sue gray | 11th Feb 22
Looking for the project using the left over half square triangles! Did I miss it??
Rita Holverson | 17th Feb 22
I’m signed up for the Daises and Buttercups Mystery Quilt. I received an email a few days ago about the finishing kit for this quilt. There were 2 choices and needless to say both kits were sold out. Will there be more finishing kits made up or do I need to find fabric elsewhere and if so, how much fabric would I need to purchase?
Thank You,
Rita Holverson
joanna@figtreequilts.com | 23rd Feb 22
We are hoping to have some more on Friday midday so check back through the link we sent you then!