
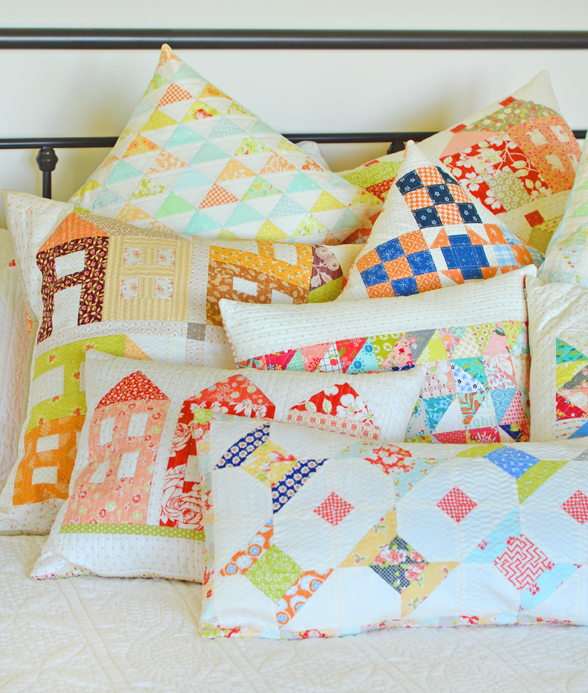
Scrapbook of Quilts: Week #2
Welcome to the second official week of our SCRAPBOOK OF FRIENDS PILLOW ALONG and our first week of actual projects! Be sure to check out what my partner in crime, Carrie [HERE on Instagram] has to add to the festivities too.
Carrie and I love working together and have really enjoyed collaborating on this book project over the last couple of years but we pretty much always do something a bit different so you will ALWAYS get two perspectives to everything if you follow along with us both!

WELCOME SPECIAL GUESTS: KIMBERLY JOLLY AND GREG JONES AND SUSAN VAUGHAN
We have a fun lineup of special guests who will join Carrie and I each week and we are really very excited to sew together each week… This week we have our friends Kimberly, Greg and Susan joining us.
They are all sharing their pillow photos and info via their INSTAGRAM feeds so please, please go check out the beauties that they have created for us to be inspired by! It is so much fun for me personally to see each person’s totally different interpretation of the block and the theme each week!
- To see Kimberly’s pillow [Click HERE or HERE]
- To see Susan V’s pillow [Click HERE].
- To see Greg’s pillow [Click HERE].
As a quick SUMMARY reminder of how this will work each week:
- We are working from our brand new book A SCRAPBOOK OF QUILTS and each week we are featuring one of the blocks in the book through a PILLOW ALONG, where we [and a few of our friends] each sew a different version of a pillow using that week’s block and theme as a way to inspire you to sew some pillows of your own along with us this summer!
- Each week Carrie and I will both post a new pillow design or idea on Instagram.
- Each week I will also post mine here on the blog and in my Facebook Group.
- If you want to see the goodies the above mentioned designers have done, you will need to go to their IG feeds as that is where they are sharing. So excited for what everyone will share each week!
THIS WEEK’S PILLOW THEME
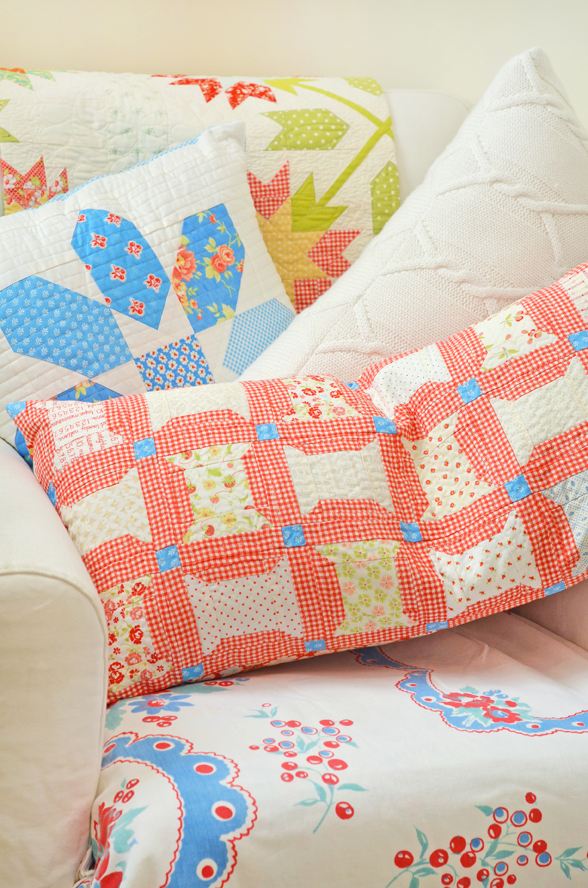
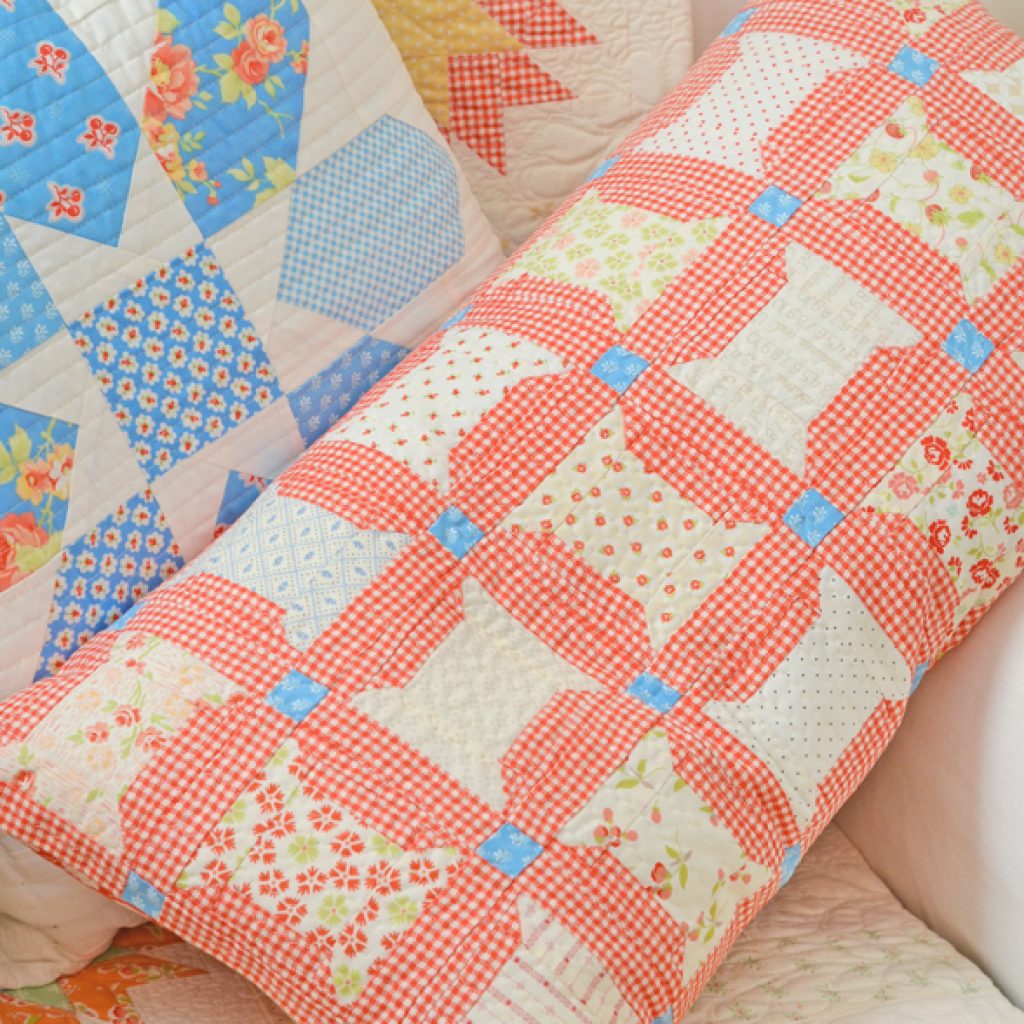
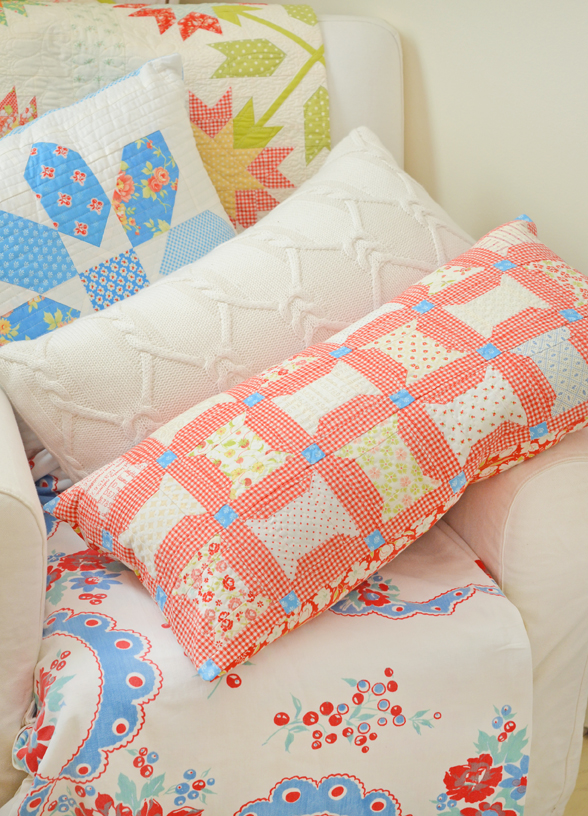
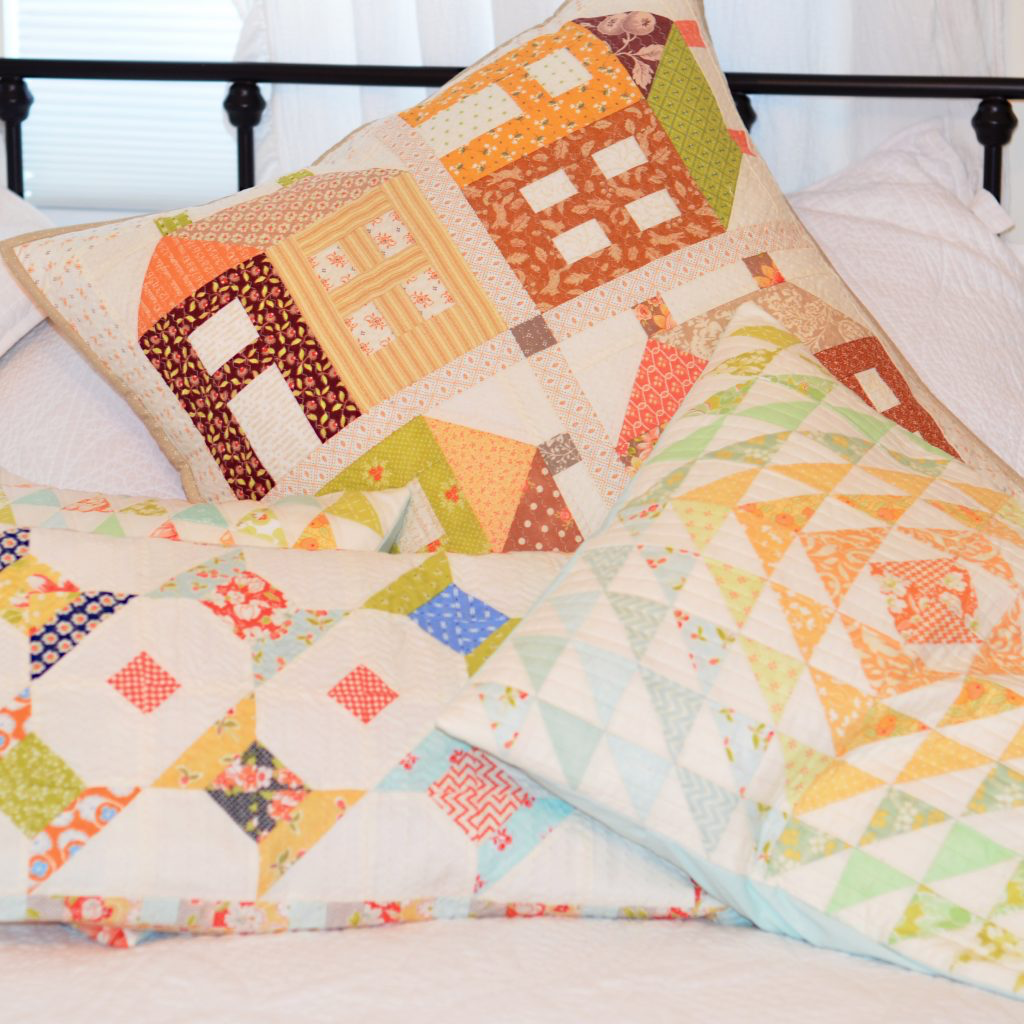
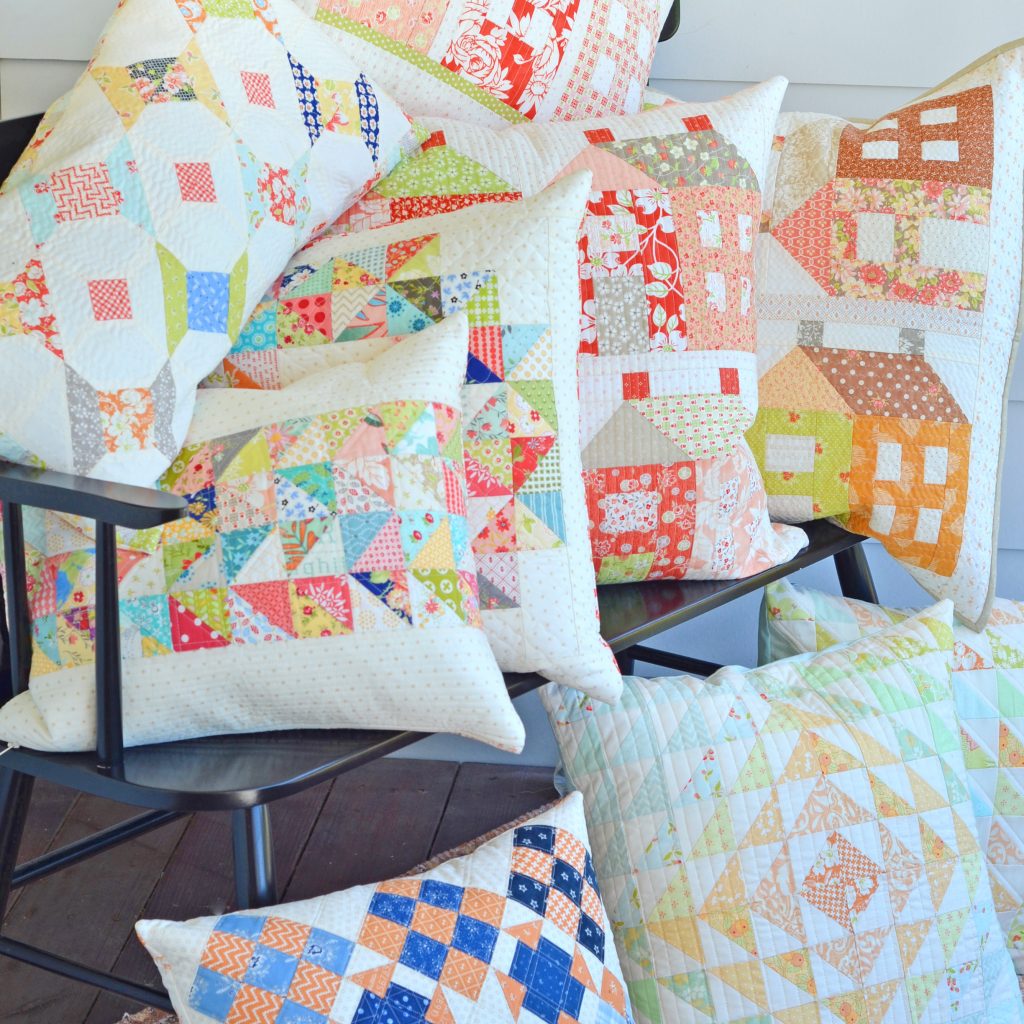
As you might have already guessed, this weeks pillow prompt is PATRIOTIC and we are working on the first block/quilt in the book which is the VINTAGE SPOOLS QUILT. If you are following along in the book, this block chapter begins on page 16. My particular pillow featuring these blocks in the book starts on page 36.
Now patriotic can be anything that communicates that to you… for some, it is very traditional and for others, it is a bit more whimsical or bright or romantic.
For me… patriotic quilts are closely tied to a summer vibe. I didn’t grow up in the US and came here as an elementary schoolgirl and my parents didn’t really celebrate any of the traditionally patriotic holidays. I think they were tremendously grateful to be here, but the holidays themselves just didn’t emotionally resonate with them if that makes any sense [we didn’t really celebrate Thanksiving either growing up].
Anyway! For me the patriotic theme in my quilting is something that I have come to love for what it means and also for the summer vibe it communicates of slowing down, taking some time, and reflecting on what we have and how grateful we are for that.
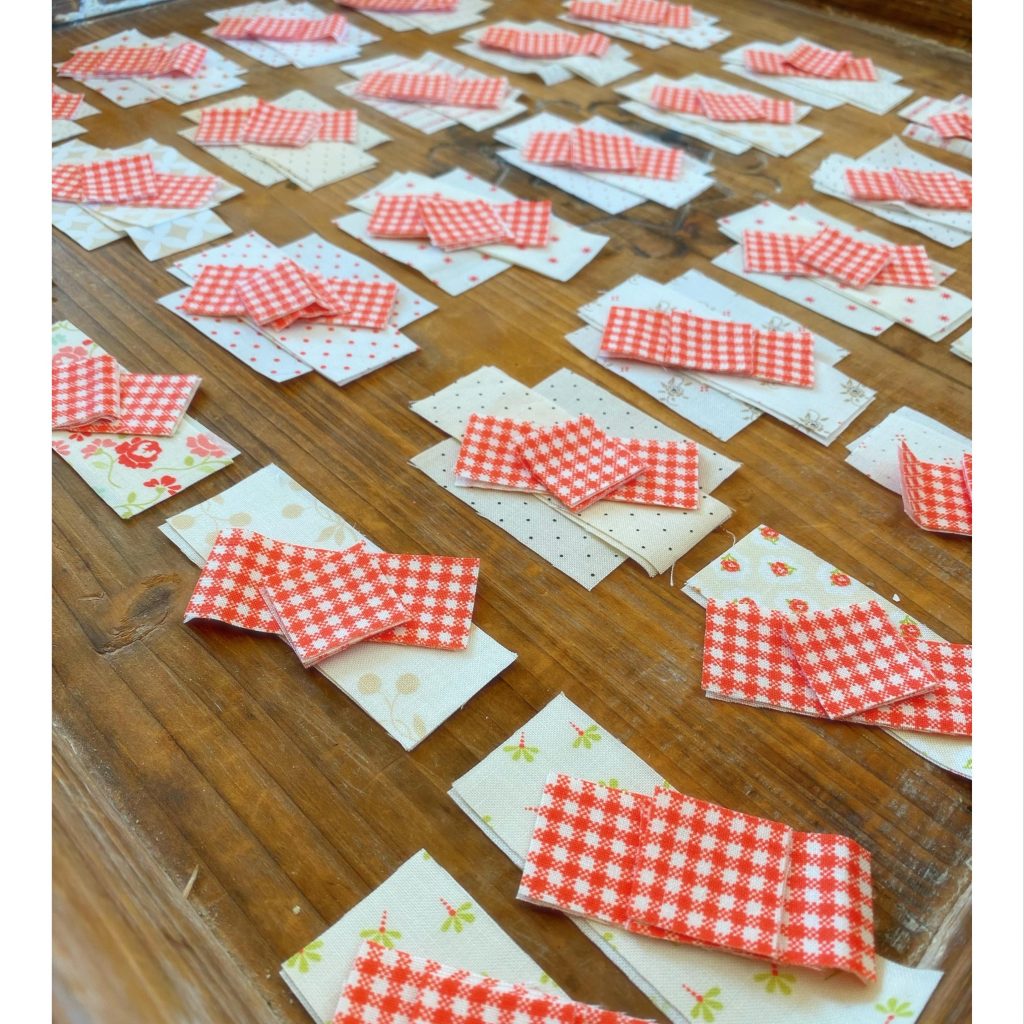
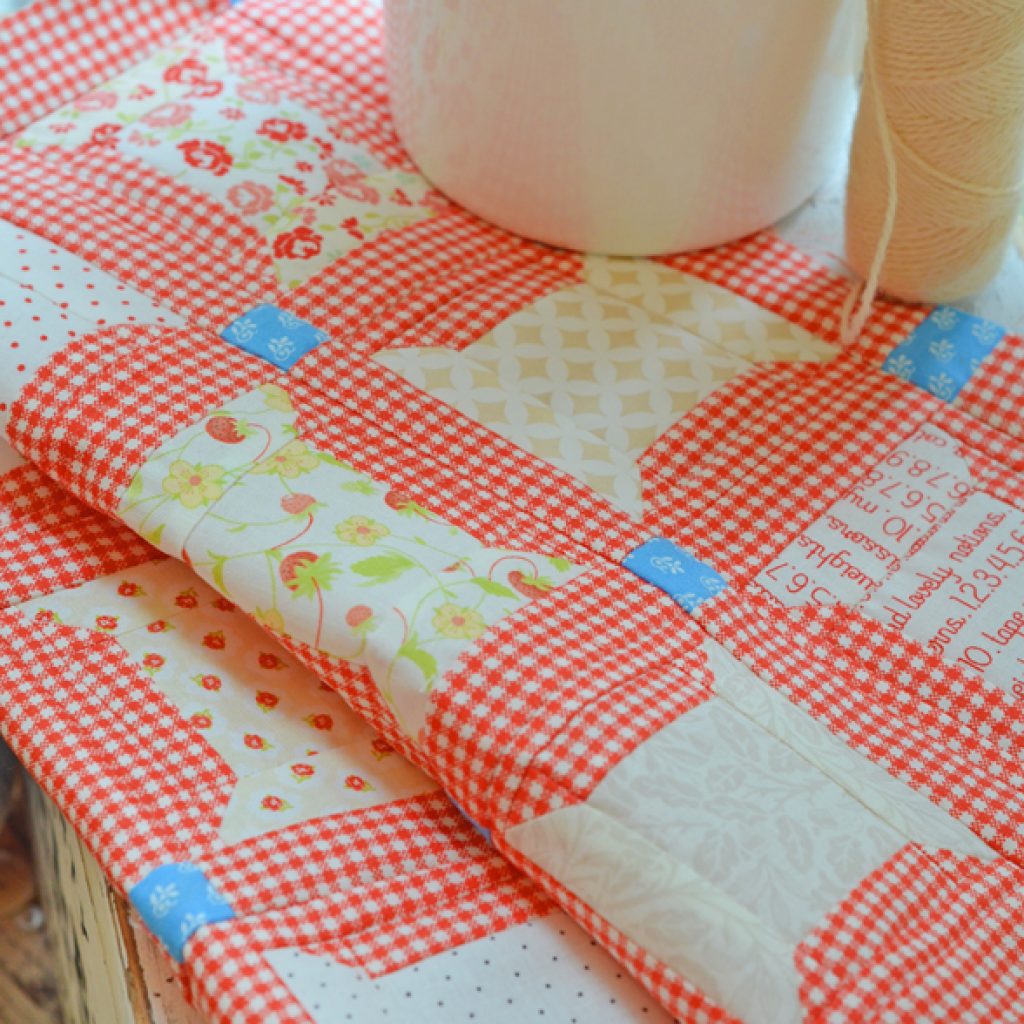
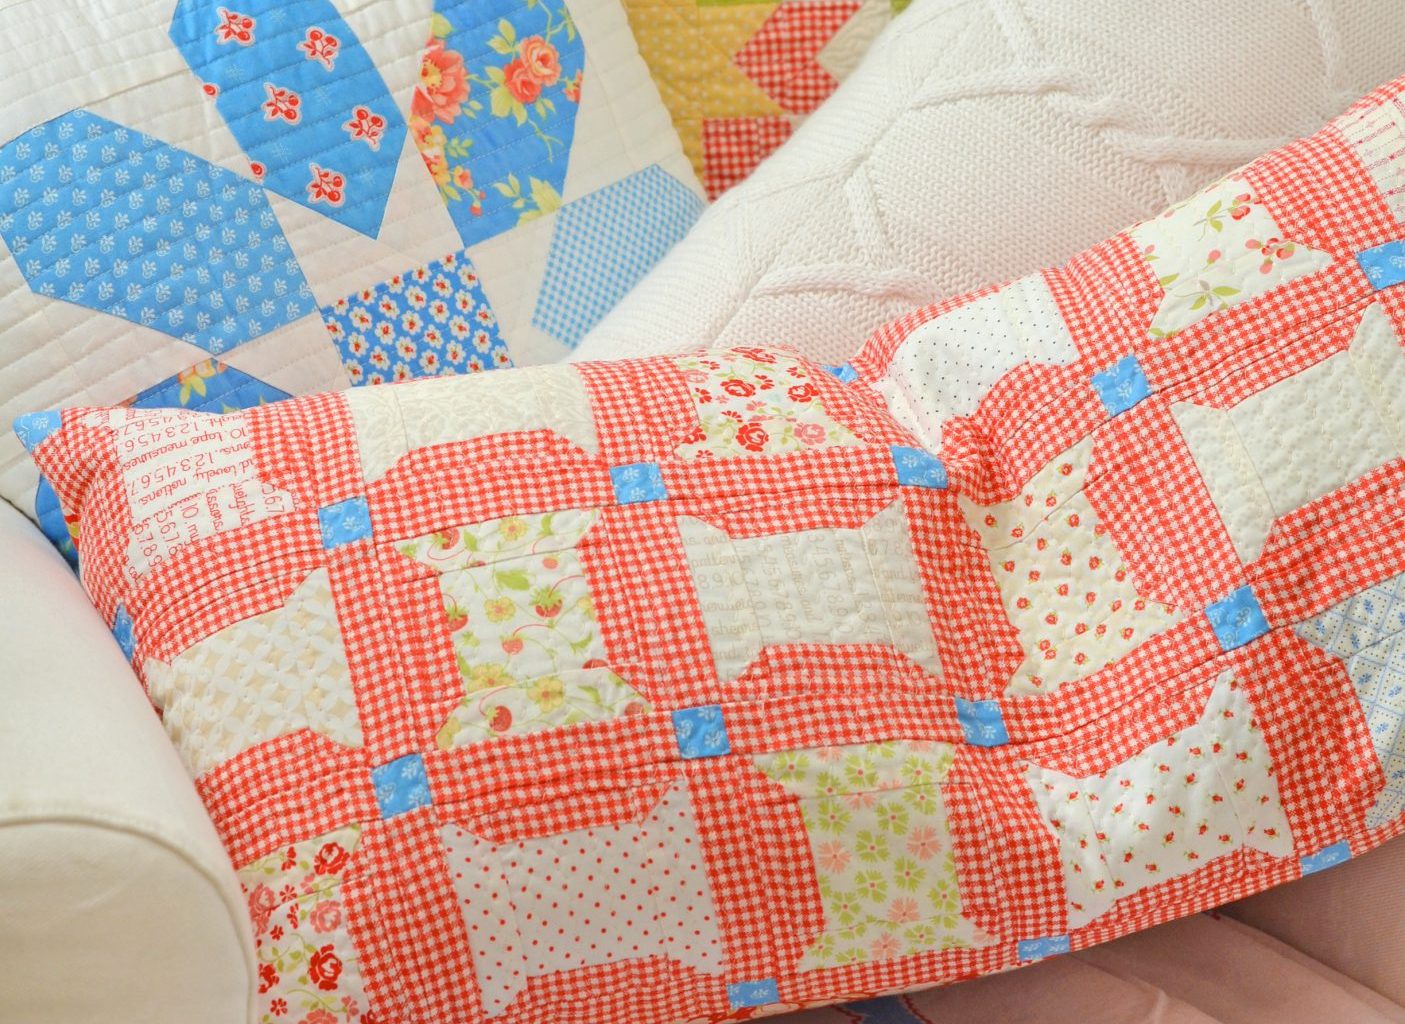
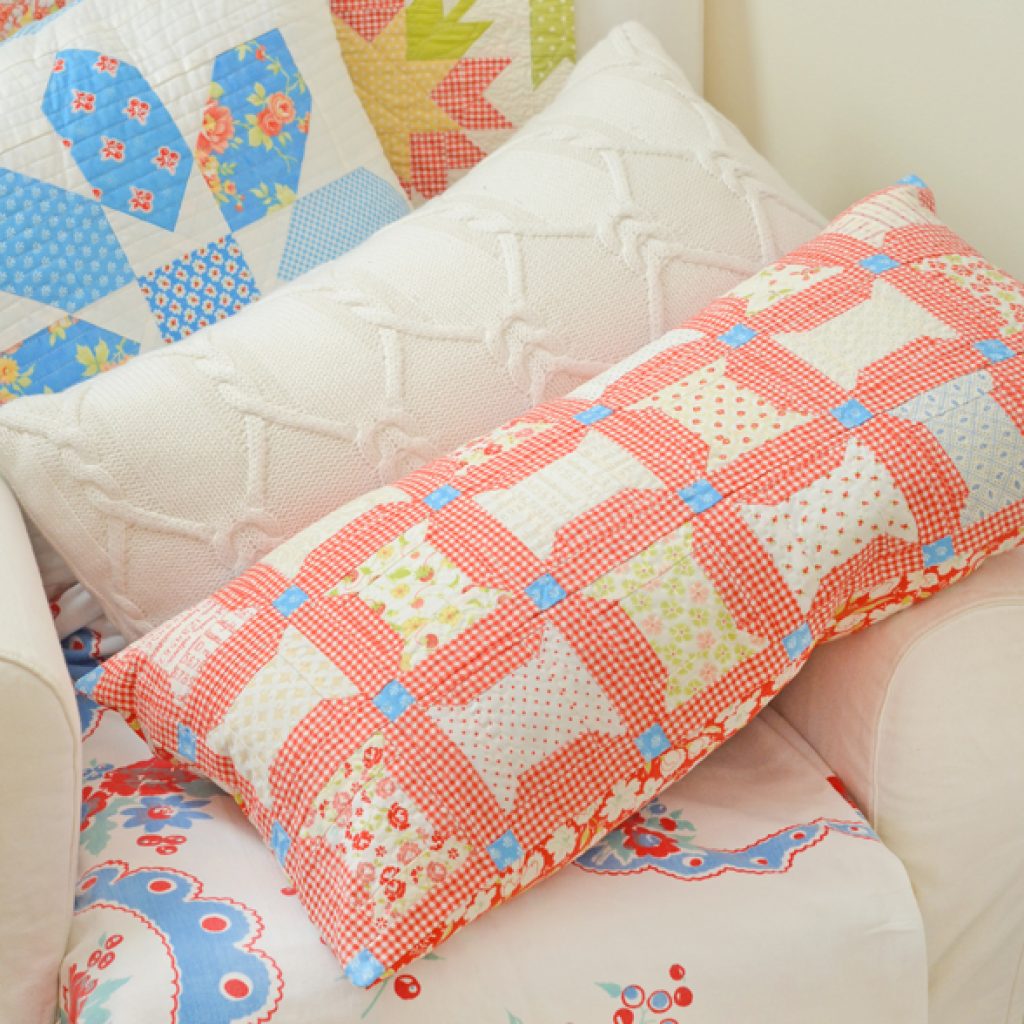
For this little pillow… I knew I wanted to shrink down the spool blocks from the book and set them on one of my all time favorite red fabrics, red gingham… what could be more summertime patriotic than that!
But of course, I had to mix in all of my favorite low volume cream prints and accent all of it with a bit of my favorite cornflower blue… just to bring in that summer red, white and blue vibe.
THE PATTERN
If you want to make the full-size spool block as it is in the book for the quilt or other projects, then you will want to go to page 18-19 to get started.
If you want to make this mini version, here is the info below.
PER BLOCK [I made 18 mini “straight spool” blocks]
- From Spool Fabric [variety of cream prints]: Cut (1) 2 ½” x 2 ½” square [d] and (2) 1 ¼” x 3 ½” [e].
- From Background Fabric [red gingham]: Cut (2) 1″ x 2 ½” [a], (4) 1″ x 1″ [b] and (2) 1″ x 4″ [c].
FOR WHOLE PILLOW
- From background gingham: Cut (45) 1 1/4″ x 4″ sashing pieces total.
- From post fabric [cornflower blue print]: Cut (28) 1 ¼” post squares total.
- Assemble the blocks in the same method as the ones in the book. Trim up the blocks to be 4″ x 4″.
THIS WEEKS PILLOW INFO: HOW I GET STARTED WITH MY PILLOW TOP
As I already mentioned, Carrie does this fairly differently [so go see how her tips are different] but here are my pointers for getting started with a pillow front.
- Piece your top [we will get more into the sizes and how I choose my size and inserts, etc next week]. If you are sewing along with us this summer, I HIGHLY suggest that you focus on making your pillow tops and then you can work on finishing them as we share more and more information on the various ways you can do that throughout the weeks to come. That way you will have all the info you want on finishing and backings and inserts and binding and zippers and flanges etc, etc, etc.
- For this project I pieced (18) blocks in a set of 3 rows of 6 blocks each, alternating the direction of each block as I went and sashing it all with a ¾” finished sashing and posts.
- For me, I almost ALWAYS quilt my pillow front. Most importantly I love how it looks that way. It looks finished and like a little quilt and I LOVE IT. It is also much more practical as it can be washed and won’t unravel or come apart.
- I almost ALWAYS quit my pillow front myself so it has to be easy. I will use straight lines or my favorite method… the wide zigzag stitch [See my YOUTUBE Tutorial on how I do that HERE]. And that is what I did here. If you want to see my process for working on this particular pillow, come on over to INSTAGRAM STORIES & later in my HIGHLIGHTS, where I will share the steps I took to make this pillow top yesterday afternoon.
- I almost ALWAYS use Pellon Fleece #987F as the back of my pillow top. It is easy, all I have to do is press it to the pollen. It doesn’t shift and most importantly, I don’t have to pin or otherwise baste it in any way. I always have a bolt of Pellon Fleece in my studio closet and also use it for wall hangings and table runners..
- I do not use lining. I just use the pillow front and the Pellon. That’s it. I quilt it and that becomes my top.
- When I quilt, I use a Hera marker to mark a few lines to get my started and then usually just use the previous stitch line as my “eyeball” line for where to place the next line. It is usually very “organic” and I don’t worry too much about precision. After all… it is a pillow and my kids are going to sit on it. The dog might even get it if I’m not paying attention. And the cat… well we all know where he is going to be the second I add it to the couch.
I HAVE A SERIES OF LITTLE VIDEOS IN MY INSTAGRAM STORIES TODAY GOING THROUGH THE ABOVE STEPS SO YOU CAN SEE THEM. ONCE THE STORIES “EXPIRE”, I WILL ADD THEM TO MY INSTAGRAM HIGHLIGHTS SO YOU CAN ALWAYS SEE THEM THERE.
ENTER TO WIN THIS WEEK’S PRIZE: Come check out my IG by noon on Tuesday for my PRIZE POST.
THINGS TO EXPECT EACH WEEK
- Weekly inspiration by theme. PATRIOTIC THIS WEEK.
- Weekly hints and tips. WE WILL TRY TO GO IN THE ORDER YOU WILL NEED TO KNOW ALL THE THINGS IN MAKING A PILLOW. SO THIS WEEK, WE ARE STARTING OFF WITH PILLOW TOP HINTS AND TIPS.
- Weekly prizes. We will have a prize each week on INSTAGRAM and a few here on the BLOG too so stay tuned!
- Weekly friendship as we sew pillows together! Since they are pillows and they are small, you can actually finish a pillow each week and have a fabulous collection by the time you are done… really!!
Sounds like a perfect way to spend the summer, don’t you think?
A FEW FAQ RIGHT NOW
Do I have to make pillows to join?
No! if you want to work on one of the quilts in the book as we work on pillows… GO FOR IT.
What are the hashtags?
If you want us and others to see what you are working on [any progress shots are fine… and of course finished pillow tops or pillows too], then use the hashtags #pillowalong and #scrapbookofquilts

Join our FACEBOOK GROUP if you haven’t already [CLICK HERE] as we will be working on it there as well as here on the blog each week.
See you next week with the second set of pillow inspirations and pillow hints and tips.
Joanna and Carrie too… along with Kimberly, Susan, Susan, Anna, Greg, Chelsi and Melissa
Scrapbook of Quilts Pillow Along:
Week 1: Set Up
Week 2: Patriotic
Week 3: Neutral
Week 4: Two Color
Week 5: Autumn
Week 6: Halloween
Week 7: Christmas
Nicki | 29th Jun 21
I love your Patriotic themed pillow! Love the more open interpretation you are using, which is far more my style than the straight up stars and bars. As a kid, my family always spent Independence Day at our camp in the Allegheny Mountains of PA. Every year was a treasure, as my mother’s brother’s family would come along for the long weekend, too. Great memories.
joanna@figtreequilts.com | 29th Jun 21
that sounds perfect
Becky | 29th Jun 21
The book is absolutely lovely! Could you give the measurements for a smaller side spool block for the pillow?
Thanks
joanna@figtreequilts.com | 29th Jun 21
All sizes we have are in the book. Thanks so much for following along!