
Scrapbook of Quilts PILLOW ALONG: Week #6
Welcome to WEEK #6!!
We are working our way through my latest book, SCRAPBOOK OF FRIENDS, by making pillows for each block featured! Be sure to check out what my partner in crime, Carrie [HERE on Instagram] has to add to the festivities too. Carrie and I love working together and have really enjoyed collaborating on this book project over the last couple of years but we pretty much always do something a bit different so you will ALWAYS get two perspectives to everything if you follow along with us both! Also you will definitely want to see the MODA Blog Post HERE.

– – – – – – – – – – – – – –
WELCOME SPECIAL GUESTS:
We have a NEW GUEST joining us this week. WELCOME MELISSA CORRY, and you are not going to believe the crazy creative thing she did with her pillow this week. Its pretty fabulous!
And of course KIMBERLY JOLLY is whipping up another fabulous pillow and SUSAN VAUGHAN is back too to add to mine and Carrie’s too.
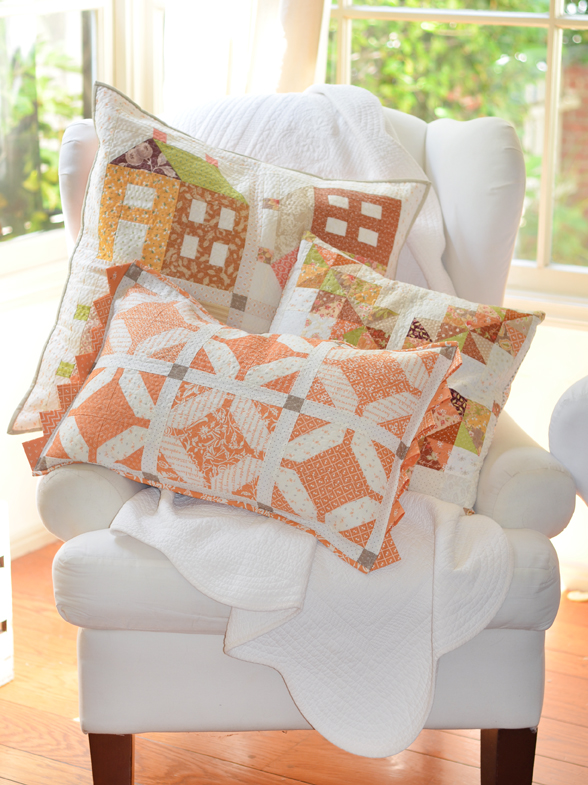
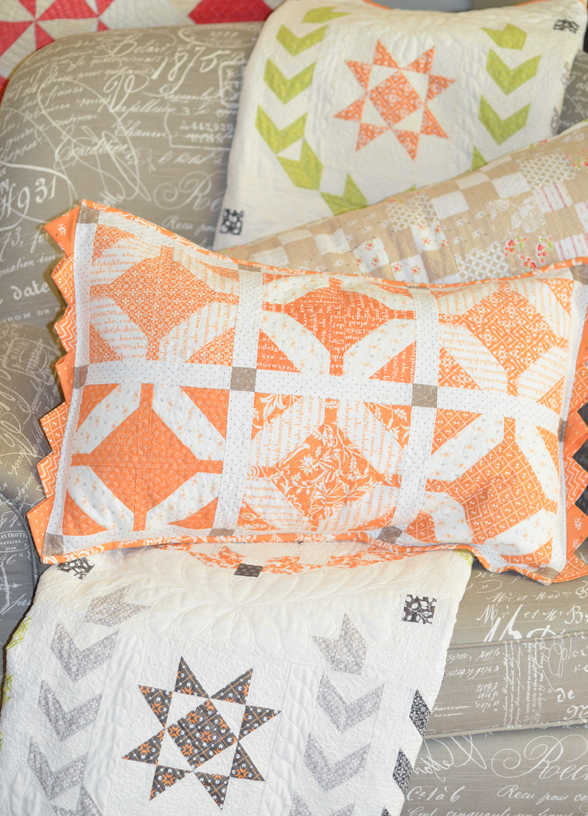
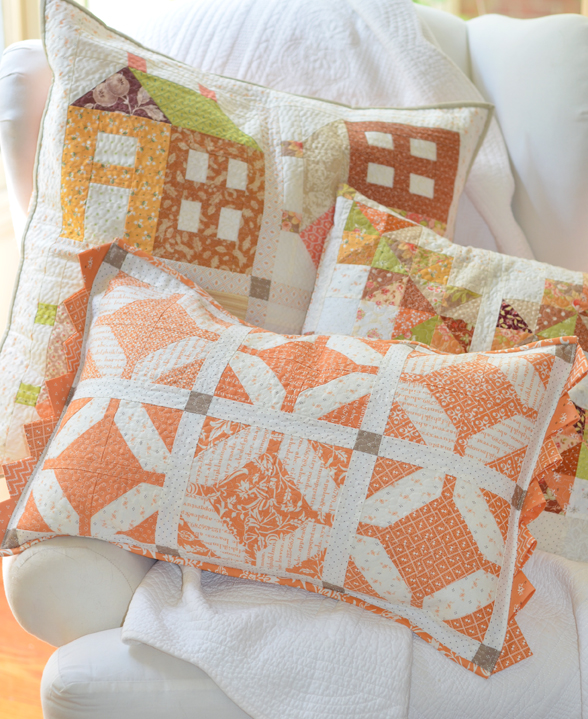
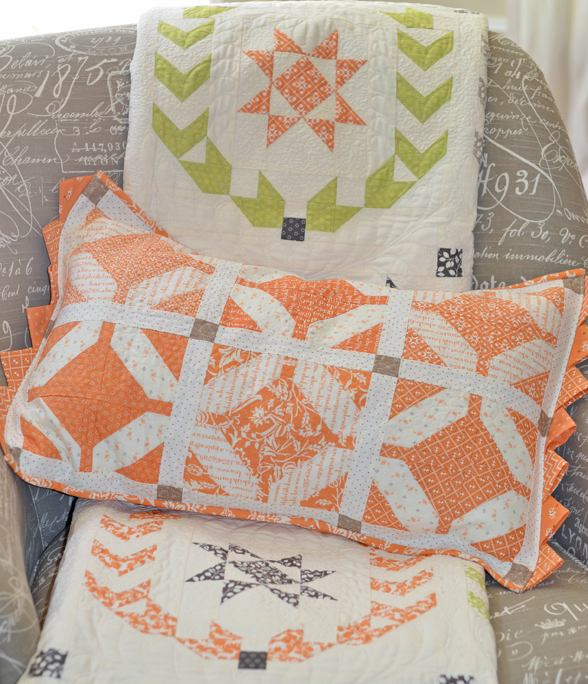
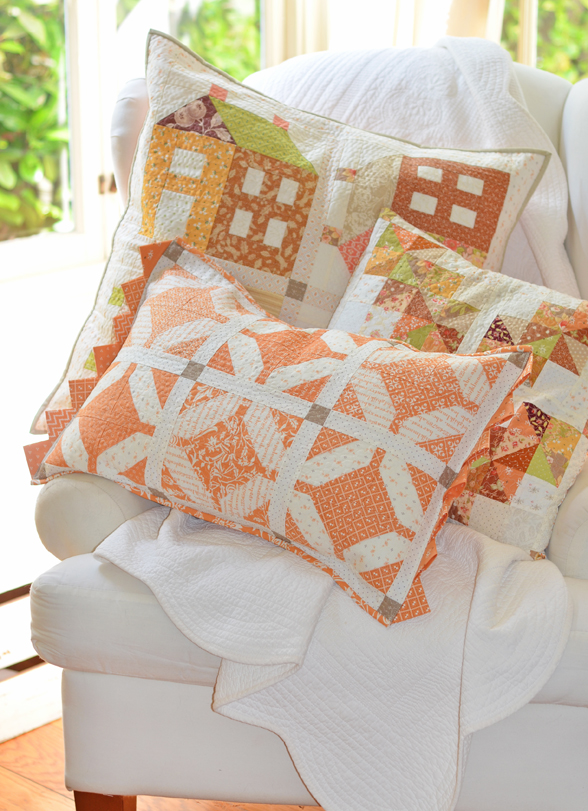
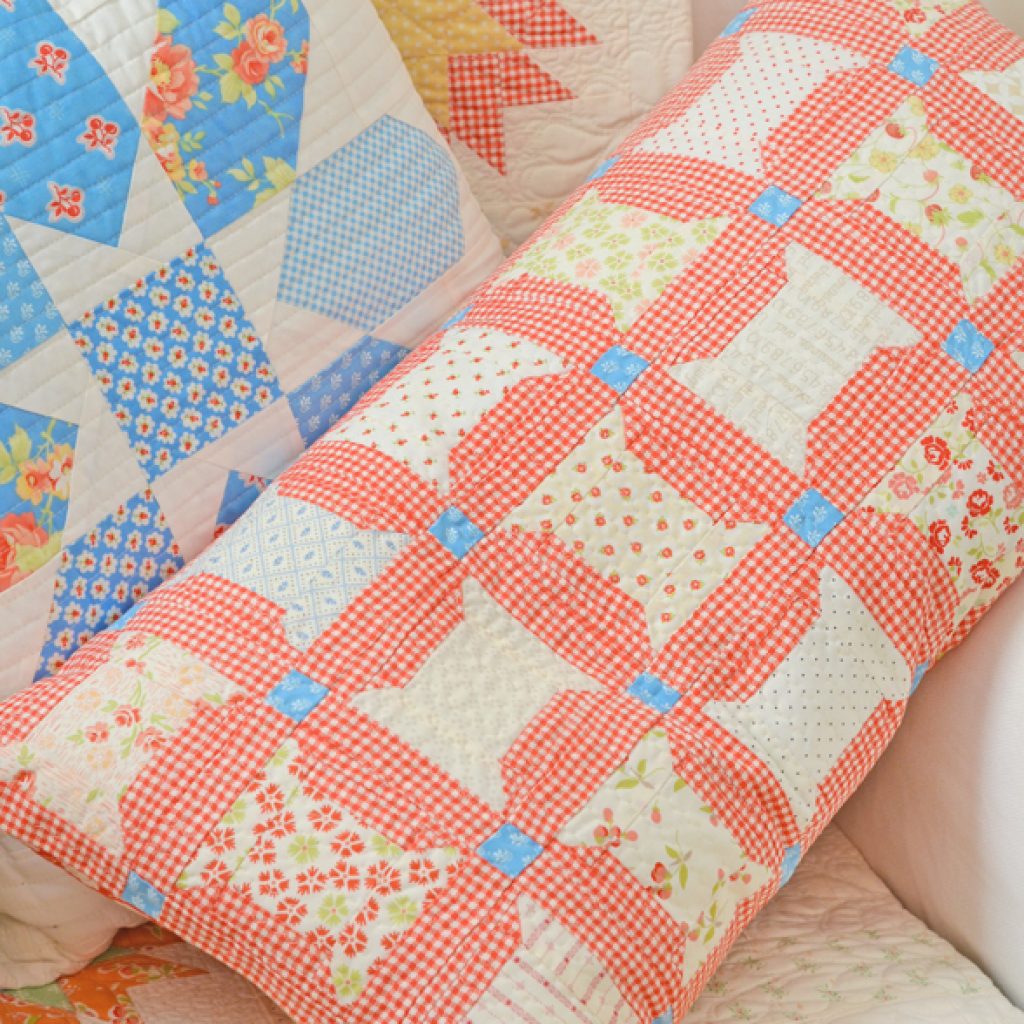
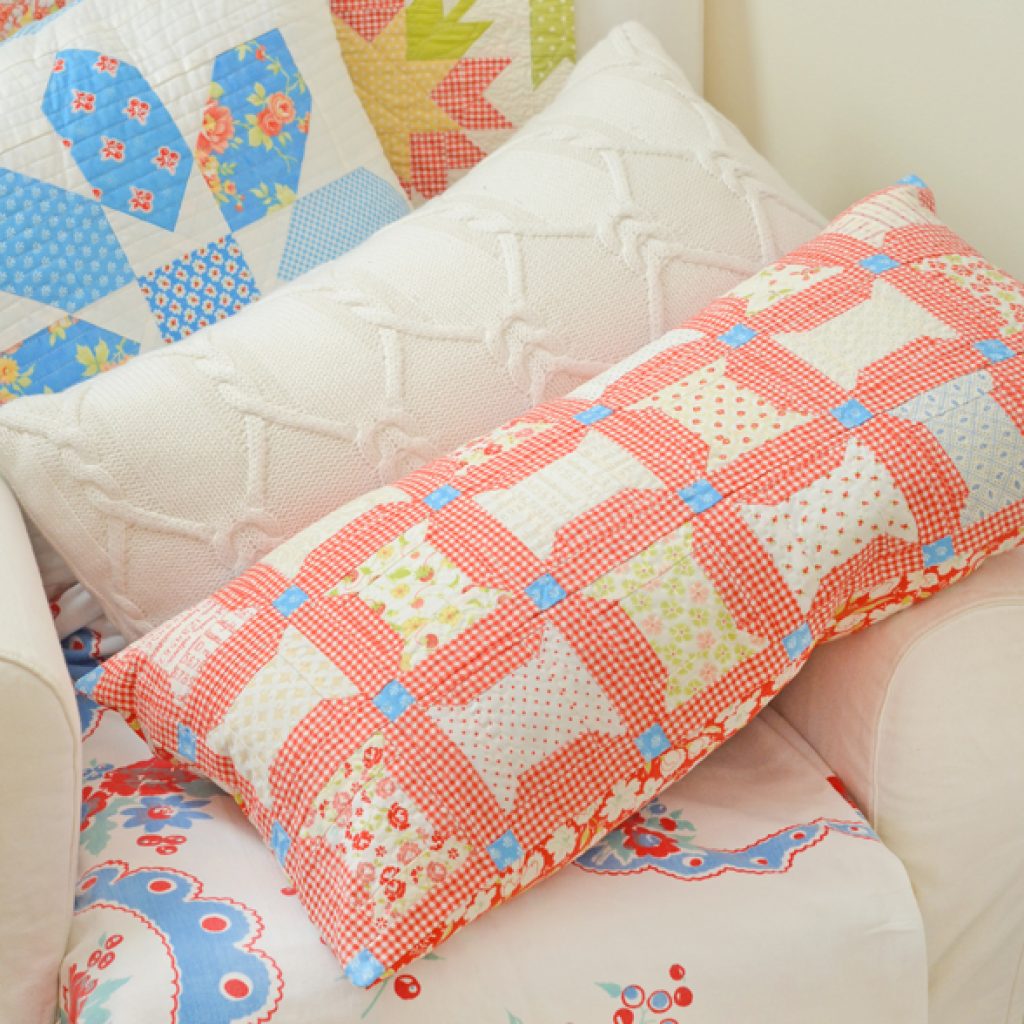
I am LOVING my autumn and HALLOWEEN pillows together on my favorite chair!
– – – – – – – – – – – – – –
THIS WEEK’S THEME AND PILLOW:
Our theme this week is HALLOWEEN and I always have a very vintage feeling vibe for my version of Halloween. It usually consists of soft oranges and soft, warm blacks with a little cream or warm grey thrown in.
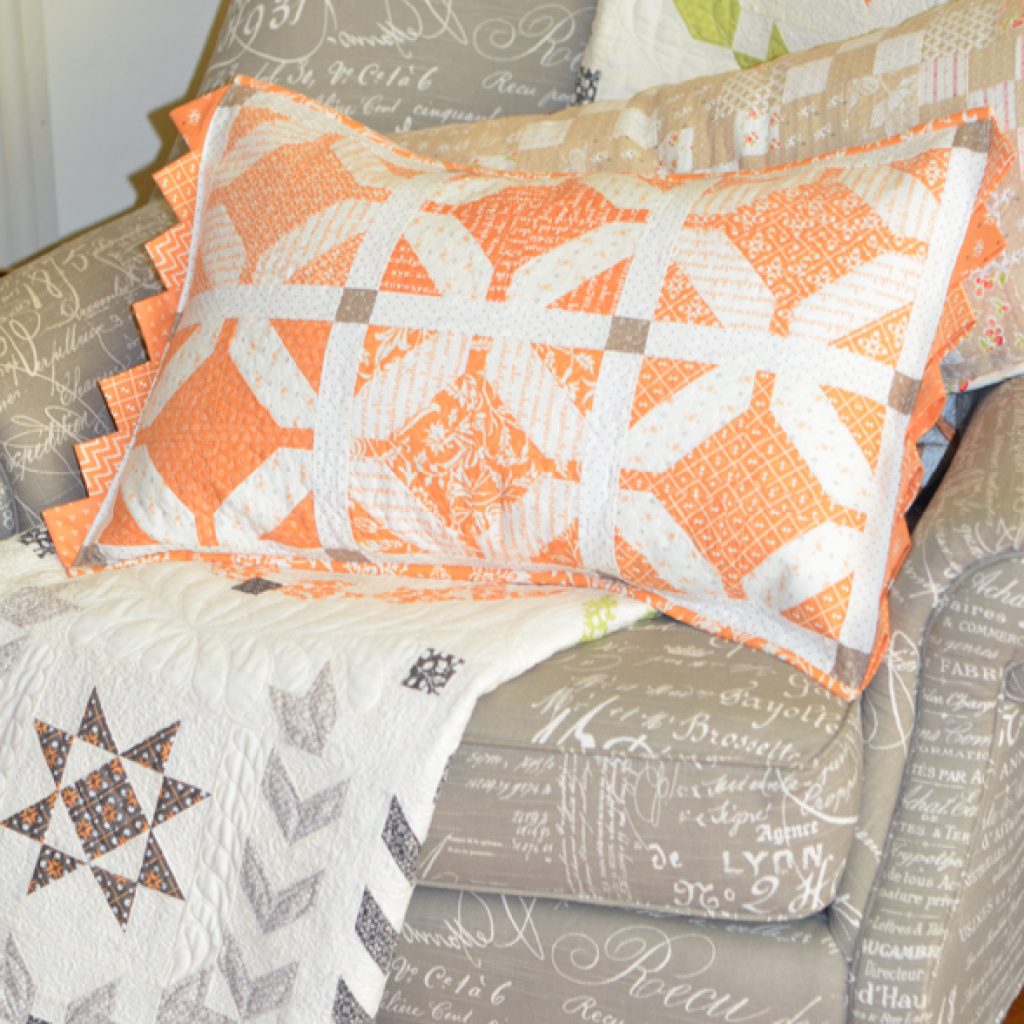
But for this pillow… I decided to go all orange so that I could coordinate it with Autumn while still featuring it for Halloween. The addition of the prairie points was just a fun Halloween feeling bonus!
Using up some of my favorite oranges and cream scraps of course.
- To see Kimberly’s pillow [Click HERE or HERE]
- To see Melissa’s pillow [Click HERE].
- To see Susan’s pillow [Click HERE].
As a quick SUMMARY reminder of how this is working each week:
- We are working from our brand new book A SCRAPBOOK OF QUILTS and each week we are featuring one of the blocks in the book through a PILLOW ALONG, where we [and a few of our friends] each sew a different version of a pillow using that week’s block and theme as a way to inspire you to sew some pillows of your own along with us this summer!
- Each week Carrie and I will both post a new pillow design or idea on Instagram.
- Each week I will also post mine here on the blog and in my Facebook Group.
- If you want to see the goodies the above mentioned designers have done, you will need to go to their IG feeds as that is where they are sharing. So excited for what everyone will share each week!
– – – – – – – – – – – – – –
MY PILLOW CHOICE & PATTERN FOR THIS WEEK
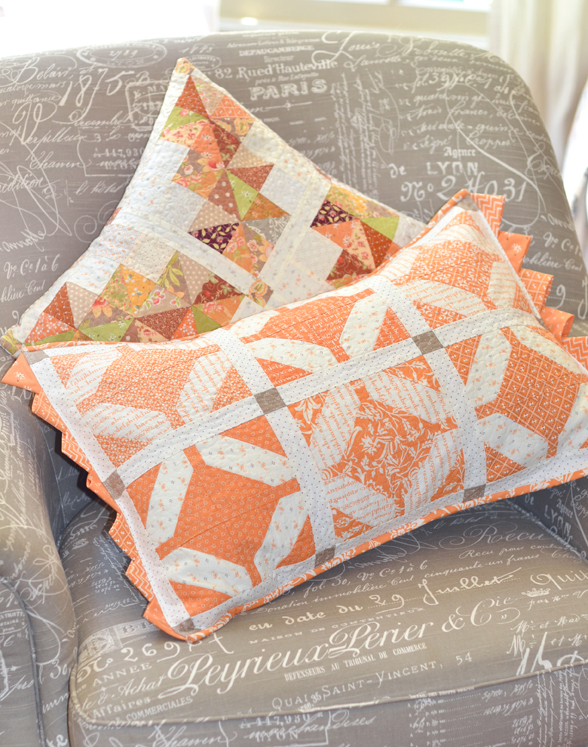
This week we are working with my CATHEDRAL GARDEN block in the book.
- If you are following along, it starts on page 125.
- I used 6 of my favorite orange prints from PUMPKINS & BLOSSOMS, ALL HALLOWS EVE and FIGS & SHIRTINGS… I love orange so much! And I added in some cream print scraps as always along with some taupe posts from STRAWBERRIES & RHUBARB.
- I made 6 blocks and used 1 ½” sashing for a finished pillow that was app. 16″ x 23 ½” finished but it definitely shrunk a little with quilting and my spraying method.
- I quilted it with a small meander/stipple stitch again on this one. The zigzag is still my absolute favorite but I wanted to make sure that the pillows had a little bit of variation on them.
- I added an envelope backing and used my favorite orange floral from Pumpkins and Blossoms.
- I bound and faced it in the same backing fabric.
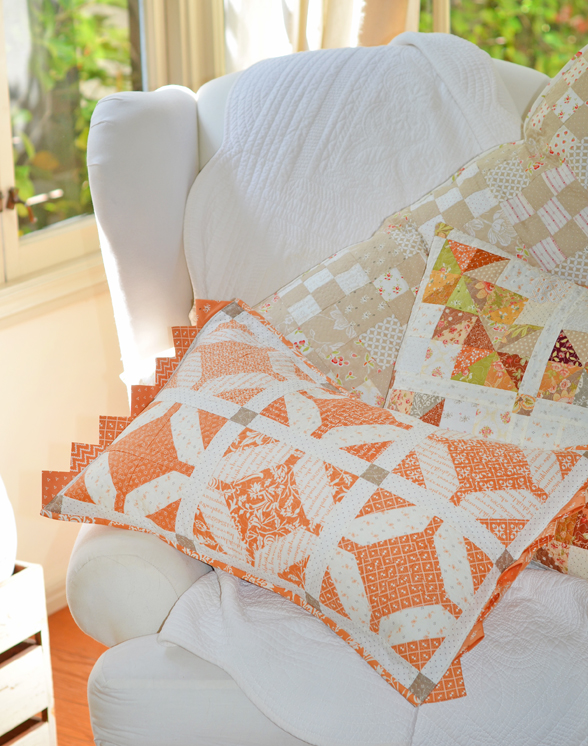
PRAIRIE POINTS
Since we are talking about pillow finishing this week, I thought I would add my all-time favorite finishing technique of PRAIRIE POINTS. They add such a fun charm to so many different projects and are kind of perfect for a Halloween themed project I think.
– – – – – – – – – – – – – –
PILLOW TIPS & HINTS FOR THIS WEEK–
EXTRAS & EMBELLISHMENTS
So if you are following along with our info each week, you will know that we have covered a different topic each week and this week we thought we would share some of our thoughts on pillow “extras”.
PRAIRIE POINTS
As you might know I LOVE PRARIE POINTS. They are a really fun addition to add to a table topper or runner or a pillow and they are so simple to make. I know that most people are really surprised by how easy they are when they first see the method.
Here is a VIDEO TUTORIAL [click HERE] on how I make mine… Easy peasy right?
I have added them to my PUMPKINS IN A ROW table runner and more recently to my BERRIES table runner as well. Adding them to this pillow was kind of a no brainer since I think it adds the perfect amount of “Halloween vibe”!
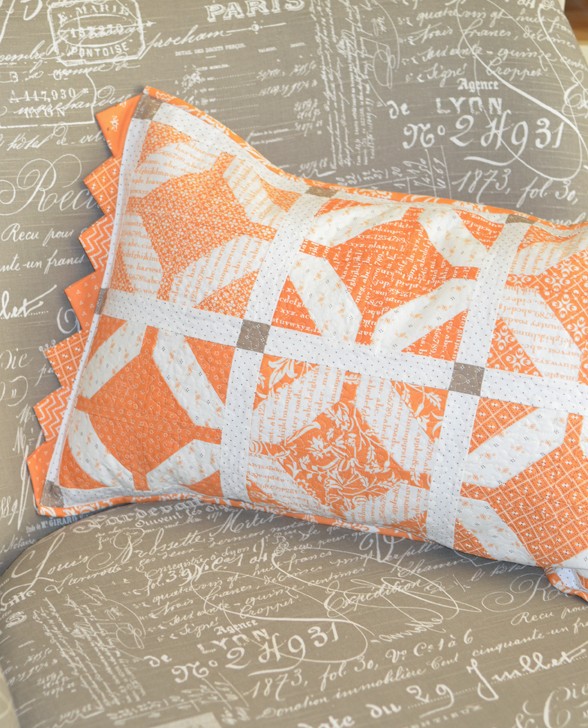
For these specific prairie points:
- I used a variety of orange fabric scraps and cut them each 3 ½” square. I needed 7 for each short side of the pillow.
- I followed the info in the video tutorial on how to make and line them up.
- For this particular pillow I overlapped them a bit more for a slightly “thicker” feel. This is all just personal preference!
BINDING FINISH
Another thing I love to do is add a BINDING FINISH to the outside of my pillow and if you scroll through some of the previous pillows you will see some examples of that [both in mine and in some of the contributors too].
Oftentimes it adds just the perfect amount of detail to the outside of the pillow and since I am not a big fan of piping or other more precise/fussy detailed finishes, I love the simple binding finish. It is both simple for us quilters to do and looks good!
Carrie Says: “I’m going to date myself here by sharing that the first time I saw this finish done was more than twenty years ago. I don’t know if Lynette Jensen of Thimbleberries was the first to do this, but it was a technique she used frequently, and most folks using this finish back then learned it from her.
The front and back of the pillow are layered with wrong sides together and the outside edge is stitched together approx. ¼” from the edge. Then a binding is attached – bias or straight of grain – in your preferred width, using your preferred binding technique.
The binding can be stitched down by machine, or by hand. The back can be an envelope closure, buttons, or a zipper – with or without a flange to cover.
What I have always liked about this finish is that it adds a pop of color, or an accent, to the outside edge of a pillow.”
RIC RAC
This is also a fun and simple way to add a little bit of extra detail to your pillow. Using the jumbo is much easier and is something that I have done in the past but you could also stitch the little ric rac right into the seam of your pillow.
Another way of doing it, would be to stitch to the inner side of binding… it would then mimic a tiny little flange on the inside. I have seen this done but can’t find a picture of one at the moment. It feels like a tiny bit of zigzag lace on the inside of your binding and is very sweet.
Carrie says: “Years ago, I made several pillows that had jumbo ric rac stitched into the seam so that there was a scalloped edge on the pillow. Jumbo ric rac is 1″ or more wide, usually 1¼”. (Some are 1-3/8″.) It looked really good, and I loved the finish.
But this worked best with 100% cotton ric rac, as it was softer, and it shrank a bit with the pillow when washed. So when I can find 100% cotton ric rac, this is something I’ll happily do again.”
WEEKLY PILLOW GIVEAWAY:
Come check out my INSTAGRAM page to follow along on the #pillowalong hashtag and see the announcement of last week’s winner this week! Each week, anyone who posts a photo with some portion of what they are working on for the pillow along and uses the #pillowalong hashtag, will be entered to win a “special prize” from Carrie and/or I. This week, my winner will also receive a baggie with my leftover autumn ½ square triangles with these exact same fabrics in hopes that they might become someone else’s much cherished pillow!
– – – – – – – – – – – – –
– – – – – – – – – – – – –
THINGS TO EXPECT EACH WEEK
- Weekly inspiration by theme. HALLOWEEN THIS WEEK.
- Weekly hints and tips. WE WILL TRY TO GO IN THE ORDER YOU WILL NEED TO KNOW ALL THE THINGS IN MAKING A PILLOW. SO THIS WEEK, WE ARE TALKING ABOUT A FEW EMBELLISHEMENTS.
- Weekly prizes. We will have a prize each week on INSTAGRAM and a few here on the BLOG too so stay tuned!
- Weekly friendship as we sew pillows together! Since they are pillows and they are small, you can actually finish a pillow each week and have a fabulous collection by the time you are done… really!!
Sounds like a perfect way to spend the summer, don’t you think?
A FEW FAQ THAT I HAVE GOTTEN SEVERAL TIMES SO HERE ARE THE ANSWERS:
How do I enter the GIVEAWAY?
See above for more info. But basically all you have to do is be working on the pillow for that week in some way, post a photo and use the hashtag. It can be anything… from a fabric pull to a few parts sewed to a block, anything really!
Do I have to make pillows to join?
No! if you want to work on one of the quilts in the book as we work on pillows… GO FOR IT and as long as you post to the hashtag, you can still be entered in our weekly giveaways.
What are the hashtags?
If you want us and others to see what you are working on [any progress shots are fine… and of course finished pillow tops or pillows too], then use the hashtags #pillowalong and #scrapbookofquilts
I don’t have the book yet. Is it too late?
No at all. Grab a book and join us. Making pillows is always fun and there are so many projects in this book that you can start with!
Join our FACEBOOK GROUP if you haven’t already [CLICK HERE] as we will be working on it there as well as here on the blog each week.
See you next week with the second set of pillow inspirations and pillow hints and tips.
Joanna and Carrie too… along with Kimberly, Susan, Susan, Anna, Greg, Chelsi and Melissa
Scrapbook of Quilts Pillow Along:
Week 1: Set Up
Week 2: Patriotic
Week 3: Neutral
Week 4: Two Color
Week 5: Autumn
Week 6: Halloween
Week 7: Christmas