
SCRAPBOOK OF QUILTS PILLOW ALONG: Week #4
Welcome to WEEK #4 of our SCRAPBOOK OF FRIENDS PILLOW ALONG. Be sure to check out what my partner in crime, Carrie [HERE on Instagram] has to add to the festivities too.
Carrie and I love working together and have really enjoyed collaborating on this book project over the last couple of years but we pretty much always do something a bit different so you will ALWAYS get two perspectives to everything if you follow along with us both! Also you will definitely want to see the MODA Blog Post HERE.

– – – – – – – – – – – – – –
WELCOME SPECIAL GUESTS:
We have a NEW GUEST joining us this week. WELCOME SUSAN ACHE -or as you might know her better- yardgrl60 on Instagram as well as KIMBERLY JOLLY is whipping up another fabulous pillow to add to mine and Carrie’s too.
– – – – – – – – – – – – – –
THIS WEEK’S THEME AND PILLOW:
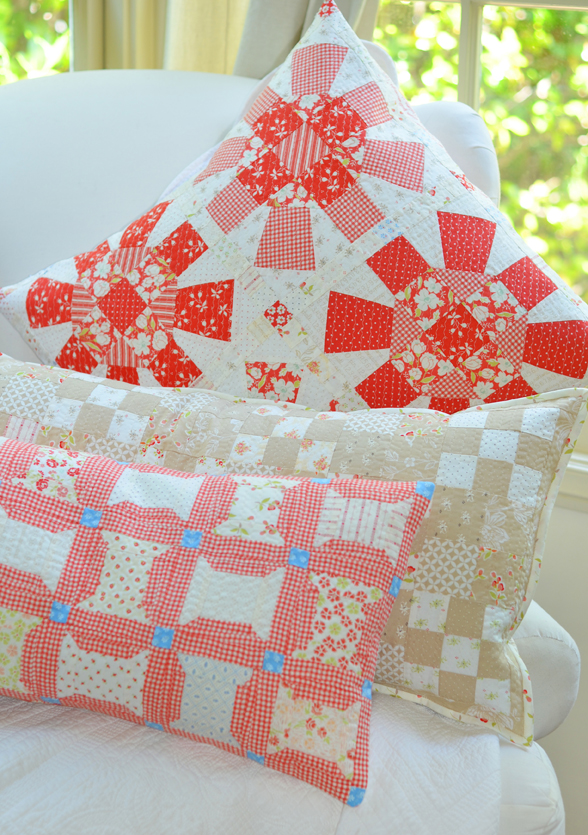
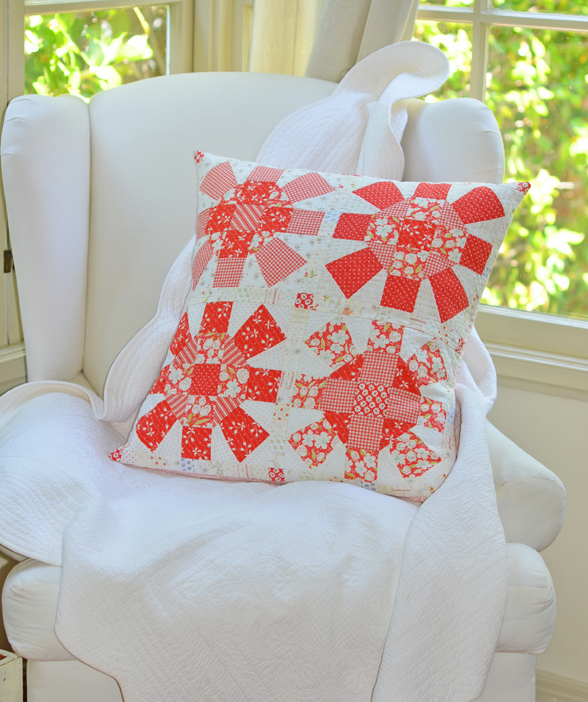
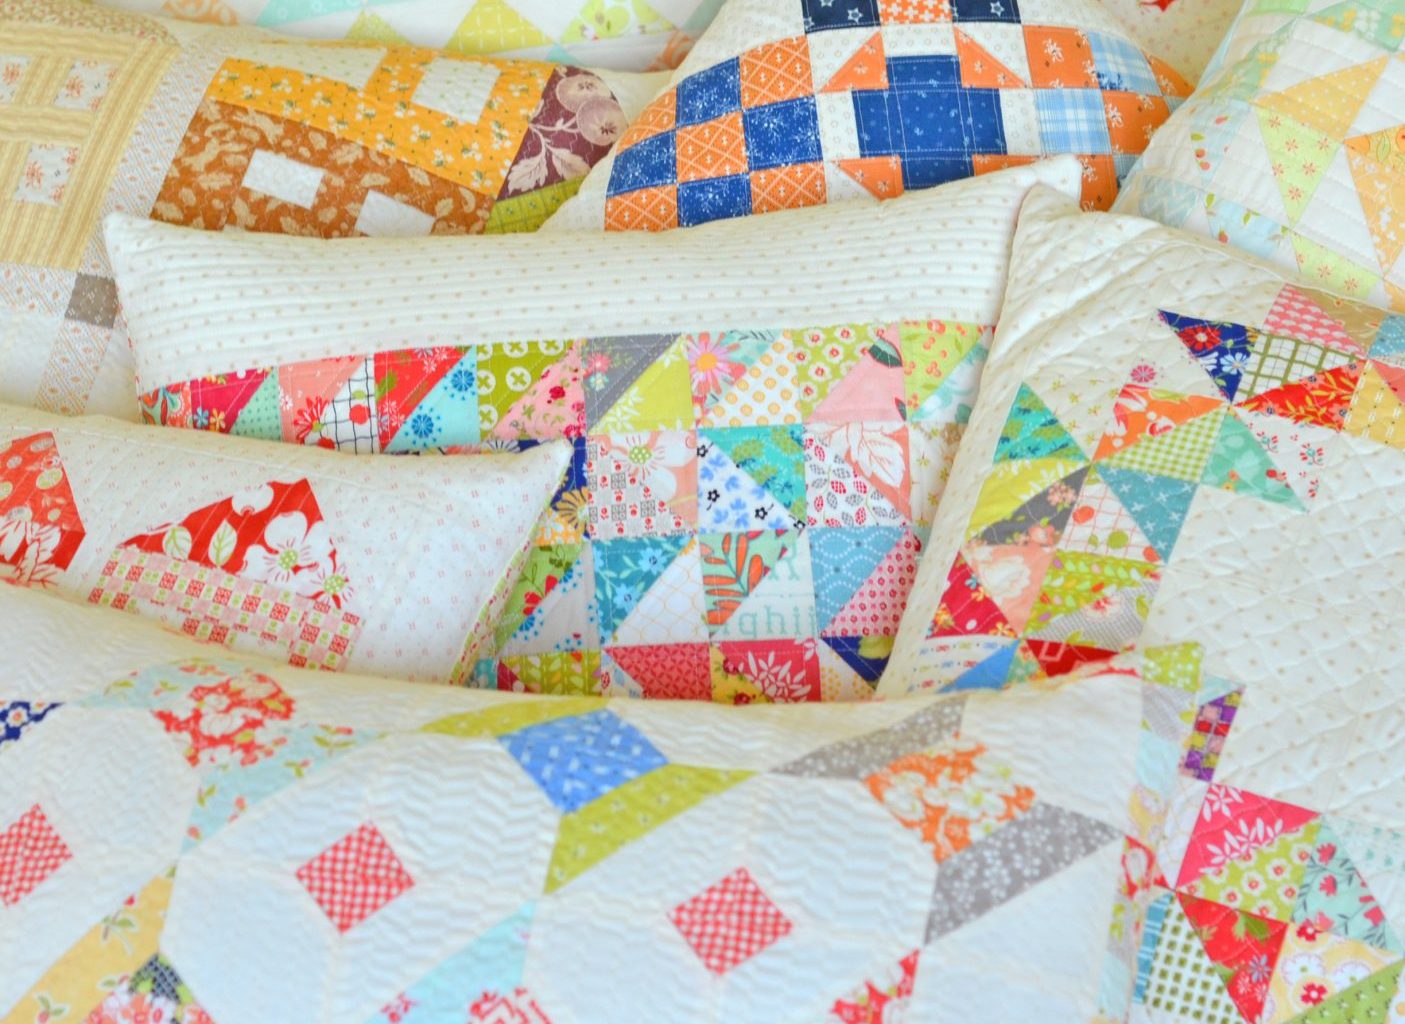
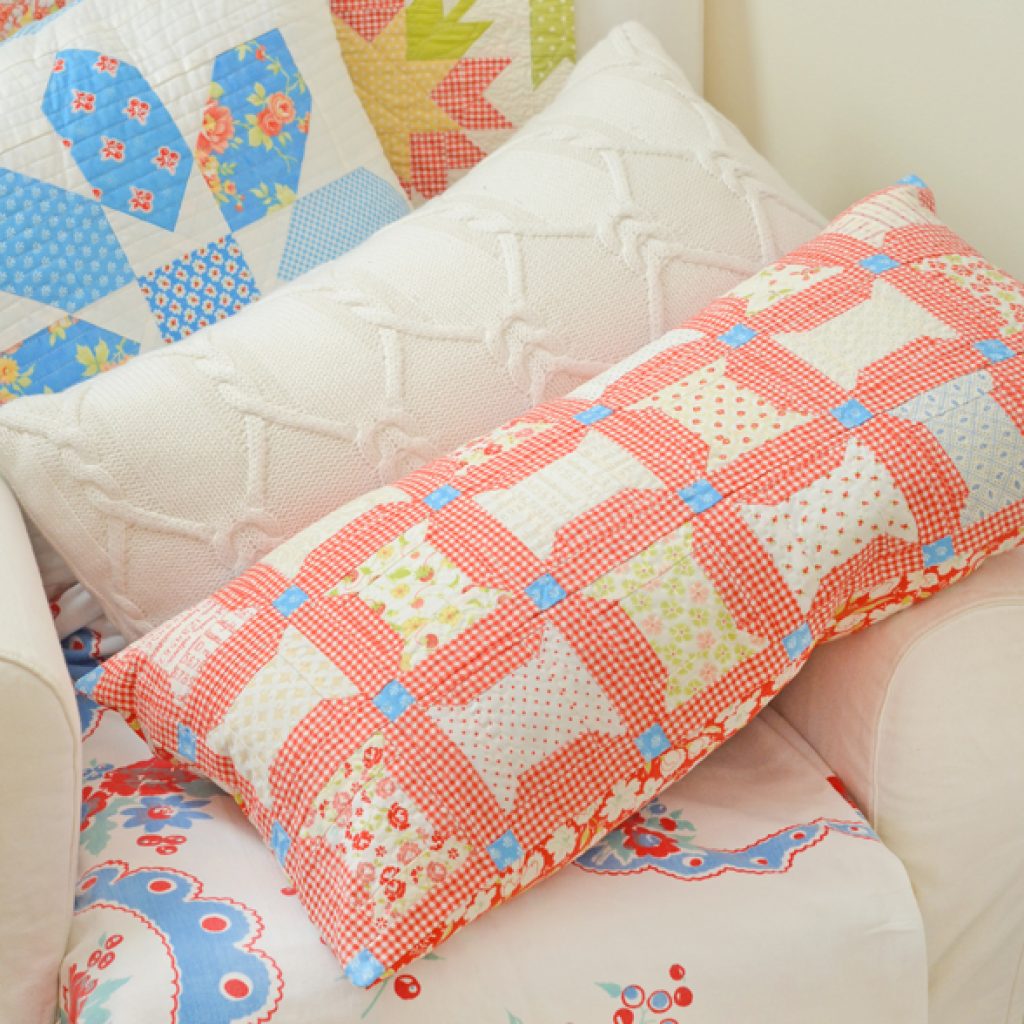
Our theme this week is TWO-COLOR and I am not sure how everyone will interpret that prompt but for me it usually means that I use one color for the prints and a variety of cream prints for the backgrounds.
I find that using just one color, instead of the usual rainbow of Fig Tree goodness I gravitate toward, really makes me slow down and enjoy a variety of prints in that one color.
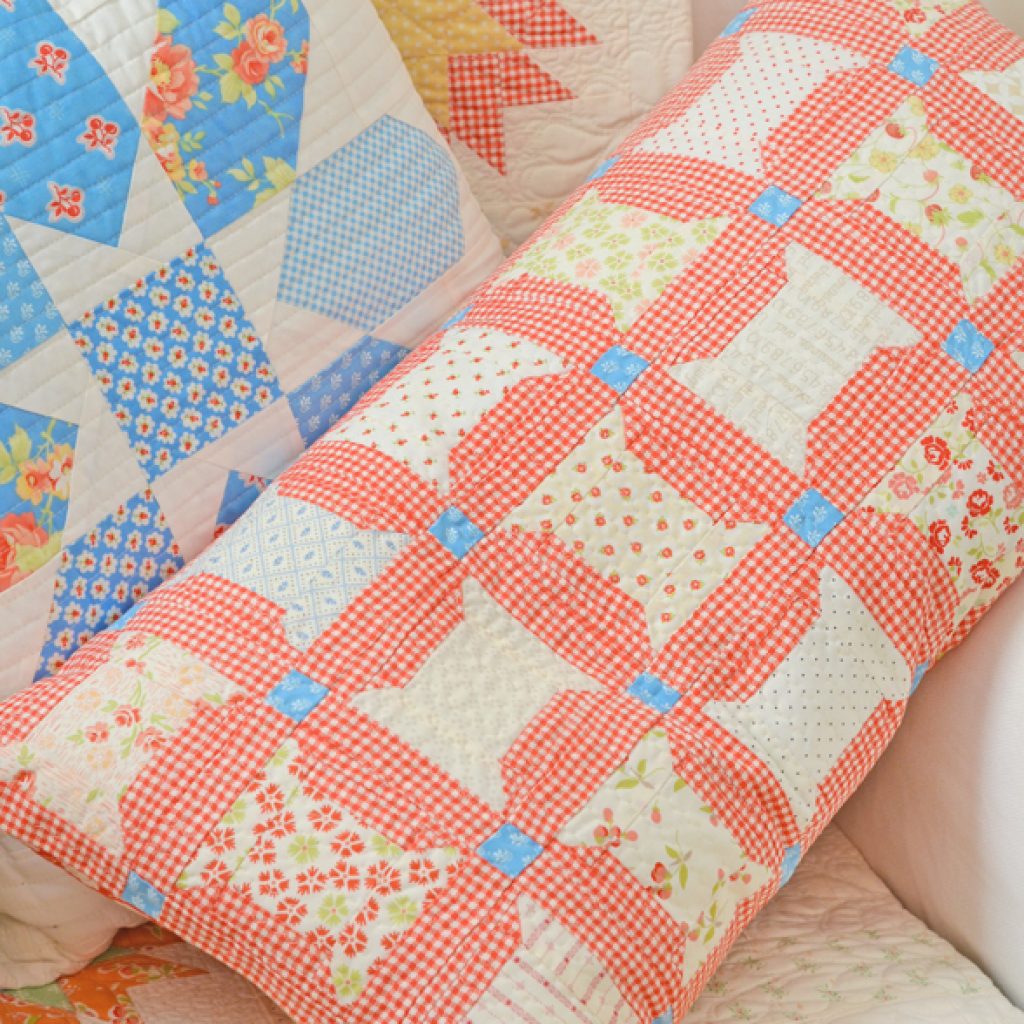
It should come as no surprise that I chose red! I almost went for yellow but I had so many good red scraps and I heard them calling my name!
One of my favorite thing about red is that I will be able to use this pillow in a variety of my decors throughout the year. Patriotic will be where it starts and then it will go away for the fall season, only to come out with my Christmas pillows and then I can recycle it for a few weeks if I want to give the house a little red and white pop for Valentine’s Day too. Red is pretty versatile when it comes to thematic decorating schemes I think!
As a quick SUMMARY reminder of how this is working each week:
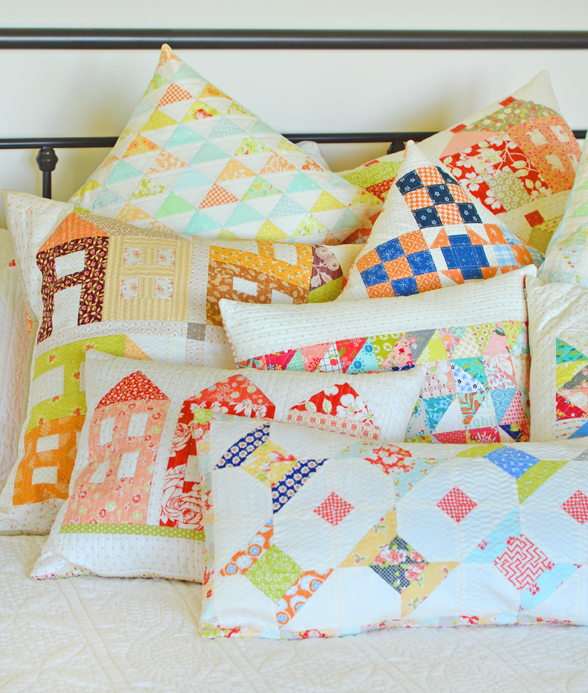
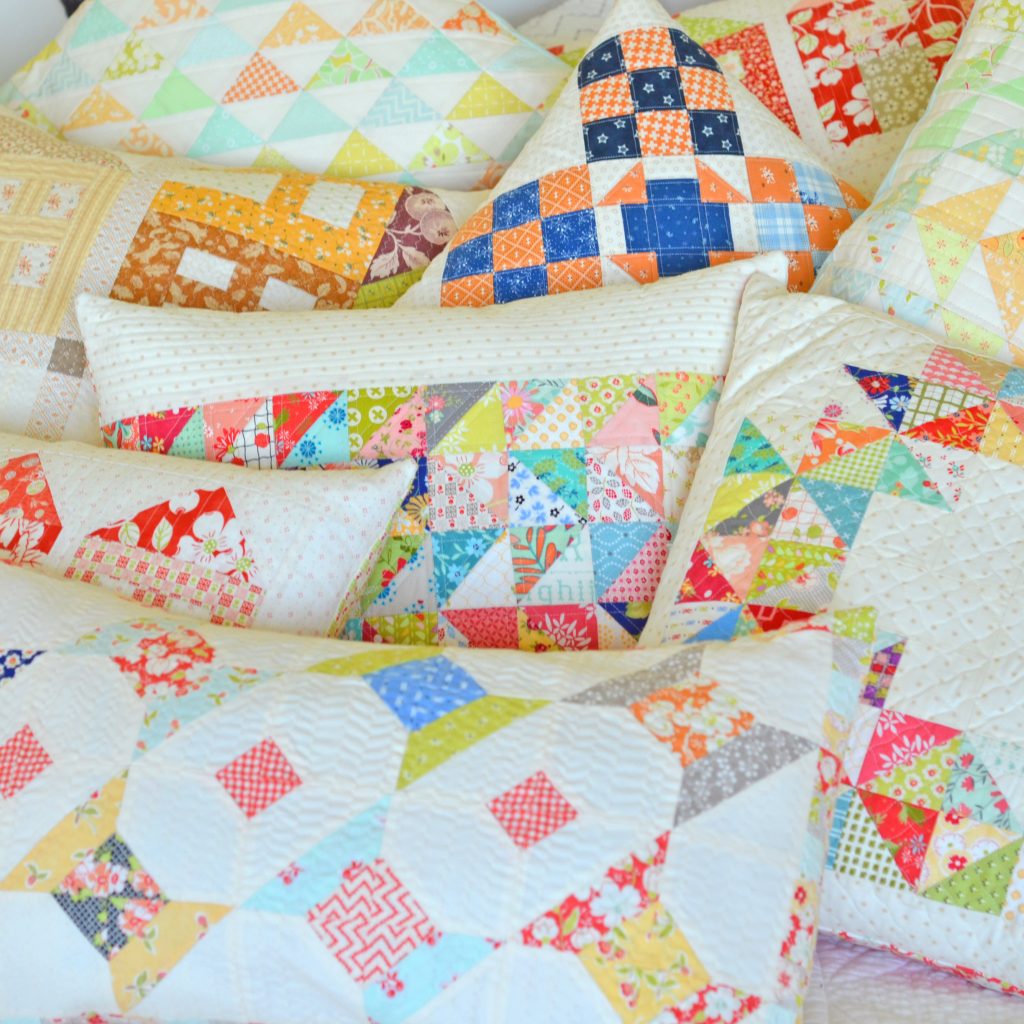
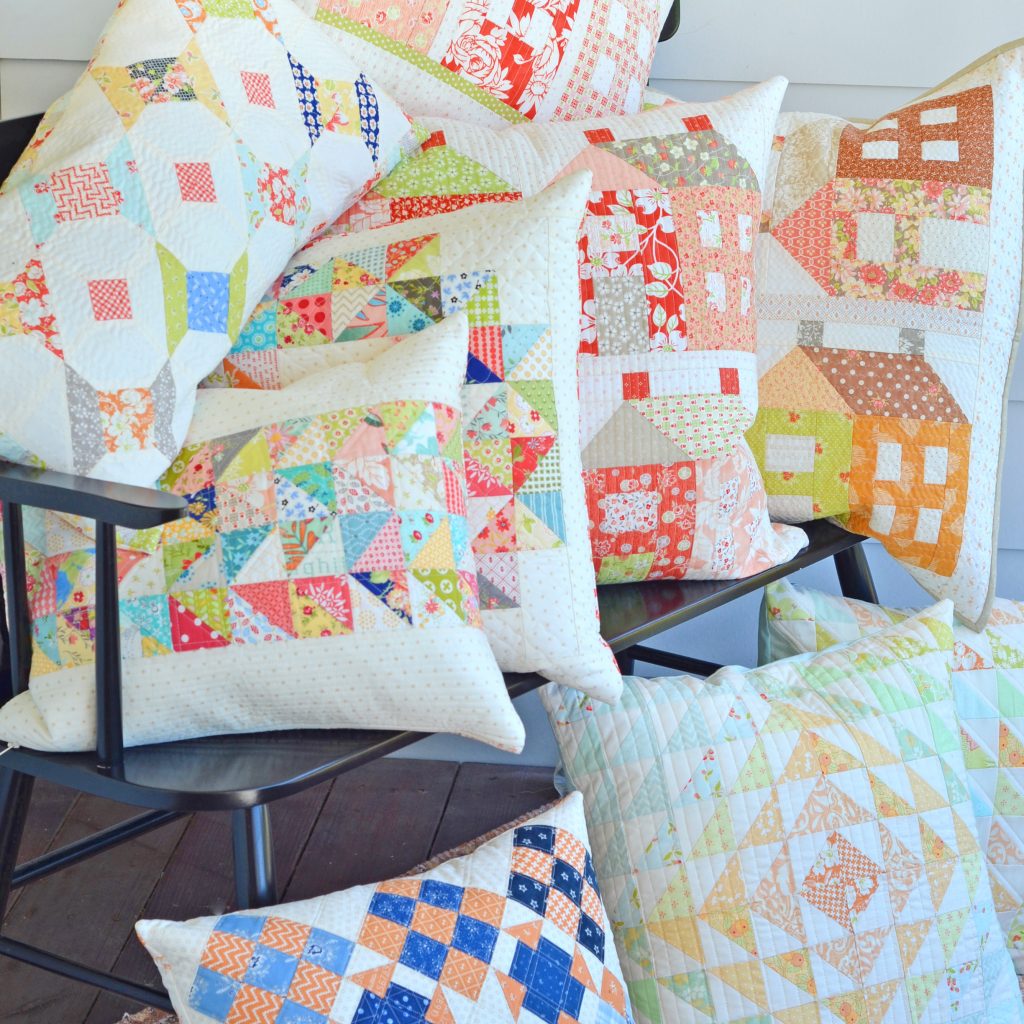
- We are working from our brand new book A SCRAPBOOK OF QUILTS and each week we are featuring one of the blocks in the book through a PILLOW ALONG, where we [and a few of our friends] each sew a different version of a pillow using that week’s block and theme as a way to inspire you to sew some pillows of your own along with us this summer!
- Each week Carrie and I will both post a new pillow design or idea on Instagram.
- Each week I will also post mine here on the blog and in my Facebook Group.
- If you want to see the goodies the above mentioned designers have done, you will need to go to their IG feeds as that is where they are sharing. So excited for what everyone will share each week!
– – – – – – – – – – – – – –
MY PILLOW CHOICE & PATTERN FOR THIS WEEK
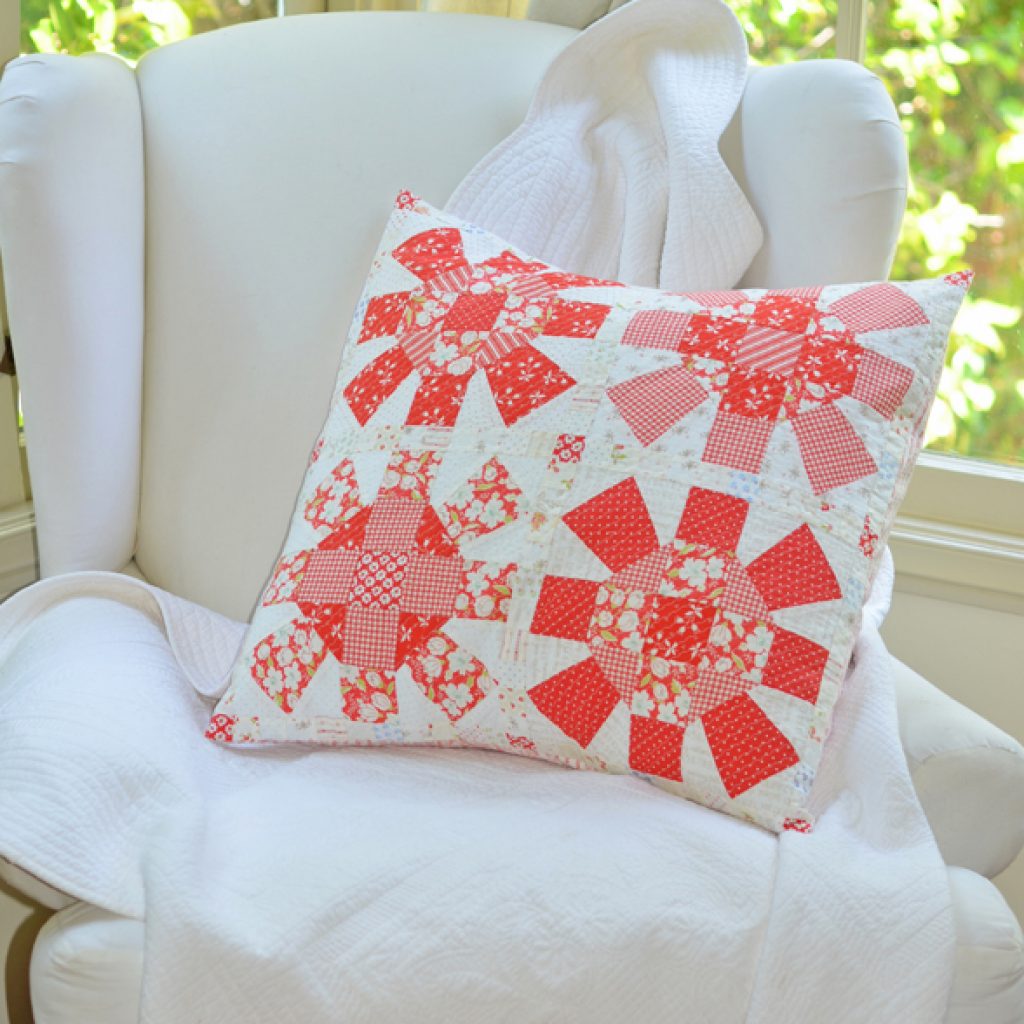
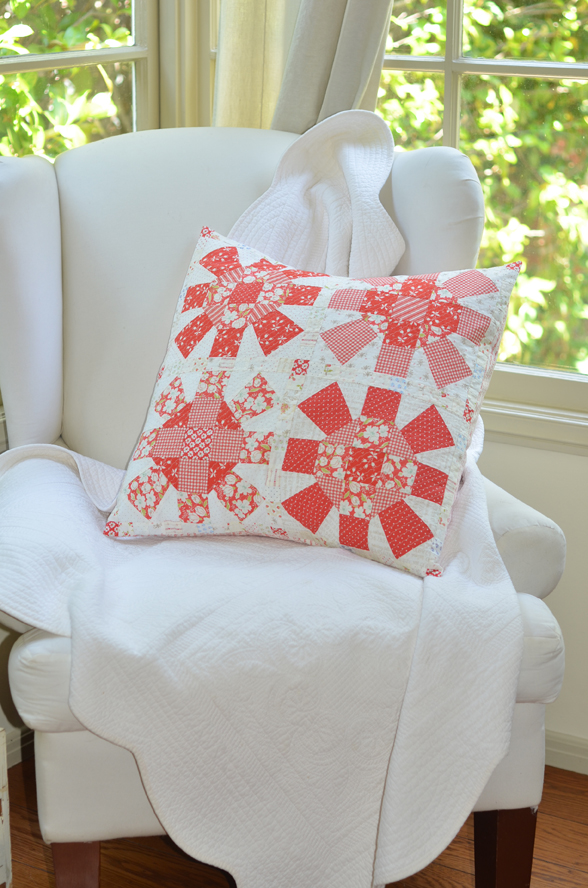
I used the OREGON TRAIL block provided in the book and even though I am usually not a template gal, and prefer using a few measurements and doing the blocks the non-template “math way”, I decided to give the templates a try. I kinda loved it! I cut several out at a time… because I am impatient that way and found the process to be fun.
- I used the main OREGON TRAIL block on page 72-75.
- I used 5-6 different red prints and cut out one entire block from each of 4 prints so that I had all the needed pieces from each print. I then just played around and alternated their location on each block so that they all looked different. I kept moving different prints around until I liked how each grouping worked and the blocks looked different from one another.
- I think when you are working with just one color in a block, even though the prints are different, it is really important that you have enough variation in tone and shading with the prints so that they stand out against one another. The easiest way to do that is to make sure that you have some prints that “read” more solid or have small designs in them like dots or tiny stars or blooms. And then that you also have prints that have a lot of white in them mixed with the color you are working with so when you stand back and look at that print it “reads” lighter and softer and stands out against the more solid ones… like the red gingham or the larger floral with lots of white petals.
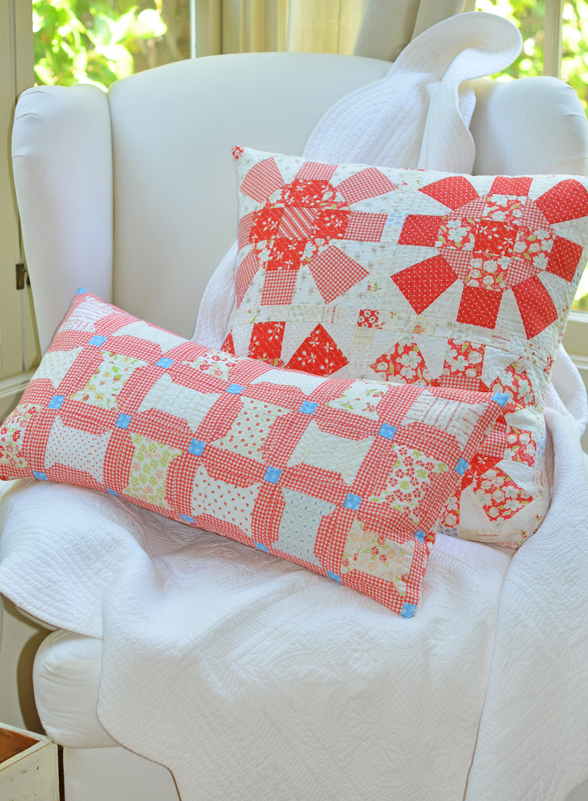
- To keep it from becoming too “messy”, I chose 4 very light cream prints and used one for each background instead of going totally scrappy. Given how much I have going on with the prints for the block, it was important that these cream prints were small, delicate and subtle
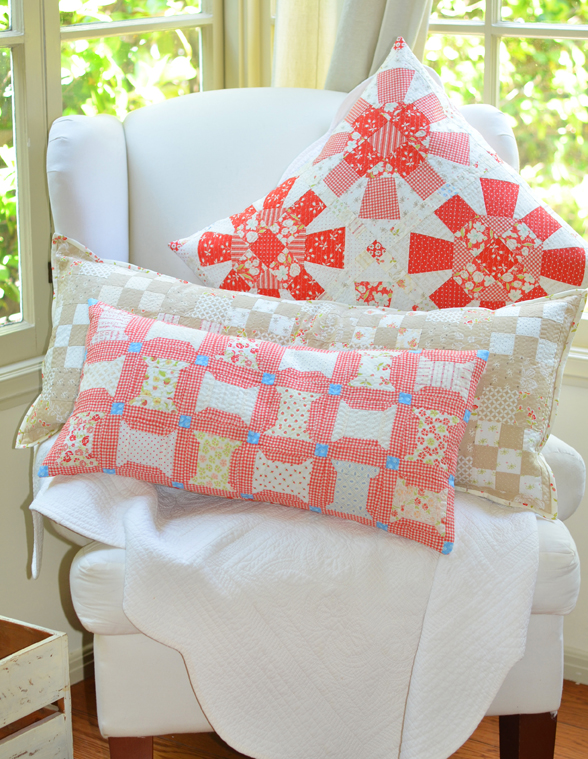
- I used a bunch of cream scraps for the little sashing I added. I needed a total of (12) 1 ½” scrappy cream squares. This was actually a great way for me to use up a bunch of cream prints that I had a pile of so it was a great use of scraps for me!
- I added (9) 1 ½” square posts to the setting as little cornerposts. I also considered just using all cream prints but decided I wanted that little tiny bit of red in the corners.
- I quilted it with a diagonal zigzag from corner to corner and then about ½” apart as I went.
- Once my pillow top was assembled, quilted and spritzed with a little water to get it slightly “crinkly”, it measured about 23 ¼” which was perfect for my 24″ IKEA pillow form
- I added an envelope backing and bound the pillow with a large cream with red floral. I decided no binding on this one.

– – – – – – – – – – – – – –
PILLOW TIPS & HINTS FOR THIS WEEK
HOW DO WE FINISH OUR PILLOWS
Back of Pillow Finish
My [JOANNA] backing choice: Pretty much most of my pillows have an envelope backing. Why? Well let’s have an honesty moment… I work up till a deadline and usually not much before.
Pillows are always something I love to do in between larger projects or when I have a little bit of extra time… note the word LITTLE BIT OF TIME! So although I absolutely love, love the feel of a finished backing zipper, it is usually not in the cards for me. The way I have come to love to make envelope backings is as follows.
- Step 1: I measure my finished pillow top top to bottom. I cut two pieces of fabric that size. So if my pillow is 24″ square, I will cut (2) 24″ x wof strips. I know this is a bit of fabric waste. But let’s be honest… I AM NEVER SHORT ON FABRIC 🙂 and it creates a much more sturdy and nice backing without me having to quilt it or add a zipper. I am all about what is fast and works and still looks good!
- Step 2: I usually keep my fabric pressed the exact way it came off the bolt with the crease running down the middle and just repress it bit more so that I have a nice crisp middle fold. If I am feeling particularly generous to my pillow :-), I will sew a stitch line about 1/2″ away from the fold on each piece so that it looks like I have a hemmed piece of fabric. Of course this is not needed because the fabric is folded in half [fabric on both sides] and does not need to be hemmed.
- Step 3: I will want to overlap my pieces by about 5″-6″ in the center of the pillow back. Not much less because the envelope will open and not too much more because it will be exceedingly hard to get your insert in and out.
- Step 4: I will trim off any extra fabric off the ends of my two strips so that what I am left with is two pieces overlapping in the middle by about 5″ and then even with the pillow all the way around. Note:** if this is a very loved piece of fabric that I would prefer to have left in bigger chunks, I will figure out how much I need for the overlap and just trim the excess off one end of each strip instead before hemming above so that I have 2 bigger chunks left instead of 4 smaller pieces.
CARRIE says: Zippers baby, she is all about the zippers. She says “I’ve done zippers in the backing, and button closures as well, but not for many years. Honestly, zippers in the bottom were easier for me, and I liked the way the pillow cover fit the pillow. It also worked really well with the back of the pillow being quilted.
QUILTED OR NOT?
CARRIE: I like the back of the pillow to be quilted. I think it gives the pillow a finished look, and it wears better through washings. Since I use the pillows I make, that’s been an important consideration. My preferences evolved, it was probably five or six years ago that I started quilting the back of all the pillows I made.
The layering is the same – fabric, thin batting, thin lining. The quilting is almost always straight lines, or a grid, sometimes on the diagonal. How close the lines are depends on the fabric, and how much quilting the front of the pillow got. (And how much time I have.)”
JOANNA: I don’t usually quilt the back but not because I wouldn’t love how that would look. It is 100% a time issue for me. If I had the time, I would absolutely quilt all of my backings and still envelope close them :-).
Note: Carrie will do a step by step zipper tutorial of how she does it next week so stay tuned.
Here is a general quick zipper tutorial that I did many years ago on how I put in a zipper without a zipper foot or any specialty tools. Click HERE.
FABRIC CHOICES FOR THE BACK
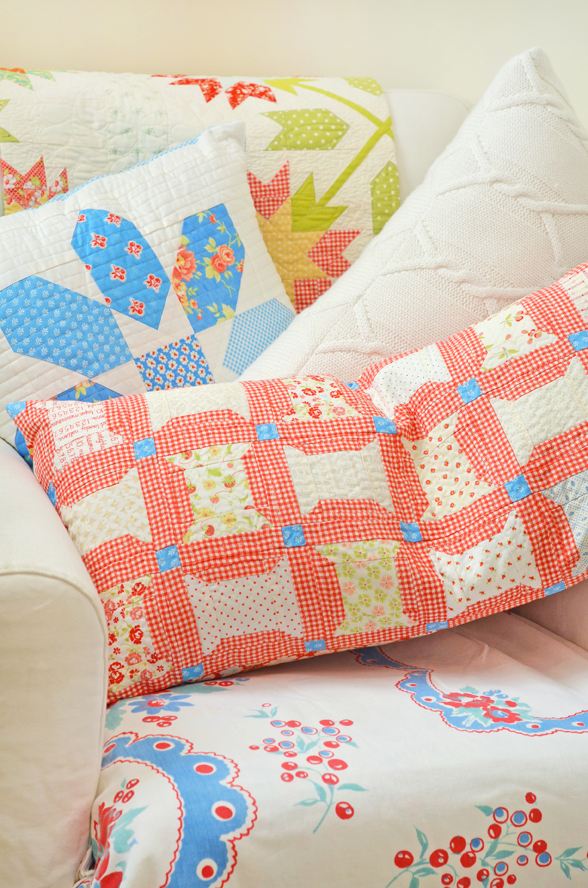
CARRIE: “From using leftovers to finding the perfect fabric for a pillow back, I like it when the back of the pillow has a bit of “pop”, that it’s unexpected. E.g., the neutral pillow has a large-scale gold floral print on the back.
I’m also a big fan of plaids and stripes on the back of the pillow because quilting is so easy – no marking required! I always look to see if there an element of the design that I can use for the quilting. Text prints – also great for the back of a pillow if you ask me”.
Pieced backs? “Absolutely. I’ve made a few of those, and I’ve added leftover blocks and pieces to a backing”.
JOANNA: I have been known to piece a back or to add something funky, but usually I am more toned down in my backing choice and I want to make sure it works with the feel or the season of the pillow front.
But I also LOVE florals on the back and text prints and other larger or novelty type fabrics that might not have been my GO TO choice for the front pieced portion. And to be completely honest… the back often gets the “WHAT WILL WORK WITH THE PILLOW THAT I HAVE PLENTY OF AND CAN PART WITH” philosophy!

WEEKLY PILLOW GIVEAWAY:
Come check out my INSTAGRAM page to follow along on the #pillowalong hashtag and see the announcement of last week’s winner today! Each week, anyone who posts a photo with some portion of what they are working on for the pillow along and uses the #pillowalong hashtag, will be entered to win a “pillow care package” from Carrie and I.
– – – – – – – – – – – – –
– – – – – – – – – – – – –
THINGS TO EXPECT EACH WEEK
- Weekly inspiration by theme. TWO COLOR THIS WEEK.
- Weekly hints and tips. WE WILL TRY TO GO IN THE ORDER YOU WILL NEED TO KNOW ALL THE THINGS IN MAKING A PILLOW. SO THIS WEEK, WE ARE TALKING HOW WE SIZE COVERS AND INSERTS
- Weekly prizes. We will have a prize each week on INSTAGRAM and a few here on the BLOG too so stay tuned!
- Weekly friendship as we sew pillows together! Since they are pillows and they are small, you can actually finish a pillow each week and have a fabulous collection by the time you are done… really!!
Sounds like a perfect way to spend the summer, don’t you think?
A FEW FAQ THAT I HAVE GOTTEN SEVERAL TIMES SO HERE ARE THE ANSWERS:
How do I enter the GIVEAWAY?
See above for more info. But basically all you have to do is be working on the pillow for that week in some way, post a photo and use the hashtag
Do I have to make pillows to join?
No! if you want to work on one of the quilts in the book as we work on pillows… GO FOR IT and as long as you post to the hashtag, you can still be entered in our weekly giveaways.
What are the hashtags?
If you want us and others to see what you are working on [any progress shots are fine… and of course finished pillow tops or pillows too], then use the hashtags #pillowalong and #scrapbookofquilts
I don’t have the book yet. Is it too late?
No at all. Grab a book and join us. We will have so much time left… we are only on project 2 out of 6!
Join our FACEBOOK GROUP if you haven’t already [CLICK HERE] as we will be working on it there as well as here on the blog each week.
See you next week with the second set of pillow inspirations and pillow hints and tips.
Joanna and Carrie too… along with Kimberly, Susan, Susan, Anna, Greg, Chelsi and Melissa
Scrapbook of Quilts Pillow Along:
Week 1: Set Up
Week 2: Patriotic
Week 3: Neutral
Week 4: Two Color
Week 5: Autumn
Week 6: Halloween
Week 7: Christmas